• Home
    • Classes & Shopping
    • Equipment & Merch Shop
    • Equipment Tips & Suggestions
  • Recipes
  • Blog
  • Cookbook
    • Susan's Paris Notebook
    • Paris Tips
    • Paris Adventures
    • More About Susan
    • Contact
    • Presidential Biographies
    • Paris Restaurants
Menu

The Little French Bakery

P.O. Box 286
North Freedom, WI 53951
6085224981
Peace, Love and Dessert

Your Custom Text Here

The Little French Bakery

  • Home
  • Classes & Shopping
    • Classes & Shopping
    • Equipment & Merch Shop
    • Equipment Tips & Suggestions
  • Recipes
  • Blog
  • Cookbook
  • About
    • Susan's Paris Notebook
    • Paris Tips
    • Paris Adventures
    • More About Susan
    • Contact
    • Presidential Biographies
    • Paris Restaurants

Door County Cherry Pie

August 2, 2013 Susan Holding
closeup-cherry-pie-feature.jpg

If you hold up your right hand, palm facing you, it's the quick reference guide to locations in Wisconsin. Follow the bottom of your thumb to the middle of your palm and that's where I live. Chicago is down at your wrist. And the thumb? Well that's Door County. The peninsula juts out and separates Green Bay and Lake Michigan. Green Bay (go Pack!) is at the bottom of your thumb followed by Sturgeon Bay, Egg Harbor, Fish Creek, Sister Bay with Gills Rock at the tip. My parents and grandparents grew up in the Green Bay area and spent lot of time in Door County. As kids we spent at least one week there each summer camping in Peninsula State Park. A gem of the Wisconsin State Park system. Every family has their favorite spots. We spent days on the lake side swimming in cold Lake Michigan at a tiny county park.

Door County is famous for several things.  Just to name a few... 1. Beautiful beaches and sunsets 2. Scandinavian Restaurants and Culture 3. Fish Boils 4. Cherry Orchards 5. And last but not least, Cherry Pie

Cherry Pie
Cherry Pie

It's safe to say that 99.9% of Door County restaurants have a cherry dessert on their menu. Most have a cherry pie served warm with ice cream.

Orchards sell freshly picked cherries and many have pick-your-own. Shortly after we were married, Gary and I visited Door County. I couldn't wait to show him Sand Bay Town Park, the goats on top of Al Johnson's Swedish restaurant, take the ferry to Washington Island, and pick cherries. It's easy I told him. We just get buckets, reach up in the trees and fill our buckets with the tart, bright red fruit. Our trip was great and the cherries were abundant. We quickly picked a few buckets and brought them home for family and a few pies.

The last few years have been tough on the cherry crop. Early thaws followed by sudden snow and storms have made the harvests small to non-existent. This year is a great year. The long spring brought many blossoms. The trees are full of cherries! Last week our friend made a trip to the peninsula and brought home a bucket of cherries.

Tart Door County Cherries

For those of you close enough to get in on cherry season, here's a pie recipe. For those too far away, pick up a bag of frozen cherries and join the fun. Even if you've never make a pie. Let's do this!

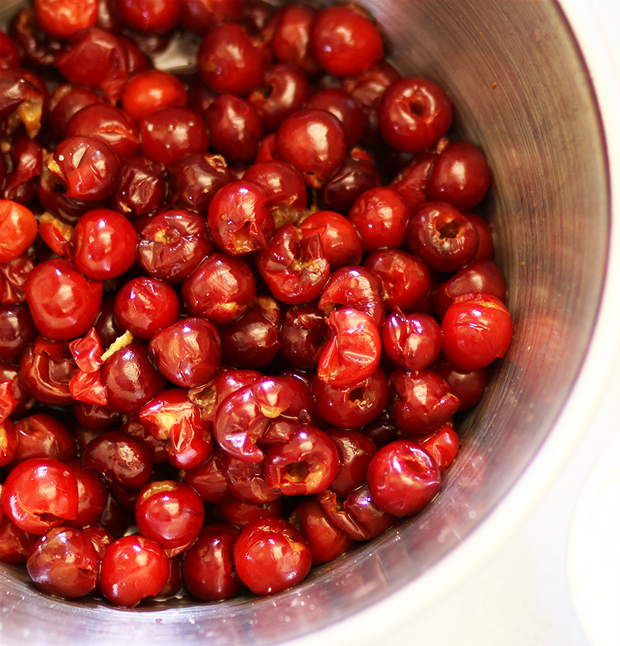
First, you'll most likely need to pit the cherries.  If you have a cherry pitter, you're in business.  If not, a hairpin or paperclip will work.  Slide the rounded end into the top of the cherry and pull of the pits.  Pit the cherries over the cherry bowl so you save some of the cherry juice.

I  know what you're thinking.  The pie sounds great, but a crust?  I'm including an all butter crust recipe for your called Pate Brisee.  If you're not quite ready for that, it's a-ok to purchase a refrigerated crust.  The crust will happen one day.

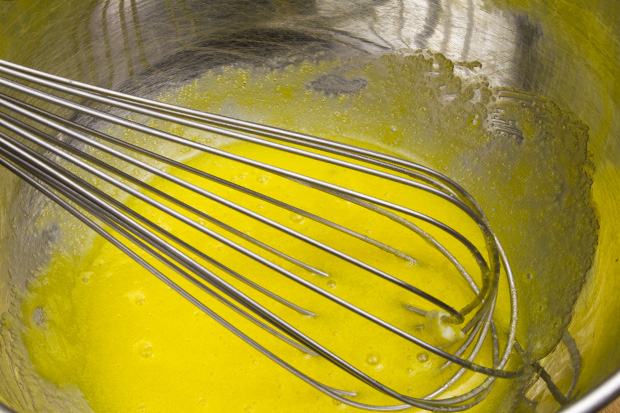
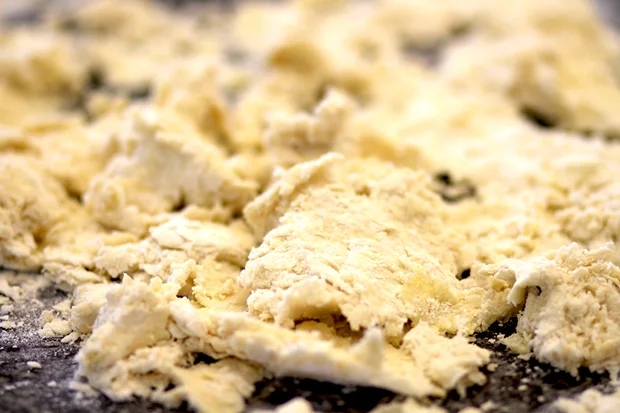
If you're making the Pâte Brisée, you'll cut the butter together add the wet ingredients into the well and chop the dough together. Here's the dough lined up,  just before it gets smeared on the counter to combine.

pate brisee in process

Then using a technique called Frisee, the crust is smeared between the heal of your hand the work surface to layer the flour and butter.  The butter will melt in the oven and push the layers of flour apart, creating a flaky, tender crust.

frisee of the crust
frisee of the crust
pate brisee crust
pate brisee crust

I added a few blueberries to the cherries to make the crust a bit fuller.  Here's the fruit just before it went into the pie crust.

cherries-and-blueberries

To print this recipe, click HERE

Pâte Brisée  (Sweet Pastry Dough) 

Makes one  10 inch tart crust (double recipe for 2 pie crusts)

Ingredients:

200 g flour

100 g butter, cold

20 g sugar

1 egg

4 g salt

1 TBSP water, cold

vanilla - a dash if desired

Using a knife or bench scraper, cut the butter into 1/2 inch pieces.   On your work surface, make a pile with the butter and flour.  Cut the flour and butter together until you have pea sized pieces.  Work quickly so the butter does not get soft or warm.   Gather the butter/flour mixture and make a circle with a well in the center.  It will look like  a flat wide volcano, with a three to four inch open space in the center.   The chefs called this a fountain.  Into the center add the water, egg, sugar and salt.  With your fingers, swish these ingredients together until you feel that the salt and sugar are dissolved.  Using the pastry/bench scraper, cut the liquid into the flour and butter.  This is when you’ll find out if your countertop is level!  The mixture will be shaggy and streaks and bits of butter.

Line the dough up in a long row (left to right) in front of you.  The line will be about two inches thick, an inch high, and about twelve inches wide.  Using the heel of your hand, smear the dough straight ahead across your work surface taking about 1/3 of the line of dough each pass.  Work left to right ... or right to left.  Once all the dough has been smeared, gather it back into the line and smear again.  You’ll make about two to three passes.  There will still be a few streaks of butter in the dough.  Flatten the dough into a disk about 6 inches in diameter and 1/2 inch thick.  Wrap the dough in plastic wrap or parchment paper, if you plan to use the same day.  Chill the dough in the refrigerator for twenty to thirty minutes.

Here's a tip:  The French term for smearing the dough is fraiser (freh-zey).   Rather than mixing the dough, it creates layers of butter and flour.  When the butter heats, it melts and becomes steam which pushes the layers of flour apart creating a nice flaking crust.   Keeping the ingredients cold and chopping rather than mixing will keep the dough light and flaky.  Over working the dough will develop the gluten making the dough tough and elastic.   Resting the dough will make it much easier to roll.

Door Country Cherry Pie

Ingredients:

4 cups pitted tart cherries

1 1/2 cups sugar

4 Tbsp cornstarch

1/2 tsp almond extract

1/2 tsp salt

1 Tbsp heavy cream

1 Tbsp granulated sugar to sprinkling on the crust

1 batch double crust pie dough - your choice

Preheat your oven to 400 degrees F.

After the cherries are pitted, drain off most of the juice, and add the cornstarch, sugar, salt and extract.  Allow to rest for about 10 minutes.

Roll the bottom pie crust and place in the bottom of the pie plate.  I would recommend a 9" pie plate, not too deep.

Place the cherries and most of the juice in the crust.

Roll the top crust and drape over cherries.  Trim the top crust about 1/2 inch past the edge of the pan.  Turn it under the bottom crust and with your index finger and thumb of one hand, press and pinch the crust around the other index finger.   Make five or six inch slits on the top of the crust.

Brush the crust with heavy cream and sprinkle with sugar.

Place the pie on a parchment paper or silicone mat lined baking sheet.  Bake at 400 degrees for 20 minutes.  Reduce the heat to 350 degrees F, and bake until juices bubble out the top slits, about 30 minute more.  If the crust starts to become too brown, tent the pie with foil or just make strips of foil to protect the edges from becoming too dark.  Cool completely.  It's best to serve a pie the day after it's made so the juices can thicken.  You'll have a much prettier piece of pie.


Let me know your favorite Door County memories!

closeup cherry pie
closeup cherry pie

If you're heading to Door County, here are some of my favorite spots.

The Whistling Swan - A beautiful Inn and Restaurant.

The White Gull Inn - Another great place to sleep and eat.

For libations, try JJ's La Puerto (Door, get in?!), Bayside Tavern, of the C&C Supper Bowl

The best smoked fish in Door County is at Charlie's Smokehouse, Gills Rock

The only place I've ever picked cherries is at The Cherry Hut

For a fun day trip, head to Washington Island.  Just a ferry ride away.

For more on Door County...

Be safe and be kind.  Happy Travels!

In dessert, pie, Susan's List, the little French bakery, The Little French Bakery, the little French bakery Tags cherry pie recipe, door county, pate brisee, The Little French Bakery
3 Comments

Paris Cookware Shops

July 26, 2013 Susan Holding
bistro-chairs.jpg

Where do I purchase my equipment? Many pieces come form Paris. Here's where to shop in the City of Light.

Read more
In favs, Susan's List, the little French bakery, The Little French Bakery, the little French bakery, travel Tags a simon, cooking equipment, copper pans, dehillerin, detou, french cookware shops, little french bakery, mora, paris
3 Comments

Ice Cream Cone Cupcakes

July 10, 2013 Susan Holding
feature-cupcake.jpg

It's just after July 4th, and we're in the full swing of summer.  Our days are hot, long and fun.  I don't know about you, but our grill is barely getting a chance to cool down between uses.   My new favorite cologne is a mixture of sunscreen and bug spray. Our garden flowers are growing by leaps and bounds.  It's such a nice time of year! Over the July 4th holiday, I made some treats perfect for a silly summer day.  Ice cream cone cupcakes.   I don't know where she learned about them, but my mom made these for us for as long as I can remember.  Who knows?  Maybe she invented them!

She'd stand the cones up in an 9 x 13 pan, fill them with batter, bake and frost.

They're the perfect eat-it-all snack.  Kind of goofy, and very easy.

I needed someone to help me with the cupcake display, so I asked for some help from my little friend Maeve.  Her outfit (self-selected) fit the occasion and the spirit of the dessert and holiday.

ice cream cone cupcakes

Things have changed on the ice cream cone cupcake scene.  You can now purchase a stand to support the cones while they're baking in the oven.  No more tipped cones!  The stand is also perfect for transporting your tasty treats.

cupcakes in the grass

For my cupcakes, I used a standard chocolate cake recipe.  Use any recipe you would use for cupcakes.  I filled the cones to just below the top section of the cone.  You really don't want to overfill them, they'll spill over and make a mess.   In fact, set the rack on a baking sheet just in case a cone or two go up and over the cone.

Once the cakes are cool, ice them with your favorite frosting and decorate with a sprinkles.   What could be more fitting to enjoy a cupcake in the grass, than a fluffy skirt, sparkle necklace and stars on your tiara!   I hope you'll make a batch and take them on your next picnic or backyard adventure!

What a treat!
What a treat!

To print this recipe, click HERE

The Little French Bakery's Chocolate Cake Recipe

Ingredients:

Makes about 2 dozen "Ice Cream Cones", or 2 eight-inch round layers

3/4 cup plus 2 Tbsp cocoa

2 eggs

1/2 cup vegetable oil

1 3/4 cup  all-purpose flour

1 cup skim or 2 % milk

1/2 cup warm water

1/2 cup hot brewed coffee

1 1/2 tsp baking powder

1 1/2 tsp baking soda

1 tsp salt

1 Tbsp vanilla extract (real, not imitation)

Directions

Preheat your oven to 350 degrees F.  Be sure the oven rack is centered in the oven.

In the bowl of a stand mixer fitted with the paddle attachment,  or a medium sized mixing bowl, combine dry ingredients.  Whisk to lighten and mix.  Add eggs, oil, milk and vanilla.   Using the stand mixer, a hand mixer beat batter on low to medium speed for 1 minute.  Stop, scape the bowl's sides and bottom be sure all ingredients are well mixed.  Beat for another 30 seconds.    Carefully add the warm water and coffee.   Switch to a spoon or spatula and throughly mix the liquids into the batter.  The batter will be thin in consistency.

Spoon/pour the batter into the cones, do not fill more than half full.   Bake 12-15 minutes, until a toothpick inserted into the cupcake is clean, and the cake springs back to the light touch.  Be careful not to over-bake.


This recipe was adapted from the famous recipe on the Hershey Cocoa can.  It's wonderful for cakes or cupcakes!

In cakes, Susan's List, the little French bakery, The Little French Bakery, the little French bakery Tags ice cream cone cupcakes, kids dessert recipe, little french bakery, summer desserts
2 Comments

Toasted Coconut Marshmallow Bars

July 2, 2013 Susan Holding
bars.jpg
Toasted Coconut Marshmallow Bars

It's the countdown to the holiday weekend.  Summer is in full swing and it's time to find fun, quick and easy treats.

I was in the grocery store today walking down the baking supply aisle as I always do, and an ingredient caught my eye.   Toasted coconut marshmallows.  Stop the cart!  For those of you who can't stand the thought, taste, smell or texture of coconut, you may want to pass on this one.   For those who are still reading, all I can say is... these are delicious!

One bag?  Two bags?  More?  No, I'm wasn't sure what I was going to do with them, and if they were weird I didn't want too many bags hanging around.    Now, what to do with them.   Marshmallows.... s'mores?   Maybe, but too obvious.

Rice Krispie bars?  Curious.  The idea hit.  How about Special K instead of Rice Krispies?  Not a huge change, but interesting.  It fit the requirements.   Fun, easy and as goofy as the marshmallows.

toasted coconut marshmallow

The recipe is the same as making Rice Krispie Treats.  Melt the butter, add the Marshmallows.  Add the cereal, mix and press into a buttered or oiled pan.  I was a bit worried about the coconut scorching or burning.  No problem.  Just keep the heat at low/medium and you'll have no problem.

melted marshmallows
melted marshmallows

I spread the mixture into an eight inch cake pan, then drizzled with melted chocolate chips.  The perfect combination in my book.  Chocolate and Coconut.

To print this recipe, click HERE

Toasted Coconut Marshmallow Bars

1 bag Toasted Coconut Marshmallows (about 30)

3 cups Rice Krispies or Special K Cereal

2 1/2 Tbsp Butter or Margarine

1/3 cup chocolate chips, melted

Directions

In a large saucepan, melt the butter/margarine.  It's ok if it browns just a little.

Add marshmallows, stir to melt.

Add the cereal.  Stir to mix, crushing the cereal a bit as you stir.

Spread in a buttered baking pan or small, flat dish with sides.

Drizzle with melted chocolate chips if desired.  Cool, cut, and serve!


Toasted Coconut Marshmallow Bars

I hope you have a Happy July 4th!  Wave a flag, thank a fireman, be safe and be kind.

In dessert, Susan's List, the little French bakery, The Little French Bakery, the little French bakery Tags little french bakery, marshmallow recipe, rice kris pies, special K, toasted coconut marshmallows
Comment

Crepes (With and Without Gluten)

May 16, 2013 Susan Holding
plates.jpg

Let’s celebrate the French February 2nd holiday - La Chandeleur

Read more
In favs, Susan's List, the little French bakery, The Little French Bakery, the little French bakery Tags crepe recipe, cup4cup, gluten free, lena kwak, paris crepe recipe, The Little French Bakery, thomas keller
12 Comments

Hazelnut Maple Cookies (Wheat free!)

May 1, 2013 Susan Holding
Spring
Spring

Here in Wisconsin it's been a long, cool spring.   This week we've started to signs of Spring.  My hens & chicks are popping out of the antique typewriter, the daffodils are blooming, and the strawberry plants are peeking through the soil.

Long before the plants were popping there was another sign of Spring.  Maple syrup season.  Wisconsin is on the edge of the maple syrup belt.   Like coffee and chocolate is to the equator, there are few places on earth that support this product's production.  The temperature must be above freezing in the day, and down to about 20 F at night.  Sap runs into buckets or through hoses to be boiled into the liquid gold.

The land we live on was once a maple syrup farm.   When we walk through the woods, we see tubing and pans from years and years ago.  So far, we haven't tapped any trees, but someday we'll give it a try.   Did you know that it takes gallons and gallons of sap to make just one pint of syrup?    I was lucky to get to watch a sap cooking session this year - with a taste of the sap.  It's much lightly sweetened water, almost like a fresh coconut water.

Now, on to the recipe!  I promise there's a connection here.

Back in January, I went to a class in Brooklyn for a class.  After class I met up my niece and her beau, they told me about "the best bakery in Brooklyn".    Ovenly.   They told me all about the gluten free items and raved about  the cookies.    I was hoping to get there during my stay but it didn't work out.  Instead, I contacted the bakery when I got home to ask about their cookies.    Would they share a recipe?  You bet!  And, it's a perfect recipe for spring.   Delicious nuts, and sweet maple syrup.

It wasn't until about half way through the preparation that I realized these are gluten free.   The cookies are amazing.  A perfect tea time afternoon pick-me-up, or great for travel.

I didn't have any hazelnut flour on hand (who does?), so I ground the nuts in the food processor.   I was about 2/3 cups short, so I made up the difference with almonds.

nuts in proc2
nuts in proc2

The nuts are blended with the egg white, zest, sugar and touch of syrup.  Rolled into ping-ping sized balls, then rolled in the maple sugar and topped with a hazelnut half.  Easy and fast.    Here the the cookies ready for the oven.  I would suggest pushing the nuts into the cookies just a little more.  They look nicer that way.

prebaked hazelnut cookies

After 12 minutes, and the best smell from the oven, the cookies are finishes.  The maple sugar melts and creates and a crisp crust, with the nutty inside, perfectly baked.    Wish you could smell them!  The orange zest is a great addition, be sure not to leave it out.

hazelnut maple cookies

Thank you to Erin and Agatha for sharing this great recipe, and Lauren for the tip.  When you're in Brooklyn, stop by and see them.  Their flagship shop is at 31 Greenpoint Ave., Brooklyn.

I hope you enjoy the cookies as much as I did!

Happy Spring!

To print this recipe, click HERE

Hazelnut Maple Cookies

Ovenly Bakery - Brooklyn

Ingredients:

4  1/3 cups hazelnuts

1 cup sugar

1 tablespoon maple syrup

zest of 1/2 orange

3 egg whites

Maple sugar for coating cookies

hazelnut halves for garnishing cookies

Instructions:

Preheat oven to 350 degrees F.  Line a baking sheet with parchment paper and set aside.

In a food processor, pulse the hazelnuts until they form a coarse meal; the pieces should not be larger than about 1/8 inch in diameter. Transfer the ground nuts to a bowl. Add the sugar, syrup,egg whites and zest. Using a rubber spatula, mix the ingredients together until well combined. Cover the dough with plastic wrap and let sit until slightly dry to the touch, about 10 minutes.

Using your hands or a small scoop, form or roll the dough into 1-ounce balls. Coat in maple sugar and top with a half a hazelnut by pressing it into the dough. Place on the prepared baking sheet and bake for 12 minutes, turning at 6 minutes. Let cool completely


Hazelnut Maple Cookie
In cookies, Susan's List, the little French bakery, The Little French Bakery, the little French bakery Tags brooklyn bakery, cookie recipe, gluten free cookies, hazelnuts, little french bakery, maple sugar, maple syrup recipe, ovenly bakery
3 Comments

Brandy Old-Fashioned

February 18, 2013 Susan Holding
brandy-old-fashioned-feature.jpg

A Wisconsin tradition.  Here's how to make this this classic cocktail.

Read more
In drinks, Susan's List, the little French bakery, The Little French Bakery, the little French bakery Tags Brandy, brandy old-fashioned, cocktail recipe, The Little French Bakery
3 Comments

Valentine Cookie Swap

February 14, 2013 Susan Holding
choc-chip-feature.jpg

Happy Valentines's Day!  I love Valentine's Day.   I've always loved it.   From elementary school shoe boxes filled with sweet notes from classmates, to a Valentine  Card and little present on the kitchen counter from Gary, I love it.    One of my favorite memories was walking into our kitchen for supper when I was about 8 on Valentine's Day.  My mom had hung lime green polka dot patent leather tote bags on the backs of our chairs.  The bag  had a sleeve on the outside that held a matching umbrella.   So sweet.  And so Doris Day! Another reason I love Valentine's Day?  It's Eddie, my dog's birthday.  Yes, we talked about naming him Romeo, Valentine, and many other more romantic names, but he was and always will be, Eddie.  Here's the birthday boy.  He's 1/2 German Shorthair and 1/2 Blue Heeler.  And quite a guy.  Today he's seven, and acts like two.

eddie
eddie

Our French Friday's with Dorie group decided to have a cookie swap to celebrate the day.   The swap was organized by Alice.  (Thanks, Alice!)    We each got the name of the Valentine, and made them a dozen cookies.  The box also included a recipe, and a little present.

My box arrived, and was so fun to open!   Susan Lester had my name.  Inside the big box was TWO boxes of delicious cookies, a pretty ceramic heart, complete with rose petals, and a tres jolie Valentine.  Thanks, Susan!   Her blog is CreateAmazingMeals.com    She knew just the right theme.   An Eiffel Tower and I'm in!

CookieSwap Box
CookieSwap Box

The cookies are fantastic!  Chewing, very flavorful and perfect for an evening snack.  Ok, I ate two right away and am tempted to have another very soon!

Here's the recipe from Susan:

To print this recipe, click HERE

Inspired by Marcel Desaulniers “Mrs. D’s Chocolate Chip Cookies” from Death by Chocolate Cookies.

Preheat oven to 300 degrees F.

In a stand mixer, at medium speed, for 4 minutes, cream

½ pound Butter, softened

2 cups Dark Brown Sugar

When light and fluffy, scrape down the sides of the bowl and blend in:

2 teaspoons Vanilla Extract

1 Tablespoon Dark Rum (we use Myer’s)

2 Eggs

When thoroughly blended, add:

4 cups All-purpose Flour (we use King Arthur)

½ teaspoon Salt

1 ½ teaspoon Baking Soda

Start on low speed, slowly increasing to medium-high.

When dry ingredients are completely mixed in, add:

2 cups Semi-sweet Chocolate Chips (we use Ghirardelli)

1 cup Walnut pieces

1 cup Pecan pieces

Drop cookie dough onto parchment paper-lined baking sheets (about 1 ½ Tablespoons).

Bake for 25 – 30 minutes, according to your preference.

Recipe from:  www.createamazingmeals.com


chocolate chip cookies

I hope you'll make these and visit Susan's site for more recipes and ideas.   Happy Valentine's Day!   Be kind.

In cookies, Dorie Greenspan, french fridays with Dorie, Susan's List, the little French bakery, the little French bakery Tags chocolate chip cookies, french fridays with dorie, The Little French Bakery
10 Comments

Caramelized Onion Dip aka French Onion Dip

January 30, 2013 Susan Holding

Love Chips + Dip? Here's a dip that will amaze your friends.

Read more
In favs, Susan's List, the little French bakery, The Little French Bakery, the little French bakery Tags french onion dip, little french bakery, onion dip, superbowl recipes
6 Comments

Pastry Creme (Crème Pâtissière)

January 16, 2013 Susan Holding
feature-pastry-cream.jpg
Pastry Cream in Puff Pastry

As I prepare to leave for Paris it seems like the perfect time to tell this story.   It's always fun remembering my days at Le Cordon Bleu.  I hope you'll enjoy.

The March to the Poubelle

Our Basic Pastry Course was in the intensive format meaning that we took 3-4 classes each day instead of 1.  It condensed 12-14 weeks of curriculum to just three.  It truly was intense.   We would be in the lecture room then immediately run downstairs to the kitchen to prepare at least one or all of the recipes the chef had just demonstrated, then back to the classroom.   The days started at 8:00 am, and went until 8:00 pm.  Some days included a free time block to run an errand, or in our case to do a little shopping and or eating.  Both activities were highly encouraged.  After all, how were we to learn what great pastries looked and tasted like?

The chefs in the school worked a French workweek (35 hours), so we had to have a combination of chefs to cover our long days.  Our main chef instructor was off for the evening and bid us farewell.   Another chef, who happened to be a Cuisine program chef, was going to oversee our kitchen preparations.  All the chefs were very distinguished and impeccably  neat.   Our new babysitter chef was even more so.  He exuded an air of confidence and importance that had us more nervous than usual.  Add to this the fact that cuisine chefs have little time for pastry chefs, (too much weighing and measuring) let alone pastry students in their first course.

It was early in the course, and we had seen pastry cream prepared, and made it ...once.  The chef suggested that we divide the  main recipe and each make a component as if we were working together in a restaurant.   One or two people would make a sponge cake, another the mousse, and another the crème pâtissière.  This sounded very reasonable.  We divided the duties between our small group, increasing the amounts so each of us would have the perfect amount for our dessert.

We carefully completed our mise en place (gathered our ingredients) and went to work.  Our Chef walked about the room watching us, and helping with any questions and offering help with locations of ingredients.  We had the feeling there were about a million other places he'd rather be, and he had more or less drawn the short straw to teach late that night.   Every time he passed by my work station, I got a whiff of his amazing cologne and a stern glance that made me even more nervous.  My French was caveman at best, so as he'd pass by, I'd muster a "bonjour Chef" and offer a nice Wisconsin smile.   He smiled back, but looked like he had just tasted something sour.

My contribution to our group was the pastry cream.  We needed 4 times the recipe for 4 students so I had to separate 16 eggs.  It went fine.  No broken yolks, and no spills.  I gathered the milk, sugar, flour, cornstarch and eggs had headed over to the stove.   I combined the ingredients in the order and technique from what my notes and memory offered.  So I thought.   I stood at the cooktop stirring and stirring, smiling away at the Chef as he approached.    He stood beside me, and watched me stir.   I had nothing to contribute to a conversation so I kept stirring and nervously smiling.  Finally, he broke the silence with "Qu'est que sais?"  I 'm sure I looked at him with a blank, panicked stare.  "Qu'est-ce que tu fais?" (what are you making?), he asked.    I thought to myself, what is wrong with him?  Surely he's seen someone make pastry cream before.   "Crème pâtissière, Chef", I said.  Hoping that he'd move on.  But no.

Then came the moment.  The belly flop in front of your swimming class moment.  In one motion, he flicked his head to the up and to the side, made THE tisk sound, and picked up my saucepan.   "Suivez-moi", he said.   I looked behind me where my classmates stood paralyzed watching and hoping one could translate.  "He wants you to follow him", one piped up.   So off we went from one end of the kitchen to the other.  It felt like the distance of a football field, but it was really about 50 feet.  I was about three steps behind, wondering where could we be going?    We arrived at our destination, a gleaming stand holding a perfectly attached garbage bag.  Why couldn't we just use the garbage can at our end of the room?  He stepped on the foot pedal with his gorgeous French, perhaps Italian shoes and up went the lid.   He stretched out his arms, and lifted the pan over his head and slowly dumped the gooey, wall paper paste mess from the pan into the garbage.   My pastry cream was poubelle.  Garbage.

"Répéter", he said as he put the pan in a nearby sink.   I made the walk of shame back to my workstation.  My friends were pale, very sympathetic and trying not to make eye contact.  They had busied themselves with things to do that required crouching behind the workstation on the other side.  I willed myself not cry.  After all, he didn't yell and scream.  But now what?  I had no idea what I had done to cause the problem.

"Je vais vous aider à faire de la crème pâtissière", he said.  I will help you make pastry cream.   I gathered a new set on ingredients.  He stood beside the entire time.   Part of me wanted to crawl in a hole, and the part felt like I had a pro at my side who wasn't going to let me screw this up again.

We went to the stove together.   I don't know what I did  wrong the first time and never will.  The second time required very little time at the stove. "Aller vite", go fast he said motioning with his arms so I knew just how fast to go.  Our pastry cream was perfect.   He held the plastic wrap lined pan as I plopped the rich, dreamy vanilla custard in to the pan.   "Vous avez fait un bon travail ce moment", You did a good job that time.  No hugs and back slaps, but a slight warmth in his eyes to let me know it was okay.

To this day, I think of him every time I make pastry cream.    It's not good, it's great, and I have him to thank.  Merci beaucoup, Chef.

I can't stand beside you, but I'll walk you through the steps of making crème pâtissière.  Perfect pastry cream.

The ingredients are simple.  Milk, sugar, flour, cornstarch and vanilla.  I don't add other flavorings or steep fancy ingredients into the milk.   I like to keep it pure and simple.  If you don't have a vanilla bean, you can add vanilla extract at the end.

pastry cream ingredients
vanilla bean
vanilla bean

Hold the vanilla bean with one hand, and with the other slice the bean open.   Using the back side of the paring knife, gently slide down the length of the bean gathering the tiny vanilla seeds/paste.  Put all the seeds and the pod into a saucepan with the milk and 1/2 of the sugar.  Stir briefly, then bring to milk to a simmer over medium heat.

Now, in a bowl, whisk the egg yolks.  Now while whisking the yolks, add the sugar.  Keep whisking.  There's a chemical reaction of heat that occurs when yolks meet sugar.   This cooks the yolks, and can make microscopic scrambled eggs in the cream making the texture less than perfect.  Once you have the eggs and sugar mixed, add the flour and cornstarch and mix well.  The mixture will be thick.

eggs and sugar
eggs and sugar
vanilla and sugar in the milk

Now comes the fancy part.  Once the milk is at a gentle boil/simmer.  Pour about 1/3-1/2 of the milk in the bowl with the eggs.  This is called tempering and lets the eggs know that they're about to get cooked.  It keeps them from scrambling later and making lumpy cream.   Mix the milk and eggs with a whisk until the mixture is smooth.

Now, bring the milk in the pan back to a rolling gentle simmer.   Have your pan ready near by, lined with plastic wrap.   Start whisking the milk and pour the eggs mixture into the milk whisking quickly.   Pay careful attention to the corners of the pan.  Stir quickly until you see the cream "burp" a bubble from the middle.  This lets you know that the cream is heated through and can go into the pan.   Don't overmix.  The cream should be thick and glossy.   This whole process will take seconds, not minutes.

cream in the pan just finished!

Now pour/spread the cream into the pan, and tuck the extra wrap around and over the cream to prevent and skin from forming on the cream as it cools.   Look at this tiny little flecks of vanilla in the pastry cream!

ready to refrigerator

Be sure the cream is less than 2 inches thick and is cooling in a layer rather than in a bowl.  It's much safer from a food safely standpoint.   Allow the cream to chill about 2 hours or until cool in the center.

When the cream is cool.   Transfer to a bowl and whisk to loosen and smooth the cream.  Add about 1 T of Grand Marnier or a favorite liqueur adding a beautiful aroma and hint of flavor.   You don't need to add the liqueur if you don't want to.   This is point where you would add vanilla extract if you didn't use a vanilla bean.

Use the pastry cream to fill eclairs, layer between sheets of puff pastry, or use it to fill a pretty cake.

I hope you'll give this a try.  It's delicious and a classic building block of all French pastry.

To print this recipe, click HERE

Pastry Creme (Crème Pâtissière)

500 ml milk

4 yolks from large eggs

125 gm sugar

30 gm cornstarch

30 gm flour

1 vanilla bean

1 T Grand Marnier or to taste (optional)

Directions

1.  Line a shallow baking pan with plastic wrap.

2.  Using a paring knife, slice the vanilla bean lengthwise through one side as if slicing a tube.  Using the back side of the knife, slide it down the length of the exposed bean to scrape out the seeds.  Remove seeds from vanilla bean.

3.  In a saucepan, add the milk, vanilla seeds, the bean pod and 1/2 of the sugar.

4.  Heat to a simmer.

5. While the milk is heating, whisk the egg yolks with the remaining sugar in a large heat proof bowl.  Then add the cornstarch and flour.  Mixing completely.

6.  Remove the vanilla bean pod from the milk.  Pour 1/2 or less of the warm milk into the bowl  over the egg mixture and whisk until smooth.  Increase the heat under the milk to a very slow boil.

6.  Pour the egg mixture back into the pan, whisking quickly and constantly until the mixture forms a smooth, glossy cream and the cream "burps" a bubble in the pan.

7.  Pour cream into the lined pan, folding the wrap and pressing on to the hot cream.  Be careful, it's hot!

8.  Chill until completely cool.

9.  Remove plastic wrap and put the cream in a bowl.  Whisk until smooth, then add Grand Marnier or other liqueur.   This is the time to add vanilla extract if you did not use a vanilla bean.

10.  Your pastry cream is ready for your favorite pastry!  It will keep for about 2 days and must be refrigerated.


raspberries in puff
raspberries in puff
In dessert, favs, other, Susan's List, the little French bakery, The Little French Bakery, the little French bakery Tags creme patisserie, pastry cream, The Little French Bakery
50 Comments

Long and Slow Baked Apples

January 11, 2013 Susan Holding
featured-apples.jpg

What are your plans for the weekend?   In that organizing mood?   I'd love to know how many of those plastic tubs are sold during January.   Today I saw a display of them in very fancy colors.  Personally, I like the clear ones so I can see what's inside.  I guess I could label them and then it wouldn't be necessary to open each one to find my summer clothes.  My new goal is things I'm not using get it out the door rather than squirreled away in the basement.   We'll see! I think it feels good to have some routine back again after the holidays.  Back from the free fall of sweets and dips.  Don't get me wrong, it's still winter and comfort food is still very welcome.   Now it's time for slow roasting, nice smells and healthier options.

There's comfort food, and then there's great comfort food.  What could possibly be better than creamy, sweet baked apples?  This is an Around My French Table recipe, by Dorie Greenspan.   As you know, I love simple, yet a little fussy recipes.   I think you'll love this one.   Why?

1.  You get to use ramekins.  You know you love them.

2.  You get to use your mandolin.  Promise, promise, promise you won't use it without the guard.

3.  You'll practice your apple peeling.

4.  You'll bake with plastic wrap.  Something I did in Paris and thought I'd never do again.  It works, really!

5.  The result is a delicious  apple dessert -so creamy and rich, it's almost like custard.   It's well worth the fussy preparation.

Long and Slow Baked Apples

The recipe is actually pretty simple, just a little time consuming.  Peel, core and slice apples. I used Fuji and they were  a really nice texture and flavor.   Be sure they're sliced very thin.

Then layer the slices with melted butter, and sugar that has been spiced with ginger and orange zest.   I skipped the ginger and used nutmeg instead.  The slices fit perfectly into the ramekins and towered over the top.

stacked apples
stacked apples

Then, wrap the ramekin in plastic wrap, then foil.    Make a few puncture holes in the top and cover with another ramekin to provide just a little pressure to the apples while they bake.

plastic wrap on apples
ramekins on top
ramekins on top

Now, find a good book - or a closet to clean.   The apples will bake for two hours at 300 degrees F.  After they're baked, let them cool all wrapped up for  15 minutes or so, then carefully unwrap them.   It's amazing!

finished apples1
finished apples1

I went a little crazy and made three recipes from Around My French Table.   The herbed spaetzle, the Orange Pork Tenderloin and the Long and Slow Baked Apples.  It was a wonderful meal.  The pork and fragrant fruits were a nice combination.   The apples were a light yet very satisfying dessert ( with some sweetened whipped cream!)

When I make these again, I'm going to turn the apples out on to a plate and serve them with a dollop of creme fraiche.    It's always a perfect match with apples.  Do you know how to make creme fraiche?    It's very easy, but requires a little planning.

To print, click HERE

Creme Fraiche

2 cups Heavy Cream

2 T Buttermilk

Mix together, and allow to set uncovered at room temperature overnight ( or about 8-12 hours).  You can use it right away or stir, cover and chill.  The mixture will continue to thicken and become more tangy.  You can keep it up to about 2 weeks in the refrigerator.   If you don't need so much, feel free to divide the recipe and only make a half batch.

Stayed tuned everyone!  I'm heading to Paris and will try to send you photos and do a few blogs posts.  Is there anything you'd like to see or read about while I'm there?  What a nice coincidence that next week's Around My French Table  recipe in a French Apple Tart.  Tres Bien!

baked apples on tray
In around my french table, favs, french fridays with Dorie, other, Susan's List, the little French bakery, The Little French Bakery, the little French bakery Tags apples, apples dessert, desserts, dorie greenspan, little french bakery
35 Comments

Onion Confit Pizza

January 8, 2013 Susan Holding
featuredpizza.jpg

Happy New Year everyone!   Most of the decorations are put away, and I'm happy to be back blogging and cooking.  As I write, there are carpenters working on the bakery building adding a "pantry".  It's going to be great.  Lots of room to put away the shelving units that have been taking up space for years.   There will be more room for classes, and I'll be able to welcome larger groups. Since we didn't need two pizzas, and it's the middle of the day.   I invited the guys for lunch.  It's freezing cold and a nice hot pizza sounded good.  It makes me feel a little like Ina Garten!

I decided to use Chianti for the wine.  The kind with the straw around the bottle.  When we were Christmas shopping, I found boxes of the drippy candles that change color as they drip. My dad loves these and so do I.  I could use a regular wine bottle, but since I needed wine and the candles needed a bottle, this was the perfect match.  I need to drink or use about another 750 ml's of wine before the candle dripping can commence but I'm off to a good start.  If you look at the box, you'll see the wine bottle sketched out!  I promise to show you the bottle once it's been dripped.

dripping candles


There are some fun recipes just around the corner.  The recipe for today is from Baking with Julia, by Dorie Greenspan and is part of the Tuesdays with Dorie blogging group.  It's not too late to pick up a copy and join the fun.

On to the pizza...

goodchianti by .

A few years ago, I was making the Onion Soup from Thomas Keller's Bouchon.  In the recipe, he teaches how to cut an onion perfectly so it will wilt and cook down nicely for caramelized onions.  I used the same technique here and will show you how it's done.

chopping an onion

chopping onion

Cutting an onion

If you run out of room, turn the onion around and start from the other side.  Cutting this way will break the membrane in the layers of the onion and help to make them move tender and softer as they caramelize.

So what is confit (cone-fee)?  It's the process of cooking to make the fruit of vegetable soft but sweet.  Orange peels are confited before being dipped into dark chocolate.  Confiture is jam in French.  So think... tender, sweet onions.

Once the onions (sprinkled with sugar) are in the pan and cooked a bit, the wine, red wine vinegar, thyme, salt and pepper as added.  I simmered the confit for about 1 1/2 hours.  Just the perfect time for the dough to have a second rise.

The dough is very easy to put together and has a wonderful texture and feel.  If you're not planning to make the onion confit, you should still head over to The Boy Can Bake and Paul will have all the recipes for you.

I used a mix of Parmesan, Romano, and Asiago cheeses with an assortment of olives.  A few of the olives were stuffed with blue cheese so they were a great addition.

ready for oven by

Exactly 15 minutes later the pizza was crisp, golden and delicious.    I baked mine on parchment on a baking sheet and skipped the peel process.

pizza on plate by Susan Holding


Have a great time making this pizza!   (and dripping candles...)


In Baking With Julia, Julia Child, Main, Susan's List, the little French bakery, The Little French Bakery, the little French bakery Tags julia child, onion confit, pizza recipe, The Little French Bakery
8 Comments

Fig Cookies (aka Newtons)

December 22, 2012 Susan Holding
fig-feature.jpg
figs
figs

Happy Holidays everyone! It's only a few days for Christmas, and I'm thinking this may be my last post before the holiday. I'd like to start off by wishing you all the best of the season and many thanks for reading and supporting my blog.

We've shoveled out from Thursday's blizzard and are ready to brave the stores to select presents for friends and family. Nope, we're not late or under pressure. This is the way we do it. In fact, one of our first dates was shopping together one day after work on the 23rd of December. I'm sure our trip will include lunch of sushi!

Figs are high on my list of favorite holiday foods. I think I stumbled upon them about ten years ago in a fancy-schmacy grocery and bought a few. Add some stilton, pears, port and a fire in the fireplace and it's perfect. Speaking of favortie things, I have one question. Why is Favorite Things considered a holiday song? Because of the warm woolen mittens? Geeesh. I love Julie Andrews, but I think it's a stretch. Back to the figs. I picked up three small boxes, brought them home, and then came across a recipe for Fig Cookies with red wine. I'm in!

You can start out with your dough or figs paste first.  They both need to cool/chill so it won't really matter which you start with.   I started with the paste.   Chop the figs and open a bottle of red wine.   Hmmm, what to do with the rest of the bottle after the 1 1/2 cups are in the pan?

chopped figs
chopped figs

Once in the pan, I added a pinch of salt to bring out the sweetness.  You could also add black pepper or some anise seeds depending on your like/dislikes in the spice area.  Simmer the figs until they're soft and the syrup if reduced it about 1/2 cup.  It's hard to tell how much liquid is left, but tip the pan and when the syrup is almost gone, call it.  Let mixture cool in the pan while you prepare the dough.

cooked figs 1
cooked figs 1
cooked figs 2
cooked figs 2
cooked figs 3
cooked figs 3

Now on to the dough.  You can use a stand mixer, or hand mixer.   Cream the butter and sugar and mix until light and fluffy.  Add the salt, vanilla, zest., mix.   Add the egg.  Mix to combine.   Mix in the flour just until the dough comes together.   Flatten the dough in a rectangle and chill for about 30 minutes.

While the dough is chilling, you can puree the fig paste in a food processor or blender.

fig spread
fig spread

Notice how red the spread looks.  I was a little worried at first, but it darkens when it cooks.   This is a good time to preheat your oven.

Using floured parchment paper.  Roll the dough about 12inches long and about 14 inches wide.  If it's easier, you can do this in two parts, so the dough is 12 x 7 or so.   It should be about 1/8" thick.

rolled dough
rolled dough

Now for the tricky part.   Make 3 inch wide strips, and pipe the filling about 1/2 inch down the center.  Resist the temptation to use too much filling.  If the dough feels too sticky or warm, don't hesitate to pop it back in the refrigerator for a few moments.

Fold the strips to the middle, slice into cookies and place seam side down on the parchment-lined baking sheet.   I had a fair amount of scraps that I baked just for fun.

trimmings
trimmings

After 20 minutes at 350 degrees F, the cookies was perfect!  Golden on the bottom and very fragrant.  I knew they were super hot, but I had to try one right of the oven.  It was so, so delicious!

stack of cookies
stack of cookies

To print this recipe, click HERE

Fig Cookies

Fig Filling

1  1/2 cup chopped figs (about 10 ounces)

3/4 cup red wine

1/3 cup sugar

1 tsp lemon zest

1/4 tsp salt

1 4/ tsp black pepper or 1/2 tsp anise seeds (optional)

Dough

1 stick unsalted butter, softened

1/2 cup sugar

1 tsp vanilla extract

1 tsp grated lemon zest

1/2 tsp salt

1 large egg

1  1/2 cups all-purpose flour

flour for dusting/rolling

For the Filling:

In a saucepan, combine all all the filling ingredients.  Bring the mixture to a boil, then reduce to a simmer.   Simmer until most of the liquid has reduced and the figs are tender.  The spread will have about 1/2 cups of liquid with the soft figs.   Allow the mixture to cool in the pan while you assemble the dough.

For the Dough:

With a mixer, mix the butter and sugar until it’s light and fluffy.  Add the salt, zest,  and vanilla and mix.  Add the egg, and mix.  Reduce the speed of the mixer and add the flour.  Mix until just combined.   Remove the dough from the bowl, and make 1 or 2 rectangles.  Wrap with parchment paper and chill for 20-30 minutes or until cool and firm to the touch.  It’s a little easier to work with two smaller pieces of dough.

For the Cookie Assembly:

Preheat your oven to 350 degrees F.  Place a rack in the center position.

Dust a piece of parchment paper (large enough to roll the dough on) with flour.  Place the dough on the parchment, dust, and cover with another sheet.  Roll the dough to approximately 1/8” thick.  You should have a rectangular shape, 12” tall and about 7-12 inches wide depending on the size of your piece of dough.  Carefully cut the dough in 3 inch wide strips. Don’t worry about separately the strips.  Using  a pastry bag or plastic big with a 1/2 “ tip, pipe the fig filling down the center of each strip about 1/2” wide.  Be careful not to overfill the strips.

If the dough is soft, you may want to re-chill for 5 minutes or so.   When you’re ready, carefully fold the side of the strip toward the center.  Slice the strip into cookies, about 1 1/2 inches long, or to your preference.    Place on a parchment-lined baking sheet seam side down.  Bake for 20 minutes, or until the bottoms of the cookies are golden brown.   Repeat if you used two pieces of dough.

Makes 24-36 cookies, depending on size (and rolling/folding skill)

Adapted from Food and Wine Magazine 2012


In cookies, Susan's List, the little French bakery, The Little French Bakery, the little French bakery Tags fig cookies, fig newton recipe, figs, The Little French Bakery
6 Comments

Jumbo Marshmallows

December 11, 2012 Susan Holding
jumbo-marshmallows-web1.jpg

Some things in life just make you happy.   Big fluffy marshmallows are perfect treats.  My little friend Maeve turned four recently, and I wanted to send something extra special to her birthday party.  Big puffy marshmallows were perfect.  They are so much better than store bought, and can be cut into just the right size.  I like the big cubes, but you can cut them smaller if you like. You might want add color, flavor or just keep them plain old white.  These are delcious, and paired with a cup of cocoa or turned into a s'more, they can't be beat.   I promise, they're not too hard, and are well worth the effort.

marshmallows1-web
marshmallows1-web

To print this recipe, click HERE

Jumbo Marshmallows

1 cup cold water

3, 1/4 ounce packets unflavored gelatin

2 cups granulated sugar

2/3 cup corn syrup

1/4 tsp. salt

1 cup powdered sugar

Using shortening or cooking spray, grease an 8 inch pan.   Sprinkle with powdered sugar to cover in a generous coating.

Fit a stand mixer with the whisk.  Empty the packets of gelatin into the bowl, and cover with 1/2 cup water.

In a medium/large saucepan, combine the sugar, 1/2 cup water, and corn syrup and salt.   Attach a candy thermometer to the side of the pan and heat the mixture until the thermonmeter reads 240 degrees F.  Don't stir the mixture..

Very carefully, pour the hot sugar mixture over the gelatin with the mixer running at low speed.   Be careful not to pour on the whisk or the sugar will splatter.  Slowly increase the mixer speed  and whip until the marshmallow is cool and the bowl feels cool to the touch.  This will take about 12 minutes, or longer.  A double batch will fill a mixing bowl and take about 25-30 minutes to cool.  Note:  your mixer may get warm or overheat...

Pour and scape the marshmallow into the pan and smooth.  You may want to use a wet spatula if the mixture is hard to spread.  Dust with powdered sugar and allow to set overnight uncovered.   After the marshmallow has set, turn out on to a cutting board and cut into cubes.  A straight down cut works easier than sawing motion.  Dust the marshmallow with powdered sugar to prevent sticking.    Store well wrapped at room temperature  for up to 2 weeks.


three-marshmallows-web
In dessert, favs, Susan's List, the little French bakery, Uncategorized Tags birthday party dessert, hot chocolate and marshmallows, kids dessert, marshmallow, marshmallow recipe
2 Comments
← Newer Posts
Hi, I'm Susan.. Welcome! I did my pastry training at Le Cordon Bleu, Paris where I earned the Diplome de Patisserie.Thanks for stopping by. Enjoy the stories and recipes and please keep in touch!  Curious about my background?  Here’s the SCOOP!


Hi, I'm Susan.. Welcome! I did my pastry training at Le Cordon Bleu, Paris where I earned the Diplome de Patisserie.Thanks for stopping by. Enjoy the stories and recipes and please keep in touch! Curious about my background? Here’s the SCOOP!

Heading to Paris? Check out my tips and favorite spots to shop, eat and sight see.

Heading to Paris? Check out my tips and favorite spots to shop, eat and sight see.

The perfect gift for the cook/baker in your life!

The perfect gift for the cook/baker in your life!

PURCHASE your own copy! You can purchase HERE

© The Little French Bakery, 2011- 2023                      

Press Kit                  Privacy Policy         Site Map