
February 2nd is a day of crepes in France. Learn all about the holiday and some delicious recipes both sweet and savory.
Read moreStrawberry Shortcake
It’s Strawberry time! Here’s a shortcake recipe sure to please.
Read moreQuick Cheese Crackers (Cookie #4) and My Gift to You
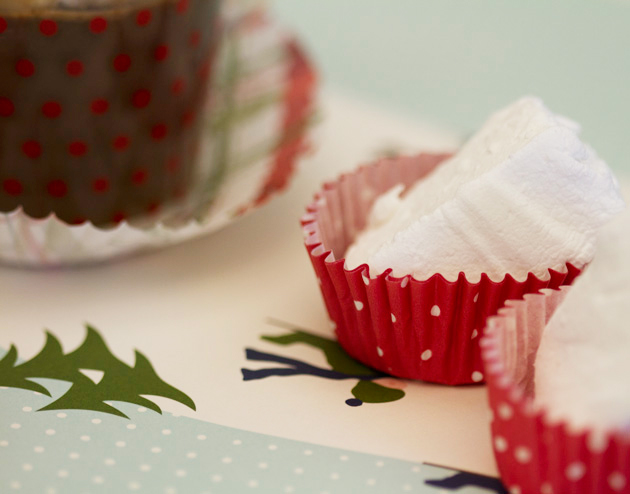
It’s getting close to Christmas! Here’s a quick, delicious cracker to have on hand. I know, it’s not a cookie, but it’s Cookie #4!
Read moreSummer Breakfast
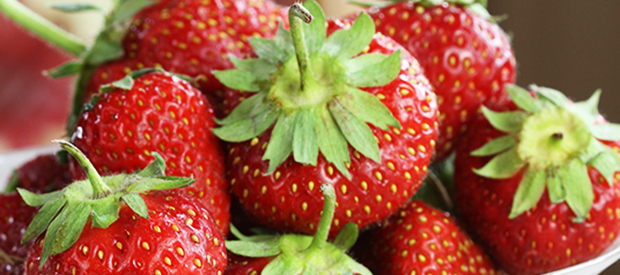
It's a perfect morning here in Wisconsin. It's the kind of day we dream about in January when it's too cold to go outside and your eyelashes feel like they're going to freeze.
Not this morning. The birds are chirping, the breeze in perfect and I got to enjoy fresh strawberries with yogurt and granola on my deck with a steaming cup of coffee.
I have a few favorite things I'd like to tell you about. I'll keep it short but they're very fun and may make your life easier.
Read more
Butter, Let's Make It!
Living here in the Dairy State, we have all kinds of dairy events. June is dairy month, and events are happening all over. Cows on the Concourse brings cows to the Capital square in Madison. Each county has a dairy breakfast where a farm is featured and breakfast is served to hundreds of visitors. Today I'm making butter. Make from the best organic heavy cream. It's easy and so delicious!
Read moreALT Summit and Sweet Paul Makerie

What an exciting Spring! I spoke at ALT Summit and had a blast at the Sweet Paul Makerie. The Utah mountains provided a gorgeous backdrop for the week. What make it even better a delicious Strawberry-Rhubarb Coffee Cake recipe. This time I've made it gluten free.
Read moreCroissants and Pain au Chocolat

What could be better than make from scratch flaky, delicious croissants and pain au chocolat. This is one of my very favorite classes to teach. Here's the recipe for making your very own French vienoiserie at home.
What could be better than using three sticks of butter and pounding it into a cute little square!
Read moreFood Styling and Photography in Ireland

Last week I had the great fortune of attending an Angela Ritchie Ace Camp, in East County Clare, Ireland. Our instructor was Béatrice Peltre. This was my first trip to Ireland. It's a beautiful, beautiful country. The landscapes, the people and feelings you get as you travel are like no other. I don't want to bore you with 900 photos, but I'd love to share a sampling of my week. I flew into Shannon, and stayed one night to shake off my jet lag. The Carrygerry guest house not too far from the airport. As I stepped out of the cab, this was my view. The answer to the question, is Ireland really green?

I noticed all the blue and yellow banner flying in front of businesses and homes. It's to celebrate the upcoming Hurling Championship game in a few weeks. Country Clare is in the match, and it's not to be missed. The Irish are crazy about Hurling.

After a warm, hearty dinner and a good sleep I was off the next morning to meet my classmates at the Caher House near Feakle. Yes, after asking several locals, it's pronounced just the way it looks. But with a nice brogue.

This grand home was my home away from home for the class. We walked, talked, and learned so much about food styling, the ins and outs of food photography and many other tidbits. If fact, we created a Sharing List, to document all the movies and odd & ends that came up in conversation, but we knew we might forget. Thirteen women have a lot of conversations!

Our first morning we walked to see the chickens and horses, and explore the property. We discovered wild blackberries which would come in handy for our food styling exercises later in the day.

Our first styling exercise was styling a cute little jar of yogurt. Sounds simple? Add the spoon and the lighting with a pretty cloth and I had my work cut out for me. Here's my final result. We made a few more trips to the grocery store to pick up more jars. They'll come in handy for other photos. The best part is they all made it home in once piece.

Bea (pronouced Bay-ah) presented demonstrations and ideas for styling desserts, cheeses, meats and cooked foods. Always natural light, and getting the food positioned just so. Not too much, just right.

It was great fun working in pairs to style our own versions of the foods. Sometimes the food and sun cooperated, sometimes the sun went behind a cloud and changed our plans. Here are some of my shots.


One afternoon just before dinner a few of us piled in a car and were taken by the grounds/animal keeper to the other side of the lake. The views were stunning. As were drove down the single land road, we came upon a herd of wild horses. They were as interested in us as we in them.


Our field trips included a trip to an organic goat cheese factory complete with goats. It's a very small facility producing great cheese.
Normally, the goats are out grazing but the day of our visit it was raining. The goats preferred to be inside so they were treated to fresh cut lush green grass.

After my week ended, I traveled back to the Carrygerry House joining my cab driver, Finbar, for an afternoon trip around County Clare. He grew up in the area and had many ideas for things I should see before I left. My first order of business was a pair of Wellies for home. We had found several guest pairs in the basement of the Caher house and wore them into the woods and out and about on rainy days. With my country life, I thought they'd come in handy here in Wisconsin too.
Finbar stopped to ask a friend where he thought would be a good spot to find Wellies. They concurred it would be Dan, Mac & Ernies. Sounded like a good spot. They told me it has lots of farming equipment and would surely have authentic Wellies. We drove into Ennis, and pulled into the farm supply store. Silly me. It wasn't Dan, Mac & Ernies. It was Dan McInerney's! I kept my phonetic spelling to myself.


We quickly found the boot section. All the styles were lined up in a row. I tried on a few pair to find my size, finding the perfect pair. I was now the proud owner of real Wellies. No, I didn't wear them out of the store, but I did put them on in my room to test them out before I packed them for the trip home!
After some gorgeous views, touring an Abbey, and seeing many ancient sites on the area, it was time for a bite. To accompany my seafood chowder, I had a hard cider. I'm including a shot of my first Guiness too. Delicious!

I'm looking forward to my next post where I'll make Seafood Chowder and Cheddar Scones for you. The recipes are on their way from the Carrygerry House Chef and his wife, Gillian who own the Inn.
Finbar drove me to the Cliffs of Moher, one of the most beautiful places I've seen. The Atlantic is all its spendor. The area is now a National Park with safety rails and a Visitors Center. Finbar showed me the spot near the edges of the cliffs where he had picnics as a child.


It's great to be home and putting my new skills to work. A special thanks to Angela Ritchie of Ace Camps, Allison our talented chef, and Beatrice Peltre for her talent and great teaching skills!
Paris Cookware Shops

Where do I purchase my equipment? Many pieces come form Paris. Here's where to shop in the City of Light.
Read moreCrepes (With and Without Gluten)

Let’s celebrate the French February 2nd holiday - La Chandeleur
Read moreGougères with Salami and Antipasto Salad

Salami, Salami, Bologna! Anyone remember the Popeye Cartoon? As I worked on these recipes the phrase kept running through my mind. I finally did an internet search and uncovered the source. If you're in the mood for some nostalgia you can view the episode via this link. https://www.youtube.com/watch?v=kgvDcXN3pJo. A group of bloggers were invited by Bolzano Artisan Meats in Milwaukee, Wisconsin to choose a Bolzano Salami then create a few recipes. I choose Old School. A hard salami made with pork, garlic and lots of crushed black pepper. The company makes delicious meats using hormone free products in small batches. I was thrilled with my choice.

Salami and Gruyere Gougeres
The first recipe uses classic Pate a Choux with gruyere cheese and small slices of the salami. After they baked, I sliced them, and filled them with stone ground mustard, another slice of salami and cheese. Oh boy! The perfect party snack.
Salami and Gruyere Cheese
Gougères
125 gm water (about 1/2 cup)
1/2 tsp salt
3 1/2 T butter
2 tsp. sugar
75 gm flour (2/3 cup)
2 eggs, plus 1 egg for egg wash
1 cup grated gruyere cheese, or cheese of your choice
3/4 cup thinly sliced, then chopped Bolzano Old School Salami
Preheat your oven to 375 degrees F.
In a small saucepan, place the water, butter, sugar and salt. Bring to a simmer until butter melts. Add the flour all at once, and stir. The mixture will look like mashed potatoes. Place the flour mixture in a mixing bowl, and add 2 eggs one at a time. Stirring well after each egg. Stir until the mixture is smooth and glossy. Add the cheese, reserving a small amount (2-3 T), and the salami.
Using a tablespoon or pastry bag with large tip, pipe or spoon ping pong to gold ball sized balls of dough on to a parchment lined baking sheet. Place the last egg in a small dish and whisk with a fork to loosen. Using a pastry brush, gently brush the top of the balls with egg. Be careful not to drip egg on to the parchment paper from the pastry as it will keep the pastry from puffing as well as it can. Sprinkle the tops of the puffs with extra grated cheese.
Bake for 20-30 minutes or until completely golden brown. Cool on a wire rack and serve with mustard, pickles and more sliced salami and cheese. Puffs can also be sliced across and filled for tiny sandwiches.
Makes about 18 small puffs
My next recipe is Antipasto Pasta Salad. This recipes screams of summer picnics. It's far from summer where I am, but it really put me in the mood. The big chunks of smoked cheese, sun-dried tomatoes and the salami really take this over the top. Wait until you smell it. The aroma is amazing. Find a pasta with lots of curves to trap the flavorful dressing.

Antipasto-Salad

Pasta Salad Ingredients
Antipasto Pasta Salad with Salami
1 pound rotini or fusilli or any (corkscrew-shaped pastas) 2 garlic cloves 1 tablespoon Dijon-style mustard 1/3 cup red-wine vinegar 2 tablespoons balsamic vinegar 1 tablespoon water 1/2 cup vegetable oil 1 ounce (1/2 cup) sun-dried tomatoes 1/2 pound smoked gouda, cut into 1/2-inch cubes 1 1 pound can garbanzo beans, drained and rinsed
1 small can artichoke hearts, cut in half (smaller bites)
1-2 T capers 3 1/2 ounces sliced hard salami, cut into julienne strips 10 to 20 bottled small peperoncini (pickled Tuscan peppers)
1 cup cherry tomatoes cut in half 1/2 teaspoon dried hot red pepper flakes 1 cup loosely packed fresh flat-leafed parsley leaves, minced
Start boiling salted water in a large pan. Cook the rotini until it is tender and drain it. Refresh the pasta under cold water and drain it well. Using a food processor or blender, blend the garlic, the mustard, the vinegars, the water, the oil, and salt to taste until the dressing is emulsified. In a very large bowl toss the pasta well with the dressing and stir in the sun-dried tomatoes, the mozzarella, the garbanzos, the salami, the Tuscan peppers, the red pepper flakes, and capers and the parsley and tomatoes for garnish. Chill the salad, covered, for 1 hour. The salad may be made 2 days in advance and kept covered and chilled.Serves 8-10

pasta-close
Bolzano Salamis are available online and at various outlets. To find more recipes and read more about the project, you can find the other bloggers at these sites. Lori Fredrich of Burp was the curator of the project. Check them out!
Participating Bloggers:
Rebecca from CakeWalk:
Molly from Peanut Butter & Pickles:
Melanie from From Fast Food to Fresh Food:
Anna from Tallgrass Kitchen:
Lori and Paul from Burp! :
Caramelized Onion Dip aka French Onion Dip
Love Chips + Dip? Here's a dip that will amaze your friends.
Read morePastry Creme (Crème Pâtissière)


Pastry Cream in Puff Pastry
As I prepare to leave for Paris it seems like the perfect time to tell this story. It's always fun remembering my days at Le Cordon Bleu. I hope you'll enjoy.
The March to the Poubelle
Our Basic Pastry Course was in the intensive format meaning that we took 3-4 classes each day instead of 1. It condensed 12-14 weeks of curriculum to just three. It truly was intense. We would be in the lecture room then immediately run downstairs to the kitchen to prepare at least one or all of the recipes the chef had just demonstrated, then back to the classroom. The days started at 8:00 am, and went until 8:00 pm. Some days included a free time block to run an errand, or in our case to do a little shopping and or eating. Both activities were highly encouraged. After all, how were we to learn what great pastries looked and tasted like?
The chefs in the school worked a French workweek (35 hours), so we had to have a combination of chefs to cover our long days. Our main chef instructor was off for the evening and bid us farewell. Another chef, who happened to be a Cuisine program chef, was going to oversee our kitchen preparations. All the chefs were very distinguished and impeccably neat. Our new babysitter chef was even more so. He exuded an air of confidence and importance that had us more nervous than usual. Add to this the fact that cuisine chefs have little time for pastry chefs, (too much weighing and measuring) let alone pastry students in their first course.
It was early in the course, and we had seen pastry cream prepared, and made it ...once. The chef suggested that we divide the main recipe and each make a component as if we were working together in a restaurant. One or two people would make a sponge cake, another the mousse, and another the crème pâtissière. This sounded very reasonable. We divided the duties between our small group, increasing the amounts so each of us would have the perfect amount for our dessert.
We carefully completed our mise en place (gathered our ingredients) and went to work. Our Chef walked about the room watching us, and helping with any questions and offering help with locations of ingredients. We had the feeling there were about a million other places he'd rather be, and he had more or less drawn the short straw to teach late that night. Every time he passed by my work station, I got a whiff of his amazing cologne and a stern glance that made me even more nervous. My French was caveman at best, so as he'd pass by, I'd muster a "bonjour Chef" and offer a nice Wisconsin smile. He smiled back, but looked like he had just tasted something sour.
My contribution to our group was the pastry cream. We needed 4 times the recipe for 4 students so I had to separate 16 eggs. It went fine. No broken yolks, and no spills. I gathered the milk, sugar, flour, cornstarch and eggs had headed over to the stove. I combined the ingredients in the order and technique from what my notes and memory offered. So I thought. I stood at the cooktop stirring and stirring, smiling away at the Chef as he approached. He stood beside me, and watched me stir. I had nothing to contribute to a conversation so I kept stirring and nervously smiling. Finally, he broke the silence with "Qu'est que sais?" I 'm sure I looked at him with a blank, panicked stare. "Qu'est-ce que tu fais?" (what are you making?), he asked. I thought to myself, what is wrong with him? Surely he's seen someone make pastry cream before. "Crème pâtissière, Chef", I said. Hoping that he'd move on. But no.
Then came the moment. The belly flop in front of your swimming class moment. In one motion, he flicked his head to the up and to the side, made THE tisk sound, and picked up my saucepan. "Suivez-moi", he said. I looked behind me where my classmates stood paralyzed watching and hoping one could translate. "He wants you to follow him", one piped up. So off we went from one end of the kitchen to the other. It felt like the distance of a football field, but it was really about 50 feet. I was about three steps behind, wondering where could we be going? We arrived at our destination, a gleaming stand holding a perfectly attached garbage bag. Why couldn't we just use the garbage can at our end of the room? He stepped on the foot pedal with his gorgeous French, perhaps Italian shoes and up went the lid. He stretched out his arms, and lifted the pan over his head and slowly dumped the gooey, wall paper paste mess from the pan into the garbage. My pastry cream was poubelle. Garbage.
"Répéter", he said as he put the pan in a nearby sink. I made the walk of shame back to my workstation. My friends were pale, very sympathetic and trying not to make eye contact. They had busied themselves with things to do that required crouching behind the workstation on the other side. I willed myself not cry. After all, he didn't yell and scream. But now what? I had no idea what I had done to cause the problem.
"Je vais vous aider à faire de la crème pâtissière", he said. I will help you make pastry cream. I gathered a new set on ingredients. He stood beside the entire time. Part of me wanted to crawl in a hole, and the part felt like I had a pro at my side who wasn't going to let me screw this up again.
We went to the stove together. I don't know what I did wrong the first time and never will. The second time required very little time at the stove. "Aller vite", go fast he said motioning with his arms so I knew just how fast to go. Our pastry cream was perfect. He held the plastic wrap lined pan as I plopped the rich, dreamy vanilla custard in to the pan. "Vous avez fait un bon travail ce moment", You did a good job that time. No hugs and back slaps, but a slight warmth in his eyes to let me know it was okay.
To this day, I think of him every time I make pastry cream. It's not good, it's great, and I have him to thank. Merci beaucoup, Chef.
I can't stand beside you, but I'll walk you through the steps of making crème pâtissière. Perfect pastry cream.
The ingredients are simple. Milk, sugar, flour, cornstarch and vanilla. I don't add other flavorings or steep fancy ingredients into the milk. I like to keep it pure and simple. If you don't have a vanilla bean, you can add vanilla extract at the end.

pastry cream ingredients

vanilla bean
Hold the vanilla bean with one hand, and with the other slice the bean open. Using the back side of the paring knife, gently slide down the length of the bean gathering the tiny vanilla seeds/paste. Put all the seeds and the pod into a saucepan with the milk and 1/2 of the sugar. Stir briefly, then bring to milk to a simmer over medium heat.
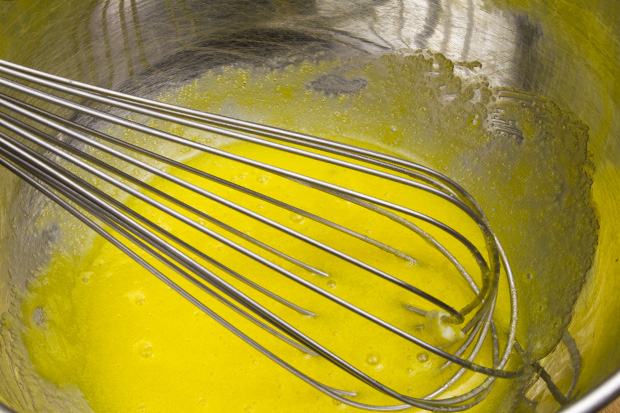
Now, in a bowl, whisk the egg yolks. Now while whisking the yolks, add the sugar. Keep whisking. There's a chemical reaction of heat that occurs when yolks meet sugar. This cooks the yolks, and can make microscopic scrambled eggs in the cream making the texture less than perfect. Once you have the eggs and sugar mixed, add the flour and cornstarch and mix well. The mixture will be thick.
eggs and sugar

vanilla and sugar in the milk
Now comes the fancy part. Once the milk is at a gentle boil/simmer. Pour about 1/3-1/2 of the milk in the bowl with the eggs. This is called tempering and lets the eggs know that they're about to get cooked. It keeps them from scrambling later and making lumpy cream. Mix the milk and eggs with a whisk until the mixture is smooth.
Now, bring the milk in the pan back to a rolling gentle simmer. Have your pan ready near by, lined with plastic wrap. Start whisking the milk and pour the eggs mixture into the milk whisking quickly. Pay careful attention to the corners of the pan. Stir quickly until you see the cream "burp" a bubble from the middle. This lets you know that the cream is heated through and can go into the pan. Don't overmix. The cream should be thick and glossy. This whole process will take seconds, not minutes.

cream in the pan just finished!
Now pour/spread the cream into the pan, and tuck the extra wrap around and over the cream to prevent and skin from forming on the cream as it cools. Look at this tiny little flecks of vanilla in the pastry cream!

ready to refrigerator
Be sure the cream is less than 2 inches thick and is cooling in a layer rather than in a bowl. It's much safer from a food safely standpoint. Allow the cream to chill about 2 hours or until cool in the center.
When the cream is cool. Transfer to a bowl and whisk to loosen and smooth the cream. Add about 1 T of Grand Marnier or a favorite liqueur adding a beautiful aroma and hint of flavor. You don't need to add the liqueur if you don't want to. This is point where you would add vanilla extract if you didn't use a vanilla bean.
Use the pastry cream to fill eclairs, layer between sheets of puff pastry, or use it to fill a pretty cake.
I hope you'll give this a try. It's delicious and a classic building block of all French pastry.
To print this recipe, click HERE
Pastry Creme (Crème Pâtissière)
500 ml milk
4 yolks from large eggs
125 gm sugar
30 gm cornstarch
30 gm flour
1 vanilla bean
1 T Grand Marnier or to taste (optional)
Directions
1. Line a shallow baking pan with plastic wrap.
2. Using a paring knife, slice the vanilla bean lengthwise through one side as if slicing a tube. Using the back side of the knife, slide it down the length of the exposed bean to scrape out the seeds. Remove seeds from vanilla bean.
3. In a saucepan, add the milk, vanilla seeds, the bean pod and 1/2 of the sugar.
4. Heat to a simmer.
5. While the milk is heating, whisk the egg yolks with the remaining sugar in a large heat proof bowl. Then add the cornstarch and flour. Mixing completely.
6. Remove the vanilla bean pod from the milk. Pour 1/2 or less of the warm milk into the bowl over the egg mixture and whisk until smooth. Increase the heat under the milk to a very slow boil.
6. Pour the egg mixture back into the pan, whisking quickly and constantly until the mixture forms a smooth, glossy cream and the cream "burps" a bubble in the pan.
7. Pour cream into the lined pan, folding the wrap and pressing on to the hot cream. Be careful, it's hot!
8. Chill until completely cool.
9. Remove plastic wrap and put the cream in a bowl. Whisk until smooth, then add Grand Marnier or other liqueur. This is the time to add vanilla extract if you did not use a vanilla bean.
10. Your pastry cream is ready for your favorite pastry! It will keep for about 2 days and must be refrigerated.

raspberries in puff
Long and Slow Baked Apples
What are your plans for the weekend? In that organizing mood? I'd love to know how many of those plastic tubs are sold during January. Today I saw a display of them in very fancy colors. Personally, I like the clear ones so I can see what's inside. I guess I could label them and then it wouldn't be necessary to open each one to find my summer clothes. My new goal is things I'm not using get it out the door rather than squirreled away in the basement. We'll see! I think it feels good to have some routine back again after the holidays. Back from the free fall of sweets and dips. Don't get me wrong, it's still winter and comfort food is still very welcome. Now it's time for slow roasting, nice smells and healthier options.
There's comfort food, and then there's great comfort food. What could possibly be better than creamy, sweet baked apples? This is an Around My French Table recipe, by Dorie Greenspan. As you know, I love simple, yet a little fussy recipes. I think you'll love this one. Why?
1. You get to use ramekins. You know you love them.
2. You get to use your mandolin. Promise, promise, promise you won't use it without the guard.
3. You'll practice your apple peeling.
4. You'll bake with plastic wrap. Something I did in Paris and thought I'd never do again. It works, really!
5. The result is a delicious apple dessert -so creamy and rich, it's almost like custard. It's well worth the fussy preparation.

Long and Slow Baked Apples
The recipe is actually pretty simple, just a little time consuming. Peel, core and slice apples. I used Fuji and they were a really nice texture and flavor. Be sure they're sliced very thin.
Then layer the slices with melted butter, and sugar that has been spiced with ginger and orange zest. I skipped the ginger and used nutmeg instead. The slices fit perfectly into the ramekins and towered over the top.

stacked apples
Then, wrap the ramekin in plastic wrap, then foil. Make a few puncture holes in the top and cover with another ramekin to provide just a little pressure to the apples while they bake.

plastic wrap on apples

ramekins on top
Now, find a good book - or a closet to clean. The apples will bake for two hours at 300 degrees F. After they're baked, let them cool all wrapped up for 15 minutes or so, then carefully unwrap them. It's amazing!

finished apples1
I went a little crazy and made three recipes from Around My French Table. The herbed spaetzle, the Orange Pork Tenderloin and the Long and Slow Baked Apples. It was a wonderful meal. The pork and fragrant fruits were a nice combination. The apples were a light yet very satisfying dessert ( with some sweetened whipped cream!)
When I make these again, I'm going to turn the apples out on to a plate and serve them with a dollop of creme fraiche. It's always a perfect match with apples. Do you know how to make creme fraiche? It's very easy, but requires a little planning.
To print, click HERE
Creme Fraiche
2 cups Heavy Cream
2 T Buttermilk
Mix together, and allow to set uncovered at room temperature overnight ( or about 8-12 hours). You can use it right away or stir, cover and chill. The mixture will continue to thicken and become more tangy. You can keep it up to about 2 weeks in the refrigerator. If you don't need so much, feel free to divide the recipe and only make a half batch.
Stayed tuned everyone! I'm heading to Paris and will try to send you photos and do a few blogs posts. Is there anything you'd like to see or read about while I'm there? What a nice coincidence that next week's Around My French Table recipe in a French Apple Tart. Tres Bien!
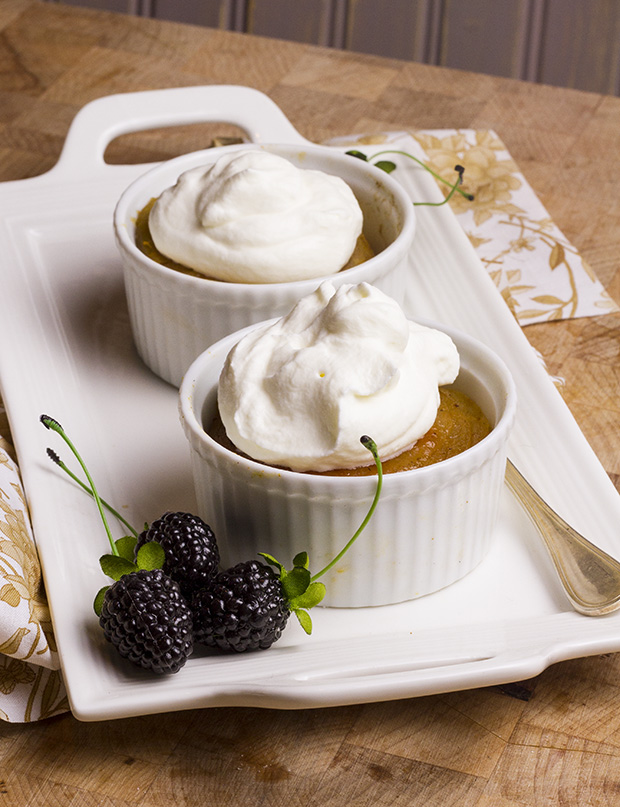
baked apples on tray
Jumbo Marshmallows

Some things in life just make you happy. Big fluffy marshmallows are perfect treats. My little friend Maeve turned four recently, and I wanted to send something extra special to her birthday party. Big puffy marshmallows were perfect. They are so much better than store bought, and can be cut into just the right size. I like the big cubes, but you can cut them smaller if you like. You might want add color, flavor or just keep them plain old white. These are delcious, and paired with a cup of cocoa or turned into a s'more, they can't be beat. I promise, they're not too hard, and are well worth the effort.
marshmallows1-web
To print this recipe, click HERE
Jumbo Marshmallows
1 cup cold water
3, 1/4 ounce packets unflavored gelatin
2 cups granulated sugar
2/3 cup corn syrup
1/4 tsp. salt
1 cup powdered sugar
Using shortening or cooking spray, grease an 8 inch pan. Sprinkle with powdered sugar to cover in a generous coating.
Fit a stand mixer with the whisk. Empty the packets of gelatin into the bowl, and cover with 1/2 cup water.
In a medium/large saucepan, combine the sugar, 1/2 cup water, and corn syrup and salt. Attach a candy thermometer to the side of the pan and heat the mixture until the thermonmeter reads 240 degrees F. Don't stir the mixture..
Very carefully, pour the hot sugar mixture over the gelatin with the mixer running at low speed. Be careful not to pour on the whisk or the sugar will splatter. Slowly increase the mixer speed and whip until the marshmallow is cool and the bowl feels cool to the touch. This will take about 12 minutes, or longer. A double batch will fill a mixing bowl and take about 25-30 minutes to cool. Note: your mixer may get warm or overheat...
Pour and scape the marshmallow into the pan and smooth. You may want to use a wet spatula if the mixture is hard to spread. Dust with powdered sugar and allow to set overnight uncovered. After the marshmallow has set, turn out on to a cutting board and cut into cubes. A straight down cut works easier than sawing motion. Dust the marshmallow with powdered sugar to prevent sticking. Store well wrapped at room temperature for up to 2 weeks.

three-marshmallows-web
Bagels! Baking with Julia

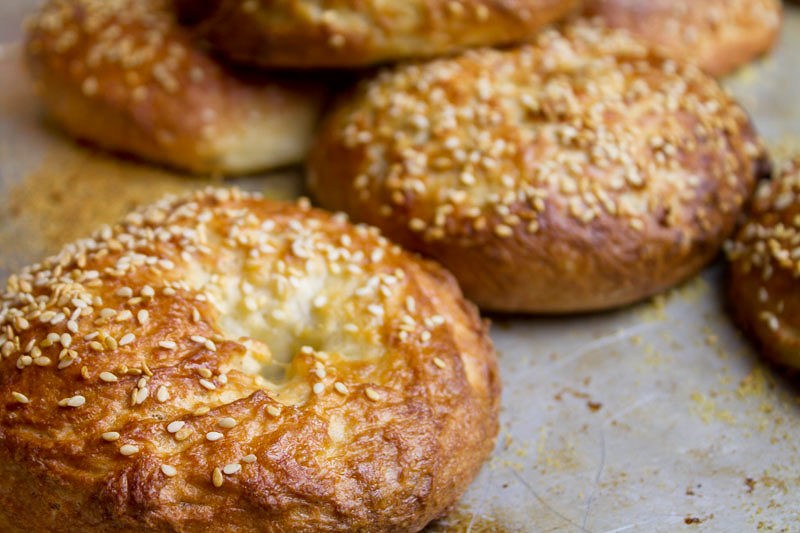
I'm not sure how to spell it, but all I can say is Ei-yi-yi! This recipe had it's moments, but I'm happy to report that they're really good. This week's Baking with Julia recipe is bagels. I was driving last week and heard a public radio interview of the book helping us know what to make from scratch, and what to buy already made. About half way through this recipe, I thought I clearly knew the bagel answer. Buy them. When they came out of the oven, so pretty and delicious... it's a coin toss. It was worth the effort and fretting.
Our host this week is Heather, from Heather's Bytes. She'll have the recipe, and her tips and tricks at her blog.
When I was in college I had three roommates. We loved to cook - make that experiment. There were a lot of firsts. Quiche, soups, ethnic recipes, pretzels, breads...and bagels. I don't remember the bagels being bad, nor good. They must have been college student edible. It was fun to revisit bagels again. This time with a few more skills and baking experience.
The dough went to together easily. The rise was right on time, and into the fridge went the dough. So far so good. After the chill, I started with stock pot of water, added the baking soda/sugar and began shaping the bagels. The dough is sticky and tricky to get into the balls. I never did quite master the twirl, but I got them into the boiling water. As they boiled, they puffed and looked like squishy dumplings. As they were bubbling away, I was getting ready to tell you about my disaster. I'm happy to report that after I put them in the oven, the texture evened out, and the surface began to look like a bagel, a REAL bagel. The timing was perfect, and out of the oven they came. The inside texture was nice, and the taste was really good.
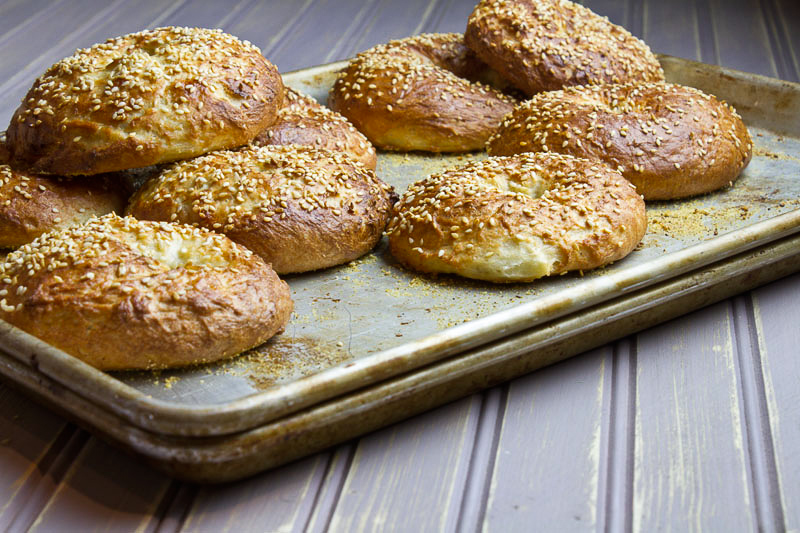
If you're a bagel lover and looking to try something fun, give the recipe a try. Top them with your favorite sesame, poppy or crunchy seed and enjoy!

Time for Apple Pie
Welcome to The Little French Bakery Blog! It's such a great time of year. Perfect for starting new projects and trying new recipes.
As many of you know, Gary and I just returned from Italy. We attended an amazing cooking class on wood-fired cooking. It was so fun to get up every day and fire the oven with the residual heat from the day before. We roasted, baked, grilled and learned many great new recipes. One of the best days was learning to remove all the bones from a chicken and roast it under bricks in the oven. I did it! A few years ago, I was wearing gloved to remove the neck from a chicken if there was a little left. Now... ta da! It's hard to believe that a whole chicken can be roasted in just 12-18 minutes, and be so delicious.
Another of my favorites was an apple crostada. A simple tart crust filled with apples and set on on the oven floor to bake. The first half of the baking was on parchment paper, then 2nd half directly on the oven floor. Wood fired cooking adds such a great dimension to food. Not smoky, but just moist and flavorful.
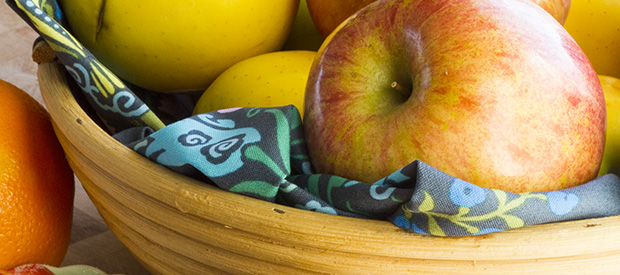
We arrived back at home just in time for fall and the start of apple season here in Wisconsin. I love apple pie! I've picked up some Cortland and yellow Delicious and am ready to start baking. This time, I'm going to try a new recipe, and bake in the outdoor oven. I'll give it a try and post the recipe if it turns out!
As you bake your apple desserts this fall, try adding some creme fraiche as a topping. It goes so well with apples. Another tip for a new taste is to omit the cinnamon and "usual" spices. Just add vanilla. The French aren't crazy about cinnamon and only use it sparingly. Once you try an apple dessert without cinnamon, you might be hooked.
To make creme fraiche: 2 cups heavy cream 1 T buttermilk Stir together and allow to rest overnight (not refrigerated). In the morning, stir the thickened creme fraiche and refrigerate, covered. It will continue to thicken and sour over the next few days. It can be kept up to 10 days or so. It can be whipped slightly for topping, or added to warm dishes as you would cream/sour cream without separating. Enjoy!