It's finally February 7th! I've been waiting patiently (well, not so patiently) for today. Today is the very first week of Baking with Julia, a baking group coordinated by Dorie Greenspan. The original group baked its way though Dorie's Baking book. They completely the recipes and were ready for the next challenge. Dorie Greenspan authored Baking with Julia, so its fitting her book is next. Twice each month, we'll bake two recipes from the book and post to http://tuesdayswithdorie.wordpress.com/ As some of you may know, I also participate in French Fridays with Dorie, which bakes & cooks recipes from Around My French Table.
I never had the opportunity to meet Julia Child, but I love her. I love her fearless spirit, her laugh, her stature, and most of all her love of cooking. When I pull out her books and read a recipe, its her voice I hear reading to me. If something spills or doesn't turn out quite right, she's there in spirit with her happy, let's move on, coaching. I know things will turn out fine. My hope is that I can inspire people the way she does some day.
I hope you'll pick up a copy of the book and bake along with me. Feel free to add your link or notes in my comments area. Or, sign up with the group. The February 21st recipe is Chocolate Truffle Tartlets! Can't wait!
Let's start baking!
Of all the categories in the patisserie world, I think I like bread making the best. It takes times, patience, and the coordination of efforts with dough. Yeast is in charge of most of the process. You can try to rush it, but its really going to do what it pleases. It's more like a duet.
The recipe makes two loaves of bread. I doubled the recipe (exactly) for make four loaves. I also used my French bread kneading machine just to pull the dough together. I finished the dough my hand. The machine is to cool. It turns against the doughs friction against the side as the hook pulls and turns the dough. Just the action that you do with your hands. It allows me to make bigger batches, and have my hands free for other baking. It's very gentle, and still requires fairly close supervision so the dough doesn't wander up the hook or out of the bowl. We used a machine like this at school, and I was able to find one when I got home. I can make up to about 10 loaves of bread in it at a time. Not huge production, but bigger quantities than can easily be done by hand.
Once the dough was mixed, it rested for about 5 minutes. This process is called autolyse. The yeast gets started, the flour and water setttle in, and the gluten begins to develop.
When I'm teaching a bread class, the number one question is always. "How long will I knead the dough?" The best way to know that you're finished kneading it to check a gluten window. Gently cut off a small piece of dough, gently tease/strectch the dough with your fingers and look for a sheer pane of dough that wont' tear as it's being stretched. It you can make it sheer without tearing, you're finished! Here' a photo of the White Breads' gluten window.
Notice the light coming through the sheer dough. I was doing the photography and stretching myself, so the dough isn't stretched as thin or far as I would have like. Every single time I make bread, I check for the window. Every batch is different, and I always want to make sure I've worked the dough enough.
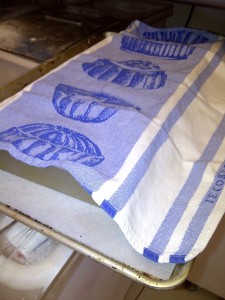
After the dough has had a good rise, and at least doubled in volume, it's time to shape the loaves. I weighed the whole batch, then divided by four to make sure each loaf was about the same size. You certainly don't have to be this picky, but baking is much more even when the loaves are the same. I like to cover the bread pans with a favorite towel. Call me superstitous. By the way, did I tell you that I always spin the dough three times, then flip it in the bowl before it starts to rise? Habits are good!
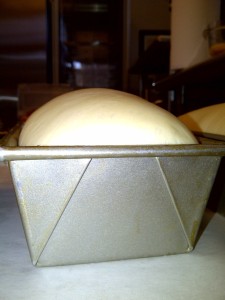
Here are the sweet loaves shaped and ready for the 2nd rise.
The 2nd rise is about an hour. The key to to let the bread rise until the loaf is about 1 inch about the top of the pan. That way, with the added spring in the oven, you'll have a nice tall loaf with perfectconsistency to the crumb. This recipe has a little bit more yeast than some recipes, so the bread rose faster than I was expecting. It's just a bit taller than usual, but doesn't it look great!??
Now into the oven! The yeast will work like crazy as the temperature of the dough increases. Once the dough reached about 120 F, the yeast will die, and bread will be it's finished size. I bake the dough until the internal temperature is about 180-200F. Just push an instant read thermometer right into the end. You can also pop the dough of the pan and look at the color. It should be golden. Once you've got the temp and color, try to tap the loaf and listen to the "hollow" thump. It's hard to know that sound unless you know the bread is done. I turn the bread out of the pans immediately and let them cool on their sides. OK, another weird habit, but it works. I pulled this bread out of the oven at about 195F and liked the pretty light golden color. This was JUST enough. It could have easily gone another 5 minutes. It's great for toast. Don't underbake your bread. The golden color is caramelization of the sugars which equals flavor!
The bread is cool, and upon inspection, no swirly holes. It has a nice soft but sturdy, consistent crumb. And... look at the cute shape of the loaves. They look like the cookie cutter shape of bread! and...not too high to fit into the toaster!
I hope you'll join me in two weeks for the Chocolate Truffle Tartlets. In the words of our dear Julia, "Bon Appetit"!


