Tuna Lentil Lemon Salad - French Fridays with Dorie


img_6635


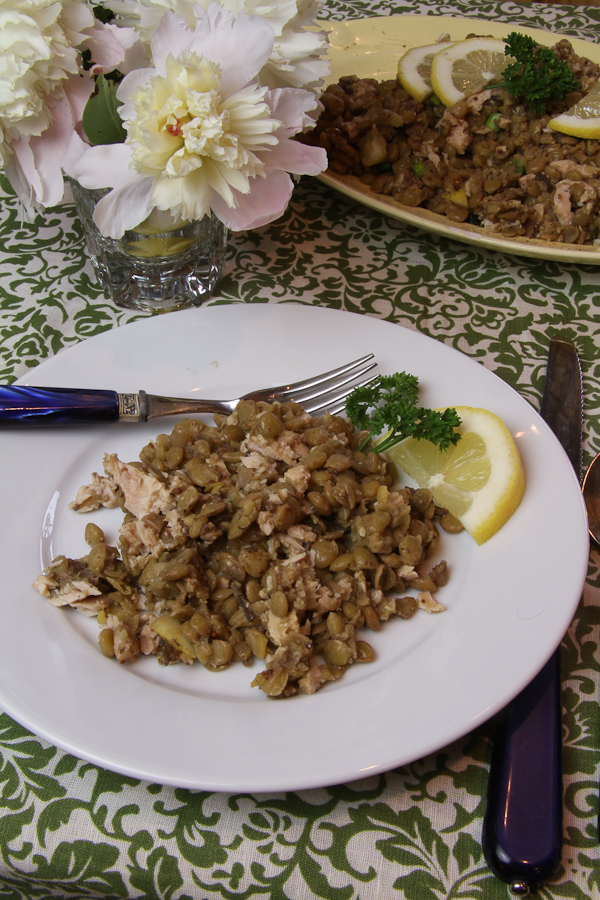
It's been a wonderful spring.  I know that I keep remarking on how pretty spring is, but it really, really is.  Take peonies for example.  They arrive every year, stay for about a week, and give us absolute beauty.  The smell is mesmerizing, to me.  We have a spot on our property where the original homestead log cabin once stood.  The cabin has been relocated, but the plants, trees, and shrubs that were planted by the generations who lived there remain.  There are ear trees, apple trees, lilace, lilies, and peonies.   We have to hike in to cut them.  By the time we're home, the ants have crawled out and are running up our arms.  Once in a vase, there are days of that the great smell.  Those are mine in the photo.  I love the creamy white, with the tips of pink.   Did you take peonies or lilacs to school for your teacher?  Maybe Lily of the Valley?   They were so pretty when we left home with the wet paper towel around the stems, but by the time recess rolled around, they were droopy and looking sort of pitiful.  It always meant the school year was almost over, and summer was on its way.

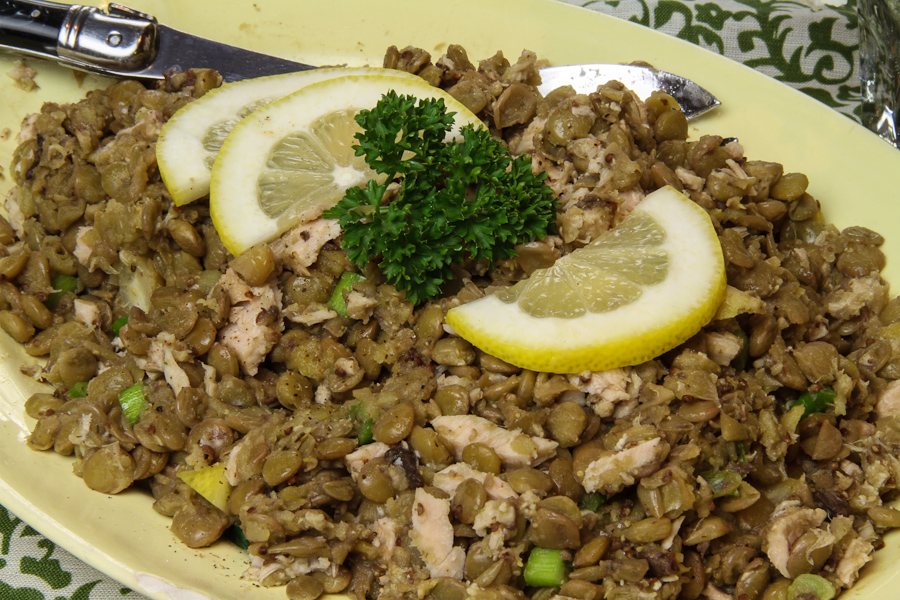
This week's Around My French Table/French Fridays with Dorie recipe is Lentil Tuna Salad with Preserved Lemon.  Very simple, light, and delicious.  I knew I may have a sales pitch ahead of me.  Gary is no fan of lentils.   He doesn't know why, just has no particular love for them.  Plus, he's a non-olive guy.   I knew if it was tapenade, we'd be ok.  Just no whole olives rolling around.

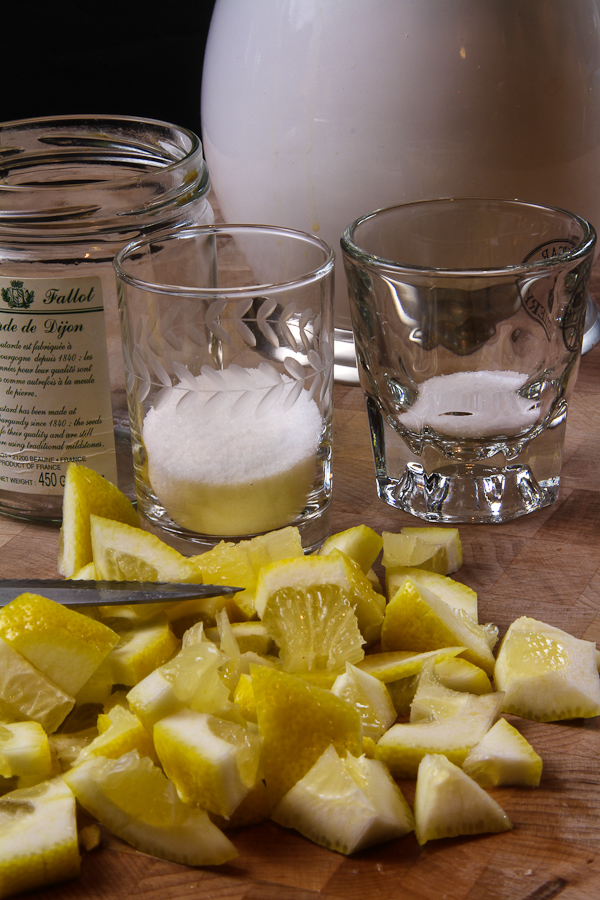
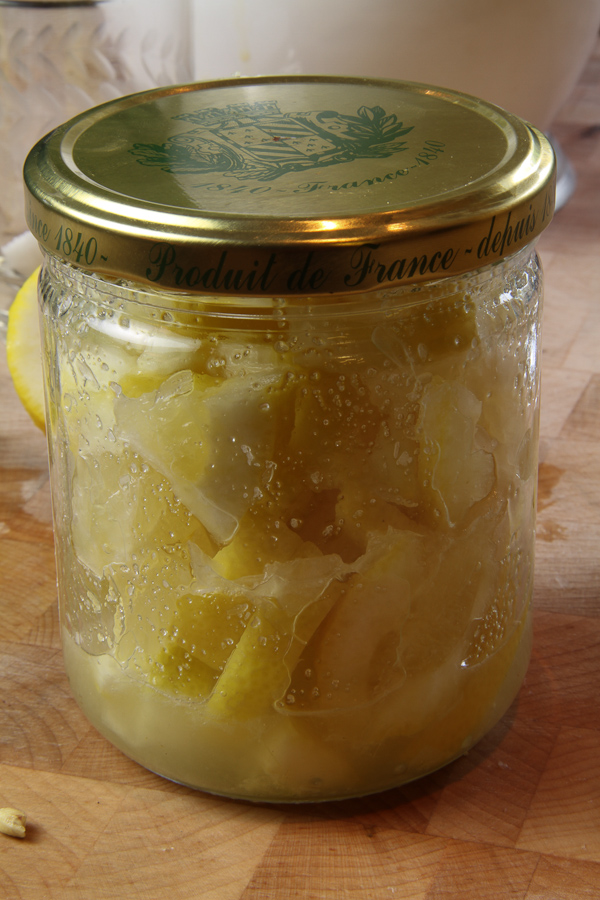
The recipe calls for preserved lemons which are very popular in Moroccan foods.   Lemon are packed in the jar with lemon juice and salt for about 4 weeks.  The skin softens and they can be sliced, diced and put in recipes.  I didn't have 4 weeks for preserve lemons, though this would be a good time to start.  I found a great "quick" preserved lemon recipe my Mark Bittman.  It took three hours intead of weeks.  I don't think they were quite as tender as the long version, but they worked well.

img_6638

First, the lemons are chopped then combined with salt and sugar, then placed in the jar.  Shake the jar every 10-15 minutes, and in the three hours, the lemons break down and have a preserved lemon quality.

img_6639

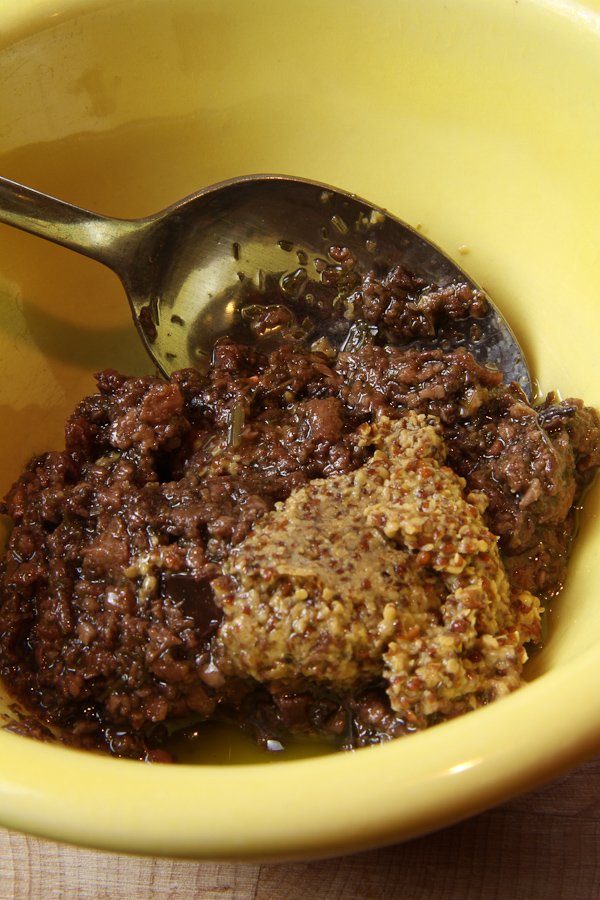
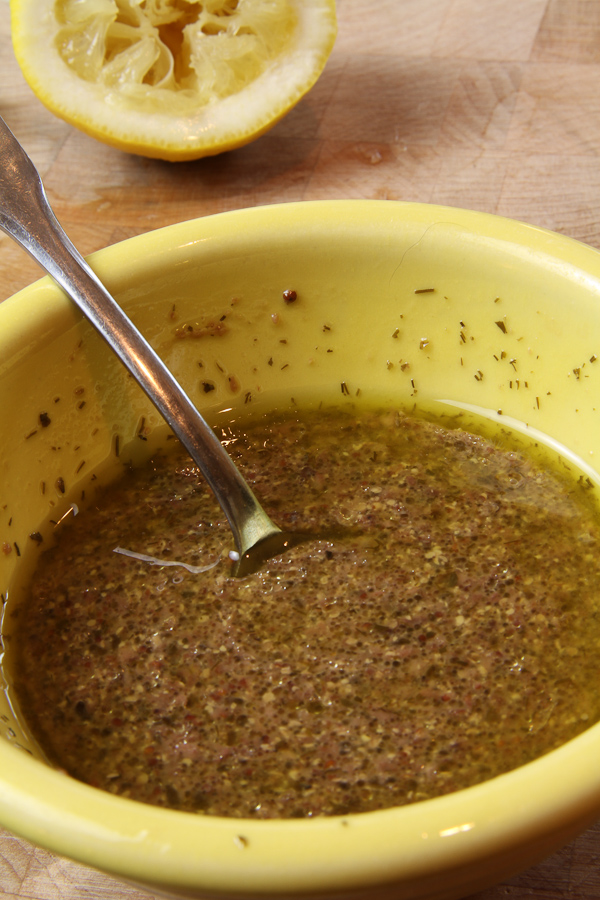
The dressing is a basic red wine vinegar vinaigrette with grainy mustard and black olive tapenade.  What a great combination!  I think this would be great to drizzle over Salade Nicoise!

img_6640

img_6641

I added the dressing to the lentils while they were warm, and they absorbed much of the liquid.  The lemons, scallion and tuna really worked well together.  I added a little just a squeeze of lemon juice to the top with the salt and pepper.   It was a nice dinner, and no complaints about the lentils.

img_6650


This recipe would be perfect for a picnic lunch on a warm summer day.  Enjoy!  Hope you can find some pretty peonies!

img_6646


Hungarian Shortbread - Baking with Julia

 This week's recipe is really fun, and very good.  If you'd like to follow along with the recipe, this week's hosts are Lynette of 1smallkitchen, and Cher of The Not So Exciting Adventures of a Dabbler.  They've got the recipe posted on each of their blogs.  

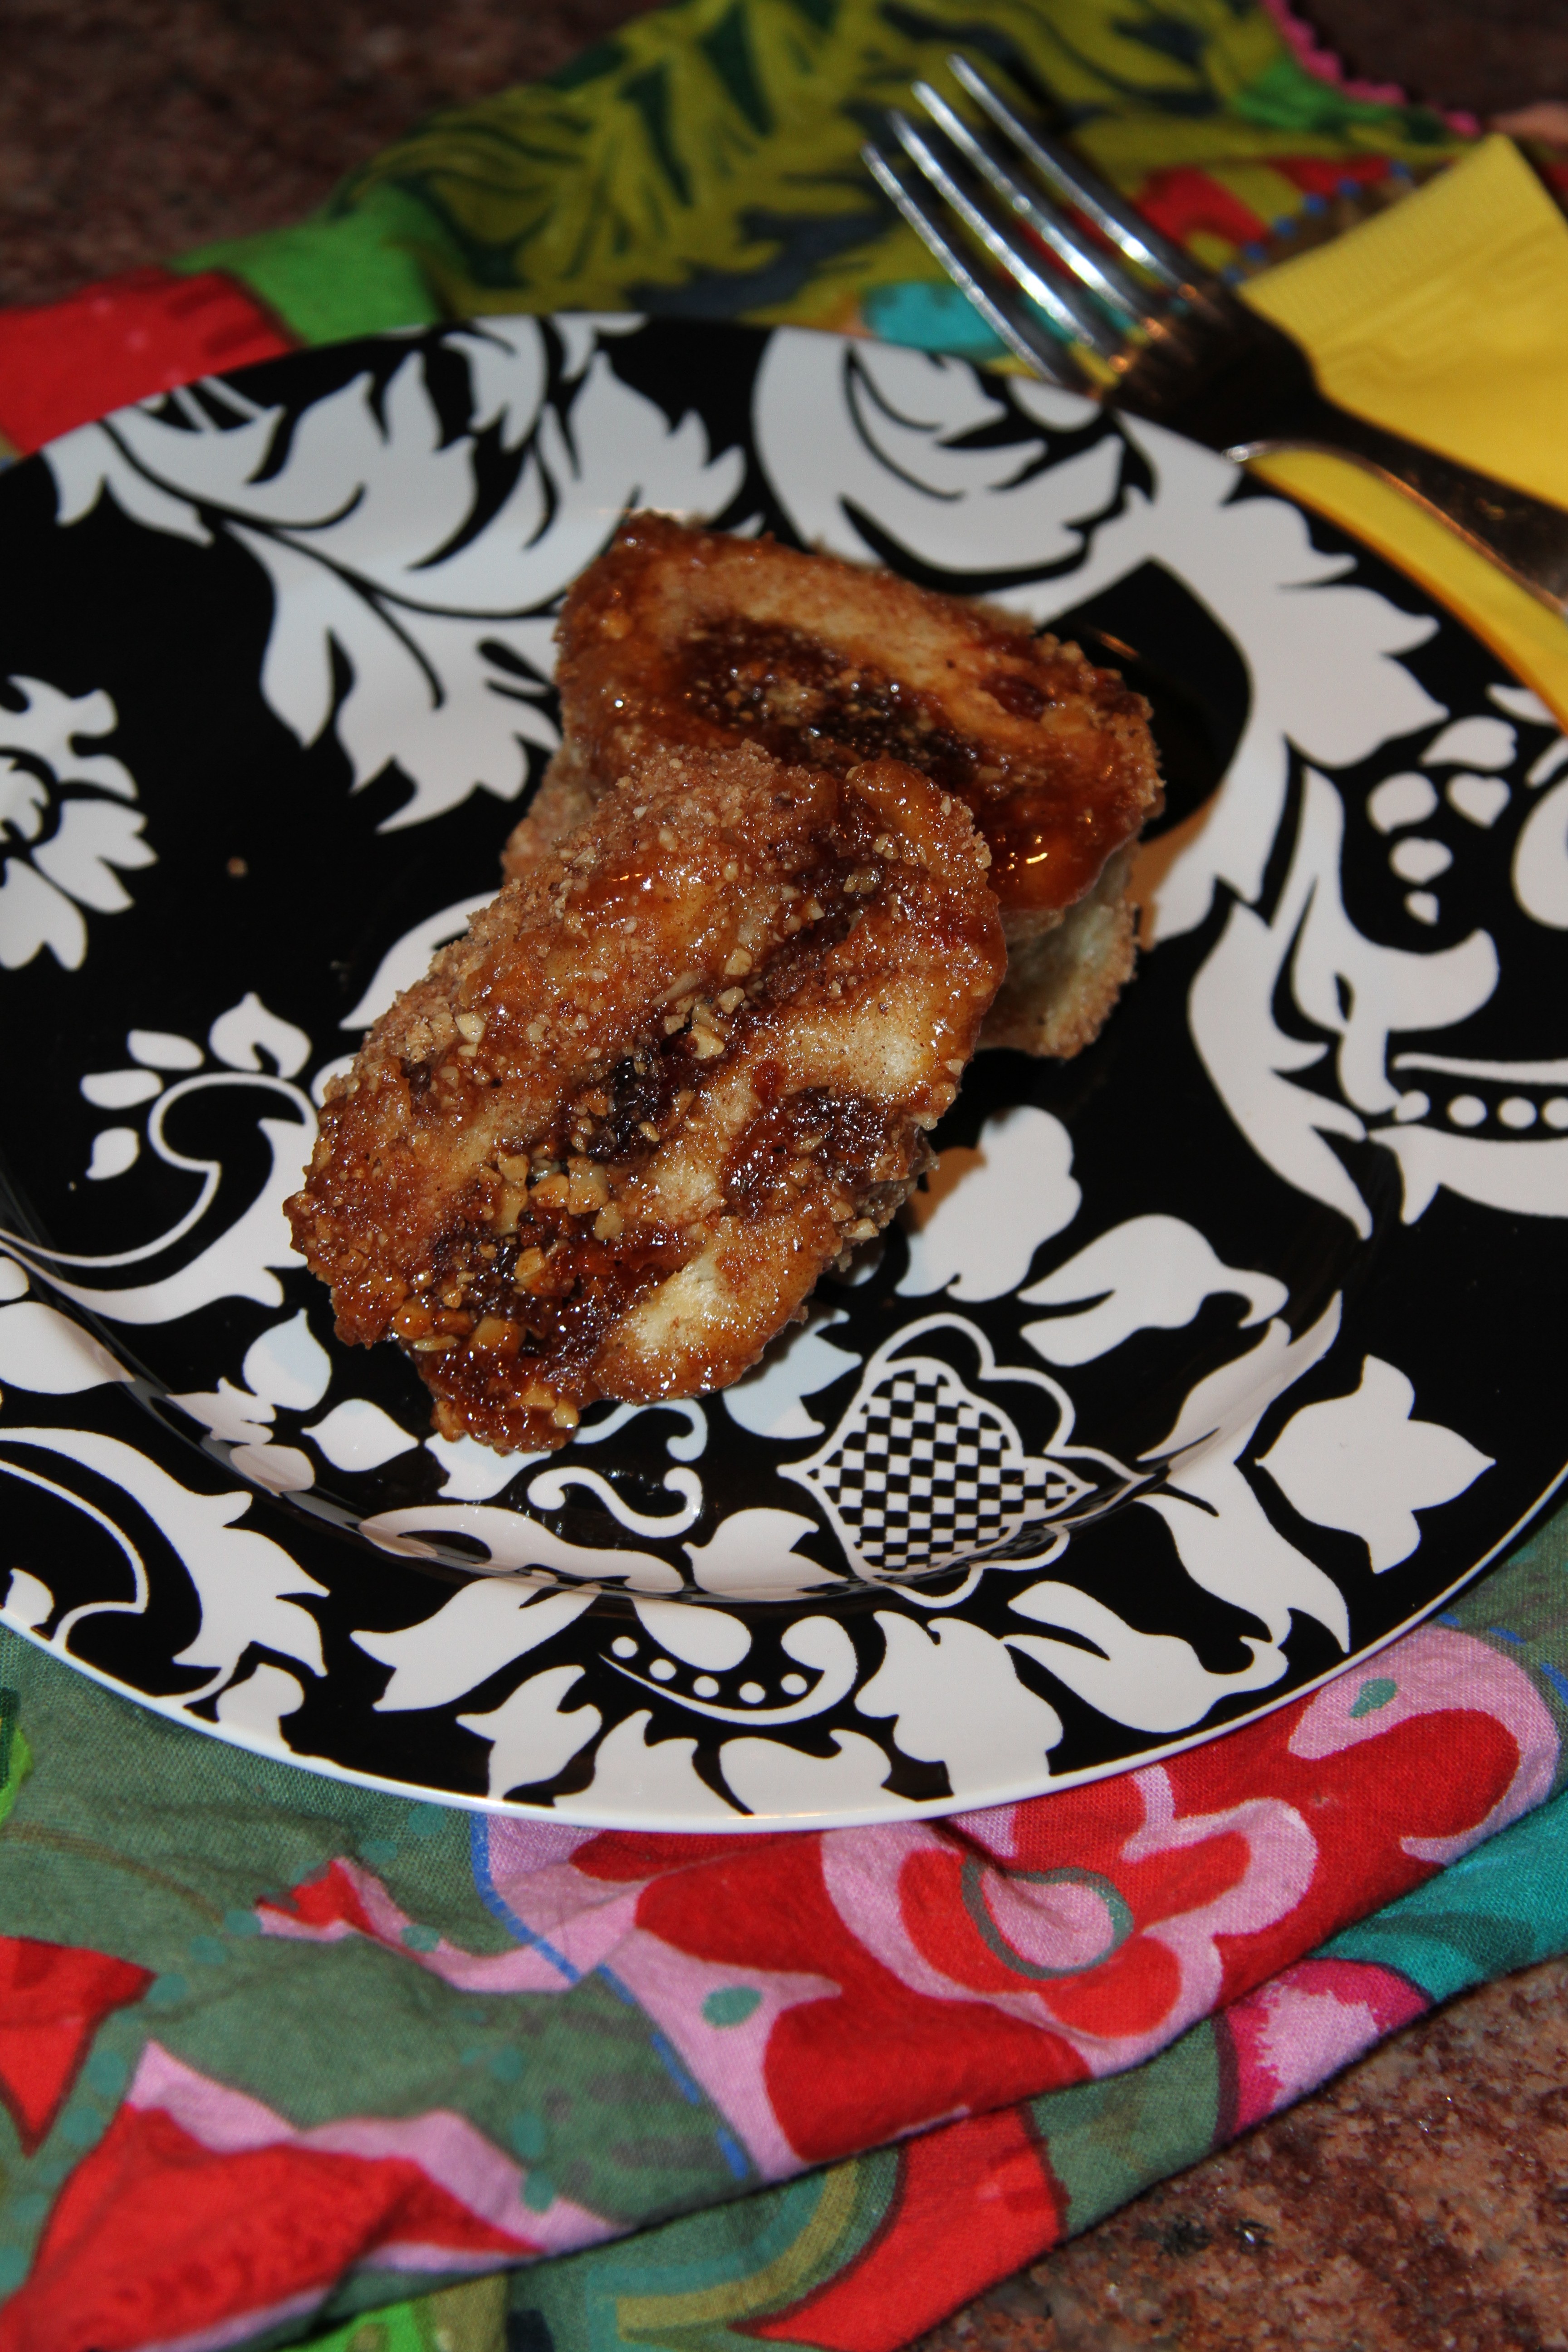
The main ingredients for the shortbread are butter, flour, sugar, eggs & salt.   Nothing strange.   It's the way the ingredients are put together that makes this really unique and  fun.   After the ingredients are combined, the dough is divided into two portions, wrapped and frozen.   When the dough is really firm, it's grated with a box grater into the pan.  Topped with jam, then the second portion is grated onto the top.  The pan is baked until golden, then topped  while still very hot with powdered sugar.  The sugar immediately melts into an icing for the shortbread.    I was so amazed with the process that I forgot to get some action shots.  There's nothing really tricky about the assembly, so you'll be a-ok.  I bet some of the other bloggers have included some process photos.

I didn't make the rhubarb jam from scratch as suggested.  I had some fig jam that looked perfect for the filling.  It was sort of a Fig Newton vision.

The shortbread is the perfect tea party sweet.  Sweet, buttery, crumbly in a cute way, and no strong flavors to interfere with a lovely cup of tea.

Speaking of tea.  I'd like to share two of my favorite teas, and their corresponding tea bags.  I know that real tea drinkers steep loose tea, but these little charmers are so cute that you'll want to use a tea bag instead.  The first one is from Fauchon.   The shop is located on Place de la Madeleine, Paris and is a destination for food lovers everywhere.  The first things you'll notice is every vegetable artistically placed, and each jar and box presented like a gift.  A trip inside, and you'll be swept away.  I refer to their tea bags as "underpants tea bags"  They're made a sheer silky fabric that you can't believe someone used just to make a tea bag.  Inside, the perfectly cut tea leaves.  This one is arome du pomme, apple tea.  it sounds strange, but it was recommended to me to try on my first visit, and has been a favorite ever since.


The other tea bag is form  Mariage Frere,  a shop in the Marais, Paris.  The tea bags are made of muslin, and also very cute.  This is the tea salon to hit after a big day of sight-seeing or shopping in Paris.  The waiters are very handsome and dressed in cream-colored linen suits.  The retail area sells beautiful tea pots and exotic tea from all over the world.   Here's a tea bag with Sur le Nil, or On the Nile.  It's an infusion tea which is very fragrant and delicious without a lot of caffeine.  You can find both teas on online and sometimes in specialty shops here in the United States.

If you're heading to Paris and would like better directions and more tips and tricks,  you can visit my Notebook.   It's got addresses and more locations for food-related travel in Paris.

I hope you'll make the shortbread, wrap it in waxed paper, tie it with a ribbon, then share it with a friend or two.   Then, brew any kind of tea and spend some time savoring the sweetness of Spring.

p.s.  Just in case you'd like help on how to brew that perfect cup of tea, a found a nice article  from the Telegraph to help.  British of course!

Lamb Navarin Printanier - FFWD

This recipe wraps up  the April collection of French Fridays With Dorie's recipes that some loved and some tolerated.   That's ok, everyone has something they're not crazy about.   Lamb Navarin Printanier is a lovely aromatic stew that is nice on a cool spring day, or a crisp autumn supper.  If you like Boeuf Bourguignon, this is for you.   But you'll have to have your wine on the side with this one. Earlier in the week, I called the local butcher and asked about the availability of lamb shoulder.  No dice.  He did have a leg of lamb that could be boned out, and cubed.   We talked about the amount, and I picked it up today.   My idea of trimmed and the butcher's idea of trimmed were very different.  I like the meat very "clean".  None of the silver skin stuff, very little fat, no icky stuff.   So I re-trimmed the meat, and ended up with quite a bit less than I had expected, but I'm sure that each bite will be good.    Here's another interesting tidbit.  In an article I found about lamb stews, the leg is not suggested because when it's braised, it can become stringy.  Yikes!   It was too late for re-do's, so I'll have to see what happens after the stew is finished.  I decided to make up for less meat with more vegetables.   I added two or three more carrots, one more turnip, and doubled the onions & potatoes.  That's just fine with me.   Most days I'd rather eat vegetables than meat anyway.  Here's the meat pre-trimming.

The recipe starts off with searing the meat.  Hmmm, I guess I forgot what lamb smells like.  Not bad, just not beef.   I didn't have to do a lot of rearranging or batches.  The meat had a nice even sear, and made lots of nice crispy fond in the bottom of the cast enamel pot.

The meat was combined with the stock, herbs and tomato paste and set to simmer.   I have a very cool item to tell all of you about.  This isn't an advertisement, and I'm not a spokesmodel, but I found something really cool, created by Michael Ruhlman.  If you make your own stock (which I usually try do, but didn't this time), and use cheesecloth to stain, here's just the ticket.  He has three reusable cloth squares that can be used to strain yogurt, stock or anything else that may need straining.  If you don't know about Michael, he's a great writer, and has several books.  The one I recommend most is Making of a Chef.  He writes about his education at the Culinary Institute of America through of the eyes of a journalist.  A great easy read.

My favorite part of the recipe was caramelizing the vegetables.  It took about 10 minutes, and they were glistening, golden and not soft as Dorie instructs in the recipe.  Here's a before and after photo of the vegetables.

We found some delicious fresh English peas in the store!  Just perfect for finishing touch.  I'm not going to serve the Navarin until tomorrow, so the peas will go in after I reheat tomorrow.  It's been awhile, but I'm going to bring it back to temp ala Sous Vide.  Using that technique, the meat won't overcook and or get rubbery like it might if I used a microwave.

The finished stew is delicious.  The  lamb tasted perfectly tender.  No stringy meat.  So go ahead, go crazy and use leg of lamb if you want to!

Happy Spring!   If you're looking for other great spring dishes, you might want to take a look at these for inspiration.

Warm Weather Pot au Feu

Bacon, Eggs and Asparagus Salad

Versatile Blogger Nomination!

What a nice surprise!  I was nominated by Maggie at Always Add More Butter for the Versatile Blogger Award.  She's been nominated too, and it's well-deserved.

The nomination comes with a few requirements.  I need to give you a list of my personal favorite blogs.  Some are really famous, and some are little blogs like mine.   They aren't in any particular order, though I read the Joy the Baker and Michael Ruhlman blogs every time there's a new post.  There's a lot of food, photography, Paris and travel here.  Guess you can tell what I like!    Also, The French Fridays with Dorie and Tuesdays with Dorie blogging groups  have many great bloggers.  It's so hard to pick my favorites.  There's so much to see and learn.

1.  Joy the Baker

2.  Michael Ruhlman

3.  Farm House Table

4.  Badger Girl Learns to Cook

5.  Crazy World of Cher

6.  Seattle Pastry Girl

7.  Kathleen Flynn

8.  Matt Bites

9.  Tartelette

10.  Mowielicious

11.  Hip Paris

12.  Eat at Burp

13.  Style Berry Blog

14.  Urban Travel Blog

15.  Peter Rhinehart's Pizza Quest

The next order of business in the nomination is to tell you 7 random things about me.  Well, here they are...

1.  I almost hopped on a plane and came home from Paris  before class started due to a scammed cab ride, botched hotel reservation and nerves.  So glad I stayed!

2.  I LOVE school supplies. Deep down, I'm a combination kindergarten teacher and Broadway singer/dancer.  A new pad of construction paper, pencils... I'm there!  The later... well it's just a dream.  Can't sing, and rarely dance.   I took ballet in college, but I was too old to try toe shoes.  That was ok.

3.  I'm  kind of afraid of horses.  As a tall kid, I always go put on the biggest horse who's only goal was to make a run for the barn.  Horses are pretty, just with someone else riding them.

4.  My favorite actresses are Gwyneth Paltrow and Meg Ryan.  I don't like scary movies, sad movies, or too much sci-fi.  Give me a romantic comedy any day!

5.  I play the piano and am trying to re-learn the french horn.  I've played the piano since 2nd grade.   I would love to take piano lessons again to keep up my skills.   I don't know if I'll ever really play the French Horn again, but it's such a great instrument.   Who can resist the sound of the horn soaring over the orchestra?

6.   I love the smell of subways (ok, we all know what that smell is... it just reminds me great trips).  I love to shop (shoes, purses, cooking supplies...) Since we live in the country, our vacations are in busy, urban places.

7.  My dream day is cooking all day, setting a pretty table, and enjoying a long evening a laughing, talking and eating with friends.  Not too random, but very true.

The last order of business for the nomination, The Rules

  • Add the award to your blog
  • Thank the blogger who gave it to you
  • Mention 7 random things about yourself
  • List the rules
  • Award to 15 bloggers
  • Inform each of those 15 by leaving a comment on their blogs or on Facebook

Thanks again for the nomination, I'm looking forward to Friday!

Coconut Friands, Can't We be Friends? - FFWD

It's been a few weeks of recipes that have fans or foes.  Sardines, now coconut.  Sorry for the extremes.   For those who don't like coconut, this may not be your recipe.  For those that do, you'll want to read on!  This ones for you.

This little tea cake is packed with coconut flavor.  The recipe was quick, easy and used things you have on hand.  The coconut was in rather large flakes, so  I gave it a whirl in the food processor to make the coconut pieces more uniform.

The ingredients went together nicely, and the final batter was smooth, and shiny.

I used a pastry bag without a tip to fill the molds (the mini muffin tins).   A word on the muffin pans.  Be sure to really butter them, and add a quick toss of flour.   You want these to drop out right away when they come out of the oven.

The friands took all twenty minutes in my oven.  I was waiting for them to brown, but they only browned around the edges and sides.  The toothpick came out clean, so I was sure they were fully baked.  The finished product was delicious.  Even better after cooling a few minutes.  Think coconut macaroon meets a madeleine.  Sweet, chewy outside, and tender middle.   A strong cup of coffee and it's a perfect treat.

Lemon Loaf Cake - Baking with Julia

This week's recipe is from Baking with Julia, and is part of the blogging group Tuesdays with Dorie. As the old saying goes... "When at first you don't succeed, try, try, again"!    Or how about,  "If it's worth doing, it's worth doing right". So I did.  Again.

My first attempt at the Lemon Cake didn't go very well.   It was my fault.   I know exactly why.   I didn't give the ingredients the attention they deserved.  The cake was dense, but not in a good way, and a little tough.   My redo was much better.  I'll try to explain the details.

The recipe has the usual cast of characters.  Eggs, sugar, flour, baking soda, heavy cream, and butter.

The first time, I read through the recipe and tossed the eggs & sugar in the mixer.  First mistake.  While it was ok and the right thing to do to add them together, it was way too much power.  A gentle whisk was the ticket.  I mixed the second batch with a balloon whisk.    Remember that when you add eggs to sugar, you should start whisking right away.  The chemical reaction that occurs when they mix is heat.  You want the cake the be tender, and not have little bits of microscopic scrambled eggs making the texture - well... rough.

Attempt one had no sifting.  What was I thinking?  Any good sponge or simple cake like this should be sifted.  I got out my sieve and sifted the baking powder and cake flour together for  a much lighter and well-combined mixture.    If you don't have a sifter, just take your whisk and whisk the flour to fluff it and break up any clumps.   Time for true confessions. The first time, I threw caution to the wind, and used all-purpose flour.   The second time, I used real cake flour.  Want to know the difference?  Cake flour has very low protein.  When you add the liquid and start to mix, very little gluten is created.  Therefore, there's very little chance of creating elasticity and rubbery cake.    For a cake with such simple ingredients, and only lemon zest for flavor, this is really important.  Don't get me wrong, all-purpose flour is great for some cakes, cookies and muffins.  Just be careful not to overmix.

Now on to the butter.  This is a very picky point, but to make a great cake in this category (madeleines, pound cake, etc.), you want to be sure your butter is melted and cooled;  and separated.  Let the butter rest in the clear container.  Allow the milk solids to settle to the bottom.  When you pour the butter into your recipe, make sure those milk solids stay in the container and don't end up in the batter.  This will also help with a tender, light pleasing texture.    Here's a photo of the butter as it settles.  See the milk solids on the bottom?

I was going to scratch up this recipe to just average, when I realized  it was me being average about my approach.  It's a really gentle, sweet, cake perfect for any brunch, coffee, or present for a friend.  I think it would be great grilled or toasted.

Just one more quote for Eleanor Roosevelt,  "It takes longer to explain why you did something wrong, than to do it right".   From now on, no rushing, no shortcuts, and more happy endings!  Thank you for listening to my long explanation!

Please try this recipe and let me know what you think.  Truc and Michelle, are the two hosts for this week's Tuesdays with Dorie - Baking with Julia and have the recipe posted on their blogs.  Coming up, a great recipe using coconut from Around My French Table.   Talk to you soon!

French Fridays with Dorie - Sardine Rillettes- Not scary, really!

This week's French Fridays with Dorie recipe is Sardine Rillette.  A wonderful quick, easy little appetizer spread. I personally like sardines. Growing up, my  mom doesn't like steak. If our family was going to have steak she opened a can of sardines, spread some butter on bread, and carefully laid the sardines side by side on top of the butter.   We could join her, or eat steak.   I always choose the sardines.  There was something about the whole ceremony that appealed to me.   When you open a can with a key, and carefully roll back the metal top, it has to be good!    I know not everyone shares my love.   This recipe is really worth trying to acquaint yourself with sardines.

The recipe calls for 2 cans of sardines, and other ingredients that you probably have on hand.  A little cream cheese, shallot, some herbs, and juice of a lemon.   Guests are coming?  You can have this ready in less than ten minutes.   I used chives.  They're growing outside our kitchen door, and I try to use them whenever I can.

I was a Trader Joe's and found two kinds of sardines.  Some in oil, and some in water.  I bought a can of each to see what they were like.  Sardines are much bigger now than I remember.  I remember little guys about the size of your pinkie or slightly bigger.   They guys are big (well, little but big) and packed in like sardines.  Sorry, had to work that in somewhere!   In one can, the sardines still had spines, so I pulled those out.   I know they would have crushed, but just couldn't leave it in.  Here are the two cans side by side.

Some chopping and snipping and the ingredients were ready to combine.

The sardines easily combined with a fork.  The final preparation is a lot like a simple tuna salad.  It would be really nice piped into the little puff, or a cherry tomato.    Hope you'll give it a try!

Next Tuesday is a lovely lemon cake by Julia.  Love lemons.  Talk to you soon!


Pizza Rustica - Baking with Julia

What a difference a week makes!  Last week, I was planning to make this recipe and serve it for dinner with salad.  Well, things have changed.  Our household has turned into a heart-healthy, diabetic diet zone.  Can you believe it?  Gary's back from having a cardiac tune-up, and I'm joining him in solidarity.  Never fear,  I'm not closing my pastry business or considering dropping out of BWj.   We'll just need to find good homes for many of the delights.   As I've been perusing a whole new world of cookbooks and recipes, I've decided to blog about the adventure.   So, my 2nd blog is Cooking for our Health.   I'll review tips, tricks and recipes for low fat, low carbohydrate meals.   Please check it out, and join in with your ideas. When I read through the Pizza Rustica recipe, I thought it sounded a little cheese heavy, and maybe not so good.  Yes, even a Wisconsin girl can have too much cheese.  I was also wondered about the absence of sliced or some sort of tomato sauce.  My worries were unnecessary. The pizza tart/pie was delicious and really pretty.   The crust was easy to manage and the filling easy to put together.

I made a call to our neighbor with three children.  It seemed like a sure thing that the pizza would be a hit.  The results came in, and the boys loved it!  They added salsa for extra zip, which sounds pretty good.

One of my favorite parts of this recipe was cutting the strips for the lattice.  I have this little tool from Paris that I've had for about 12 years, and never remember to use it.  It's a pastry cutter.   I believe it made by hand by the same man who makes the rolling pins for E. Dehillerin, the famous cooking equipment shop.  I've included a photo later in my post.

 The dough rolled out to just the right size.  Here's the dough and the boxwood rolling-pin I mentioned.

The lattice wasn't browning as much as I liked, so I tented foil around the browned edges and let it bake a little longer.  It never browned as much as I would have liked, but all the components seemed to be fully baked.

Well, Wordpress  and I are having trouble working together.  My last photos don't want to upload a just into the post.  I'll keep trying, and hopefully you'll get to see the finished Pizza Rustica!

The next recipe is Lemon Loaf -  Very Springy!

Chocolate Darlings - Cocoa Sables from FFWD

This week's French Friday's with Dorie recipe is Cocoa Sables.   Sweet, crisp, chocolatey little darling French cookies.  The should be an accent over the "e".  I've been trying to figure out how to create that character without much success.  From here on, please pretend it's there. Sables were the very first recipe we made in pastry school.  For those of you sick and tired of pastry school stories, please skip ahead.  This is a good one though.   Our class went to the very first demonstration where we carefully watched the chef make a variety of sable, or butter cookies.  He stacked butter cookie dough  on chocolate dough and made beautiful stripes, swirls and lunettes (eyeglasses.)  One sable he called "dee -a -monde".  The translator repeated the word Diamond.   The name reflects the way that the tube of dough is brushed with egg and rolled in coarse sugar to make it look like it's rolled in diamonds.   There were a few moments when I can think back and know they had me.  This was one of those moments.

I used a block of bittersweet chocolate and chopped/grated it very fine.  It added a lot to the cookie, and I would highly recommend it.

Back to school.  When we got into the kitchen, we were introduced to weighing ingredients for the first time.   The recipe called for 5 grams of salt.   If we had thought about it, how much salt can there be in a cookie recipe?  Well, we set off to the salt bin carrying mixing bowls that could have held 10 pounds of bread dough!  We can back with what equaled about a teaspoon!   We can laugh now.  At the time, all business.

Dorie's recipe uses a creamage method, using room temperature butter and gently mixing in all the dry ingredients.  I really liked adding the chopped chocolate for a little extra boost of chocolate taste.  I don't have a lot of how-to pictures this week.   Here's the dough sliced and ready for the oven.

The dough is rolled into logs and chilled.   During the chilling time, I pulled them out a few times to reroll and reshape the logs.  As the soft dough chills, it can get a flat bottom.  Rerolling, helps make the roll even and not lopsided.  The dough sliced easily.  A few of the disks had to be schmoosed back together.    The smell of the cookies baking a amazing!  Here's a tip.  When you can smell chocolate in the room, you can be sure that your dessert is almost done.  I always wondered how the chefs knew that things were finished before the timer ever went off.

The Sable are so good.   This is a great dough to have in the freezer to quickly slice and bake for an impromto dessert, or to satisfy a chocolate craving!  No need to defrost, just slice and bake.

Have a great weekend, next week is Crab and Grapefruit Salad- curious?

Irish Soda Bread - Baking with Julia

Happy Belated St. Patrick's Day!  I'm not Irish, and don't really have any Irish traditions so this was a nice way to start one. The recipe has only four ingredients.   With so few, they have to be good, and they have to be treated and executed well.  Don't overmix, bake enough, don't over bake.  And most of all, don't dilly-dally around once the buttermilk is combined with the dry ingredients.   Baking Soda, the star of Soda bread, needs two actions to start the CO2 flowing.   Liquid and Acid.   The buttermilk provides both.  Once it's added, the magic begins.   The key is to mix quickly and completely and get the bread into the oven so it can start baking and rising even more.   My dough took off right away.  You can see it start to spring just after I made the slashes on the top.

The bread baked evenly and had a nice hollow thump when tapped.   We tryed to wait overnight to have it for breakfast, but we couldn't wait.   After about 15 minutes of cooling, I cut off two slices for tastes.   It was really tasty.    I added golden raisins, which added a gentle taste and texture.    If you'd like to try the recipe, Carla and Cathleen , are the Tuesday's with Dorie/Baking with Julia hosts and will have the recipe on their blogs.

Here's the finished Irish Soda Bread, a new tradition!

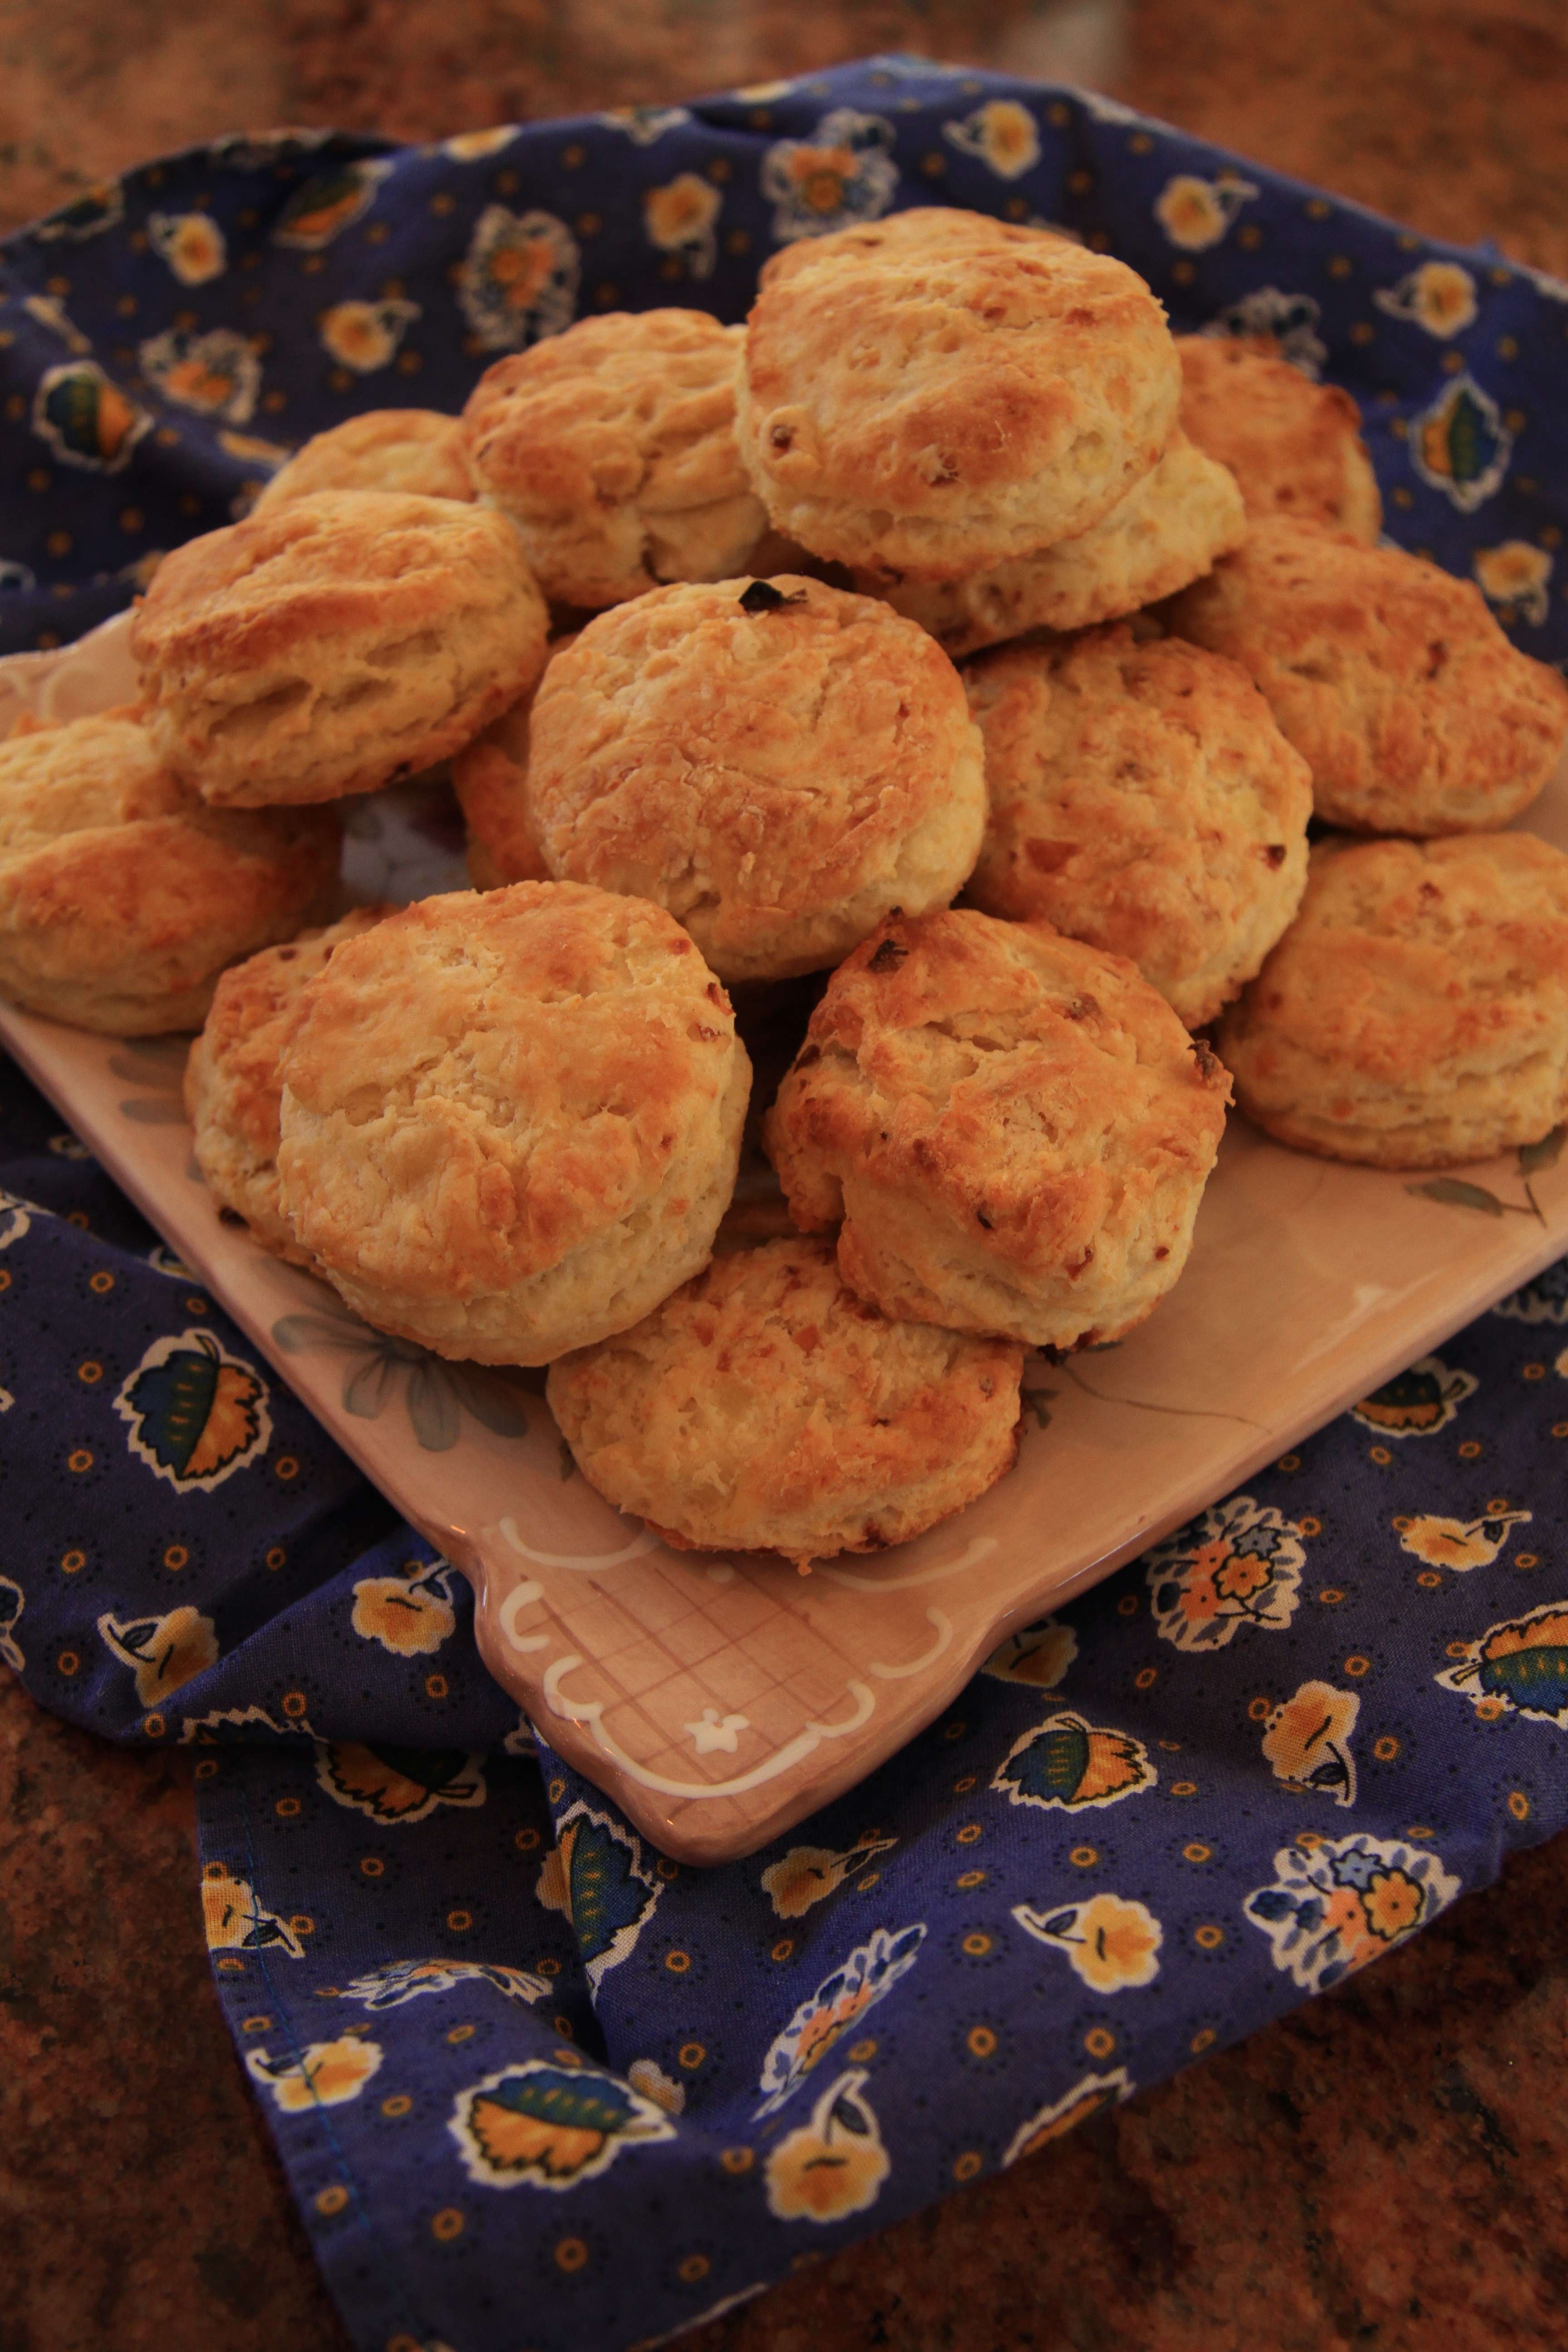
St. Germain des Pres Onion Biscuits - FFWD

Spring is in the air!  The sun in shining, the wind is blowing, we have a perfect new grandson, it's supposed to be 50 degrees here today, and I'm packing for an island vacation.  Can life get any better?   I was thinking I'd need to sit this week out due to my schedule, but when I read the recipe I just couldn't resist.    I'm a Francophile, with a capital F.   I love Paris.   I love French food, people, cooking equipment... I could go on all day.   How in the world could I not make St. Germain des Pres Biscuits?   In this sentimental moment, I gathered some of my favorite equipment.    A sweet copper saucepan to sweat the onions, a great dough scraper,  some crunchy parchment, and I'm set. When you walk into Le Cordon Bleu on any given day the smell is something you'll never forget.   (thank you Mr. Proust).   There's a lingering smell of pate a choux from the pastry kitchens,  mirepoix and searing meats from the cuisine kitchens and with a note of citrus soap.  This morning, the onions took me to Paris, walking in the door of school, ready to bake.   Oh the butter and finely minced onion smell!!!

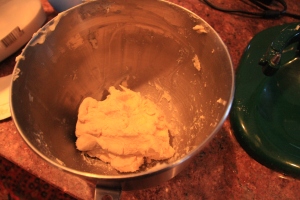
I used a slightly different dough technique to gather the dough rather than put it in a bowl.   I used the scraper to cut the butter into the dry ingredients.  Then, I tossed in the onion, made a well, added the milk, then cut the milk into the dough.  Very quickly so I didn't work the dough too much.   A few quick pats and it was ready to be cut.   In my dreamy haze, I didn't preheat the oven to 425, so I put the biscuits in the frig while the oven got up to temperature.     I remember the Chefs telling us, "always work cold, bake hot".   Yes, Chef.

I used a cutter that was about 2 inches in diameter.   Perfect three bites!


The biscuits are light, golden, flaky and have a wonderful onion scent.  Perfect for an appetizer, or next to  baked or poached eggs.  Next time I'm going to add a few chopped chives, another favorite French flavor for color and depth of the onion flavor.

Be sure to read other French Fridays with Dorie posts.  Have a great weekend!


Baking with Julia: Rugelach... Divine!


This week's Baking with Julia recipe is Rugelach.  A lovely pastry cookie filled with apricot lekvar, dried fruits and nuts.   I've made Julia's lekvar several times for wedding cake filling.   It's so good!   And simple.   Cooked dried apricots with brown sugar, and almonds.  All pureed into the spreadable paste.   The lekvar is spread on the cream cheese pastry dough, topped with nuts and more dried fruit, then rolled and baked.    Simple, not too sweet and so pretty. The dough is made in the mixer.  Emergency subject change and news flash.  My first Kitchen Aid mixer is broken.  I was making many, many croissants, and used the paddle to work together the detrempe.   On the last batch... snap.    All motor, no action.  I have another mixer, but that  was the first one I bought for the bakery and she'll be off to the repair shop for a quick repair.  It's funny, that little mixer always seemed a little more fragile than the others.   Today, I'm working in the house with the mixer that gets the least amount of use.   We should be in good hands.

Back to the dough.  The dough is made with cream cheese.  It works together beautifully and is very soft and easy to work with.   Since the dough is going to be rolled into a rectangle, it's always a good idea to shape the dough into that shape before chilling.   So pretty!

I really like apricots and prunes.  For this recipe's lekvar, I used about 2 cups of apricots and a few prunes for color and taste.  The almonds were toasted, slivered and worked really well.  I really like the color of the finished product.  It tastes and smells SO good!

The recipe for the Rugelach requires lots of prep in little bowls.   Nothing too fussy, but you need to make sure you'll all set before you start to fill the dough.  This is kind of an ugly photo, but wanted to show all the components set to go.

The rolls chilled for four hours, and then were egg washed, cut and rolled and a delightful nut, sugar, cinnamon combo.   I wasn't planning to stay up late and wait to bake them, but I'm in for the long haul with this recipe.   There must be something good on TV!

We really liked the recipe.  I'm not positive that they were completely done, but they were nicely caramelized and had been in the oven for 30 minutes.   The dough was still tender and soft, I was expecting a little crunchier.   The fruit and nuts were really good.

Just click the link to read more entries for Rugelach on the Baking with Julia  website.  In two weeks we'll be making Irish Soda Bread!  Another great recipe.  if you're looking the the recipes, the host each week will add the recipe to their post.  It should be one of the first posts of the group.  Anyone can join the fun.  Pick up a copy of the book and start to blog!

Mussels with Chorizo - Be Still My Heart!


Hope everyone had a nice Valentine's Day.    It seems like Valentine's Day ends the winter holidays, and we can officially start looking toward spring.   It's been a mild winter here, but I'm ready to some simple, spicy springy dishes.   This recipe for Mussels with Chorizo  fits the bill perfectly.    Some of my favorite times with friends have included mussels.   It's so fun to gather in the kitchen around a big steaming pan and a basket of bread.    I remember Tuesdays night  in Madison at an all-u-can-eat Moules and Frittes night at a sweet French restaurant.   So many flavors, and happy memories.

Since Around My French Table arrived, I've had my eye on this recipe.    I love mussels, love chorizo, love garlic, what more is there to say?    My all time favorite mussel preparation is white wine, garlic, butter and little thyme.  The sauce for dipping is SO good.  I've served this a many small parties and people who don't even think they like mussels love them.   The FFWD recipe had stiff competition, but I felt positive given the great ingredients.

I still follow the rule that you should eat mussels during months with "r"  in them.   So May, June, July and August, sorry.   I'm sure the mussels we get are culitivated, and it really doesn't matter.  But it kind of adds to the romance of mussels.   Living in the midwest, it's not exactly the seafood capital, but our fish monger does a great job and we've never had any funky mussels.    Once the mussels are home, I pick through them and toss out any that aren't completely closed.  Before I toss them, I give them a little tap and see it they'll close.  If not, it's adios.   Can't risk eating a bad mussel.

The recipe serves 4, and there are only two of us so I used about 2# of mussels.

The recipe starts with the usual cast of characters. red pepper, onion and lots-o-garlic.

My chorizo was in a plastic tube, and soft.  I cut the tube in half, squeezed it into the pan, then sauteed the chorizo with the vegetables.   Oh the smell!   It's so easy to wrap up the rest and use it another time.


After everything melded together, in went the tomatoes and wine.   I only used one can of tomatoes since there were fewer mussels, and I decided to eat them in bowl with baguette rather than pasta.  I'm guessing there may have been a little more wine.

Here's are the little mussels just after putting them in the pan.

The lid went on tightly for 3-5 minutes, and ta-da!  Here's they are just a few minutes later.

That's it gang!  Into a soup bowl with a nice toasted baguette slices drizzled with some olive oil.    We have a mussel eating tradition which is to use one mussel like a castenet and pinch the mussel from the others shells.   It's fun, easy, drippy and delicious and no silverware is required.    The bread soaks up the incredible sauce.   Just have a big napkins standing by.     At the end of the pot, we had no unopened mussels - success!

I have a plan to make both sauces and have a little mussel fest in March.   We loved this recipe!


Nutella Tartine - You Never Forget Your First Taste

Just like you never forget your first kiss, you never forget your first taste of Nutella.

My first bite was in a Nutella crepe in Paris.  The warm chocolate hazelnut spread is heavenly, and just a bite or two is so satisfying.

This week's French Friday's with Dorie is a Nutella Tartine.    A tartine is a toasted open-faced sandwich.   Ingredients can include pesto, arugula, tuna, tapenade, goat cheese.... you get it.

The Nutella tartine uses toasted brioche, orange marmalade, Nutella and sliced almonds.    I perfect Sunday morning (or Valentine's Day...) breakfast.

I decided to combine my Tuesday Baking with Julia white loaf bread with this recipe.   The bread is sturdy, with just the perfect amount of sweetness.

Nutella is a treasure, but there are a few treasures I'd like to introduce.  The first is the Breville Toaster Oven.  Dreamy!  It toasts, broils, bakes, everything perfectly.  It takes up no more room than a microwave.  It's a new best friend.   If you're in the market for a new toaster, pick up one of these instead.   I toasted the bread in the Breville, and buttered it with the next treasure... 

Sweet cultured butter.  I found an Irish brand at our cheese store.   The butter is so good, you can almost eat it alone.  You shouldn't skip buttering  the bread.  If you can't find fancy-schmancy butter, find some good salted butter.  This is one time when salted butter is important.  It will balance the sweetness of the jam and Nutella.  You can also make butter.  What?!? Make butter?  Yep.  It's so easy and delicious.  Here's how:

To Make Your Own Butter:

Pour 1 quart heavy cream into the bowl of a stand mixer fitter with the PADDLE.   Mix on medium speed for several minutes. (about 10).  The cream will go through the whipped cream phase, then become light yellow, and separate into butter and buttermilk.   You'll see the butter separate out, and hear the clunking in the mixer.

Remove the butter mass from the bowl, and scrape off any butter on the paddle.  Place the butter between sheets of parchment paper, or plasic wrap and knead the butter to remove any remaining pockets of buttermilk.  The buttermilk will sour, and taint the taste of the butter, so take time to make sure the butter is solid without liquid.    Then knead sea salt or salt and herbs into the butter to taste.  Start with about 1/2 tsp, and increase.  If you have a box of food service gloves, they come in handy for kneading the butter.

Form into a log, about 2 inches in diameter, and about 6 inches long.   Wrap in parchment paper, plastic wrap or waxed paper.   Chill (or use right away).  The butter will keep a few days in the refrigerator.

Back to the Tartine!

After the bread is toasted, it's spread with butter and orange marmalade and drizzeled with Nutella.   The toasted sliced almonds add great texture and crunch.   I like to cut the bread into slices, or on the diagonal.   This would also be great on a baguette.  If you're not an oranage marmalade fan, you could substitute your favorite jam.   Simply, sweet and so lovely.   We loved the tart orange taste with the sweet Nutella.   We'll be making these again!

Have a great weekend! Coming up... Chocolate Truffle Tartlets

Baking with Julia Week 1: White Bread

It's finally February 7th!  I've been waiting patiently (well, not so patiently) for today.   Today is the very first week of Baking with Julia, a baking group coordinated by Dorie Greenspan.  The original group baked its way though Dorie's Baking book.  They completely the recipes and were ready for the next challenge.  Dorie Greenspan authored Baking with Julia, so its fitting her book is next. Twice each month, we'll bake two recipes from the book and post to http://tuesdayswithdorie.wordpress.com/     As some of you may know, I also participate in French Fridays with Dorie, which bakes & cooks recipes from Around My French Table.

I never had the opportunity to meet Julia Child, but I love her.  I love her fearless spirit, her laugh, her stature, and most of all her love of cooking.   When I pull out her books and read a recipe, its her voice I hear reading to me.   If something spills or doesn't turn out quite right, she's there in spirit with her happy, let's move on, coaching.  I know things will turn out fine.   My hope is that I can inspire people the way she does some day.

I hope you'll pick up a copy of the book and bake along with me.   Feel free to add your link or notes in my comments area.  Or, sign up with the group.   The February 21st recipe is Chocolate Truffle Tartlets!  Can't wait!

Let's start baking!

Of all the categories in the patisserie world, I think I like bread making the best.   It takes times, patience, and the coordination of efforts with dough.    Yeast is in charge of most of the process.  You can try to rush it, but its really going to do what it pleases.   It's more like a duet.

The recipe makes two loaves of bread.  I doubled the recipe (exactly) for make four loaves.   I also used my French bread kneading machine just to pull the dough together.   I finished the dough my hand.  The machine is to cool.  It turns against the doughs friction against the side as the hook pulls and turns the dough.  Just the action that you do with your hands.  It allows me to make bigger batches, and have my hands free for other baking.   It's very gentle, and still requires fairly close supervision so the dough doesn't wander up the hook or out of the bowl.  We used a machine like this at school, and I was able to find one when I got home.  I can make up to about 10 loaves of bread in it at a time.  Not huge production, but bigger quantities than can easily be done by hand.

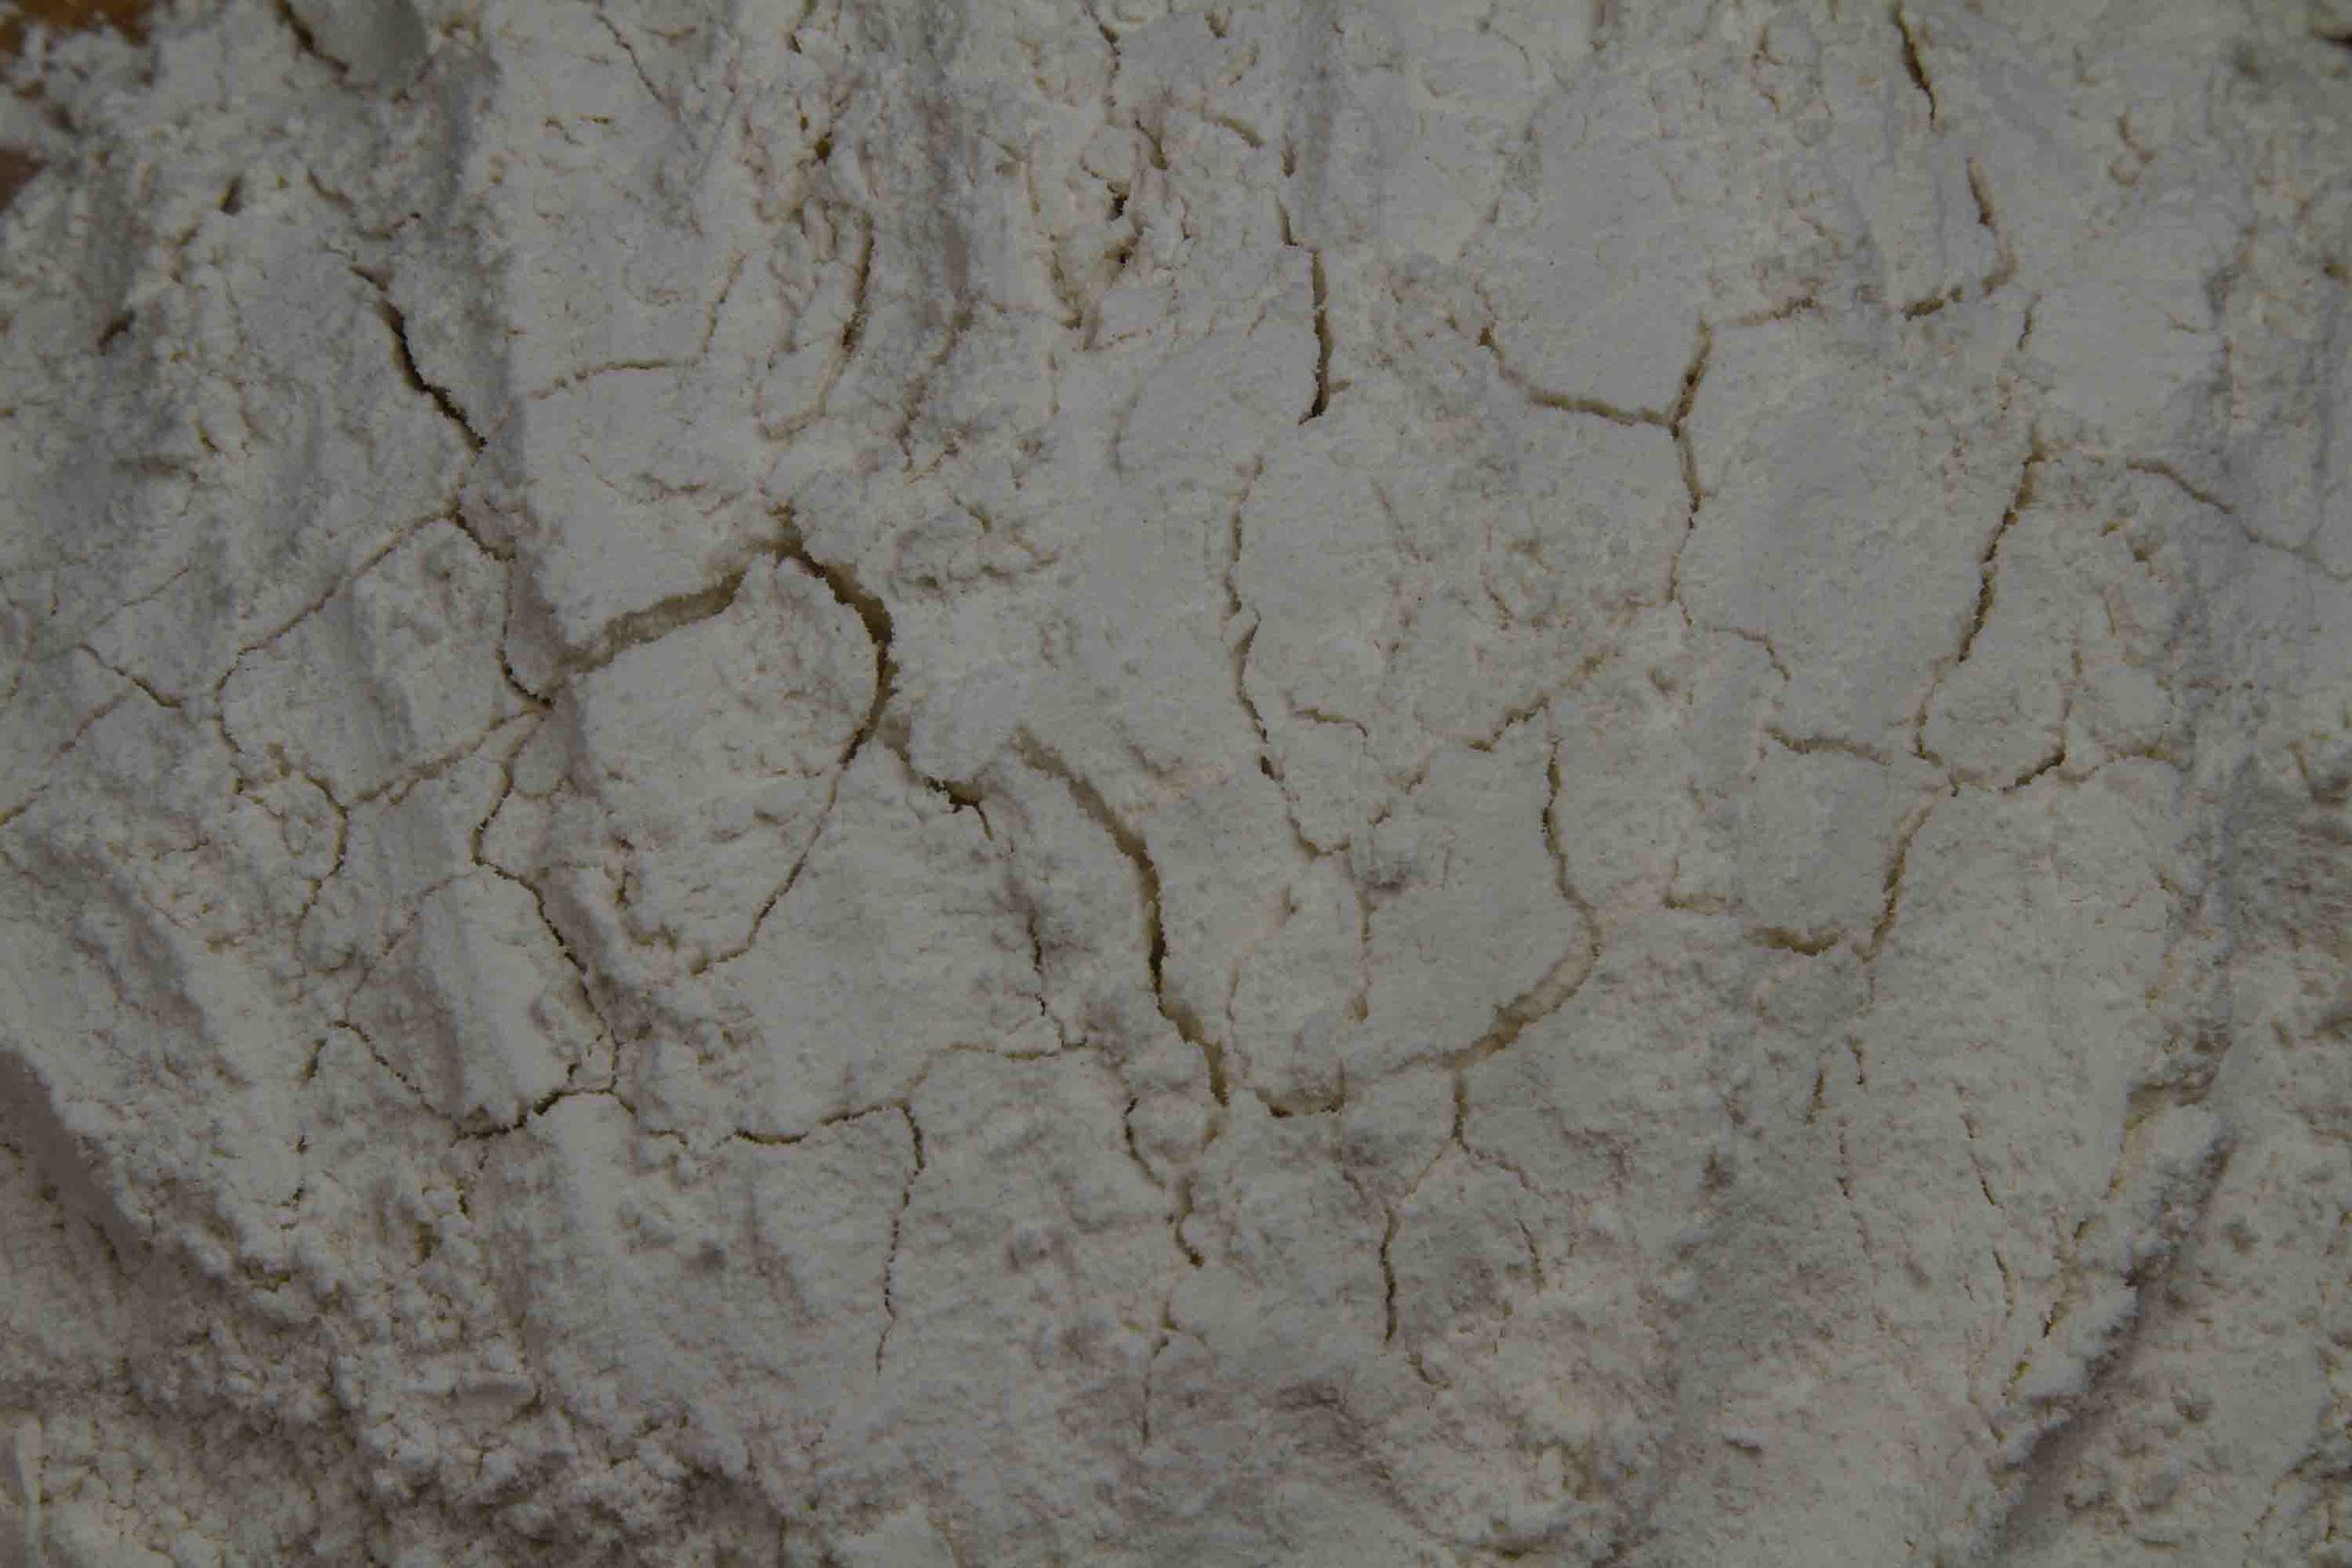
Once the dough was mixed, it rested for about 5 minutes.  This process is called autolyse.  The yeast gets started, the flour and water setttle in, and the gluten begins to develop.

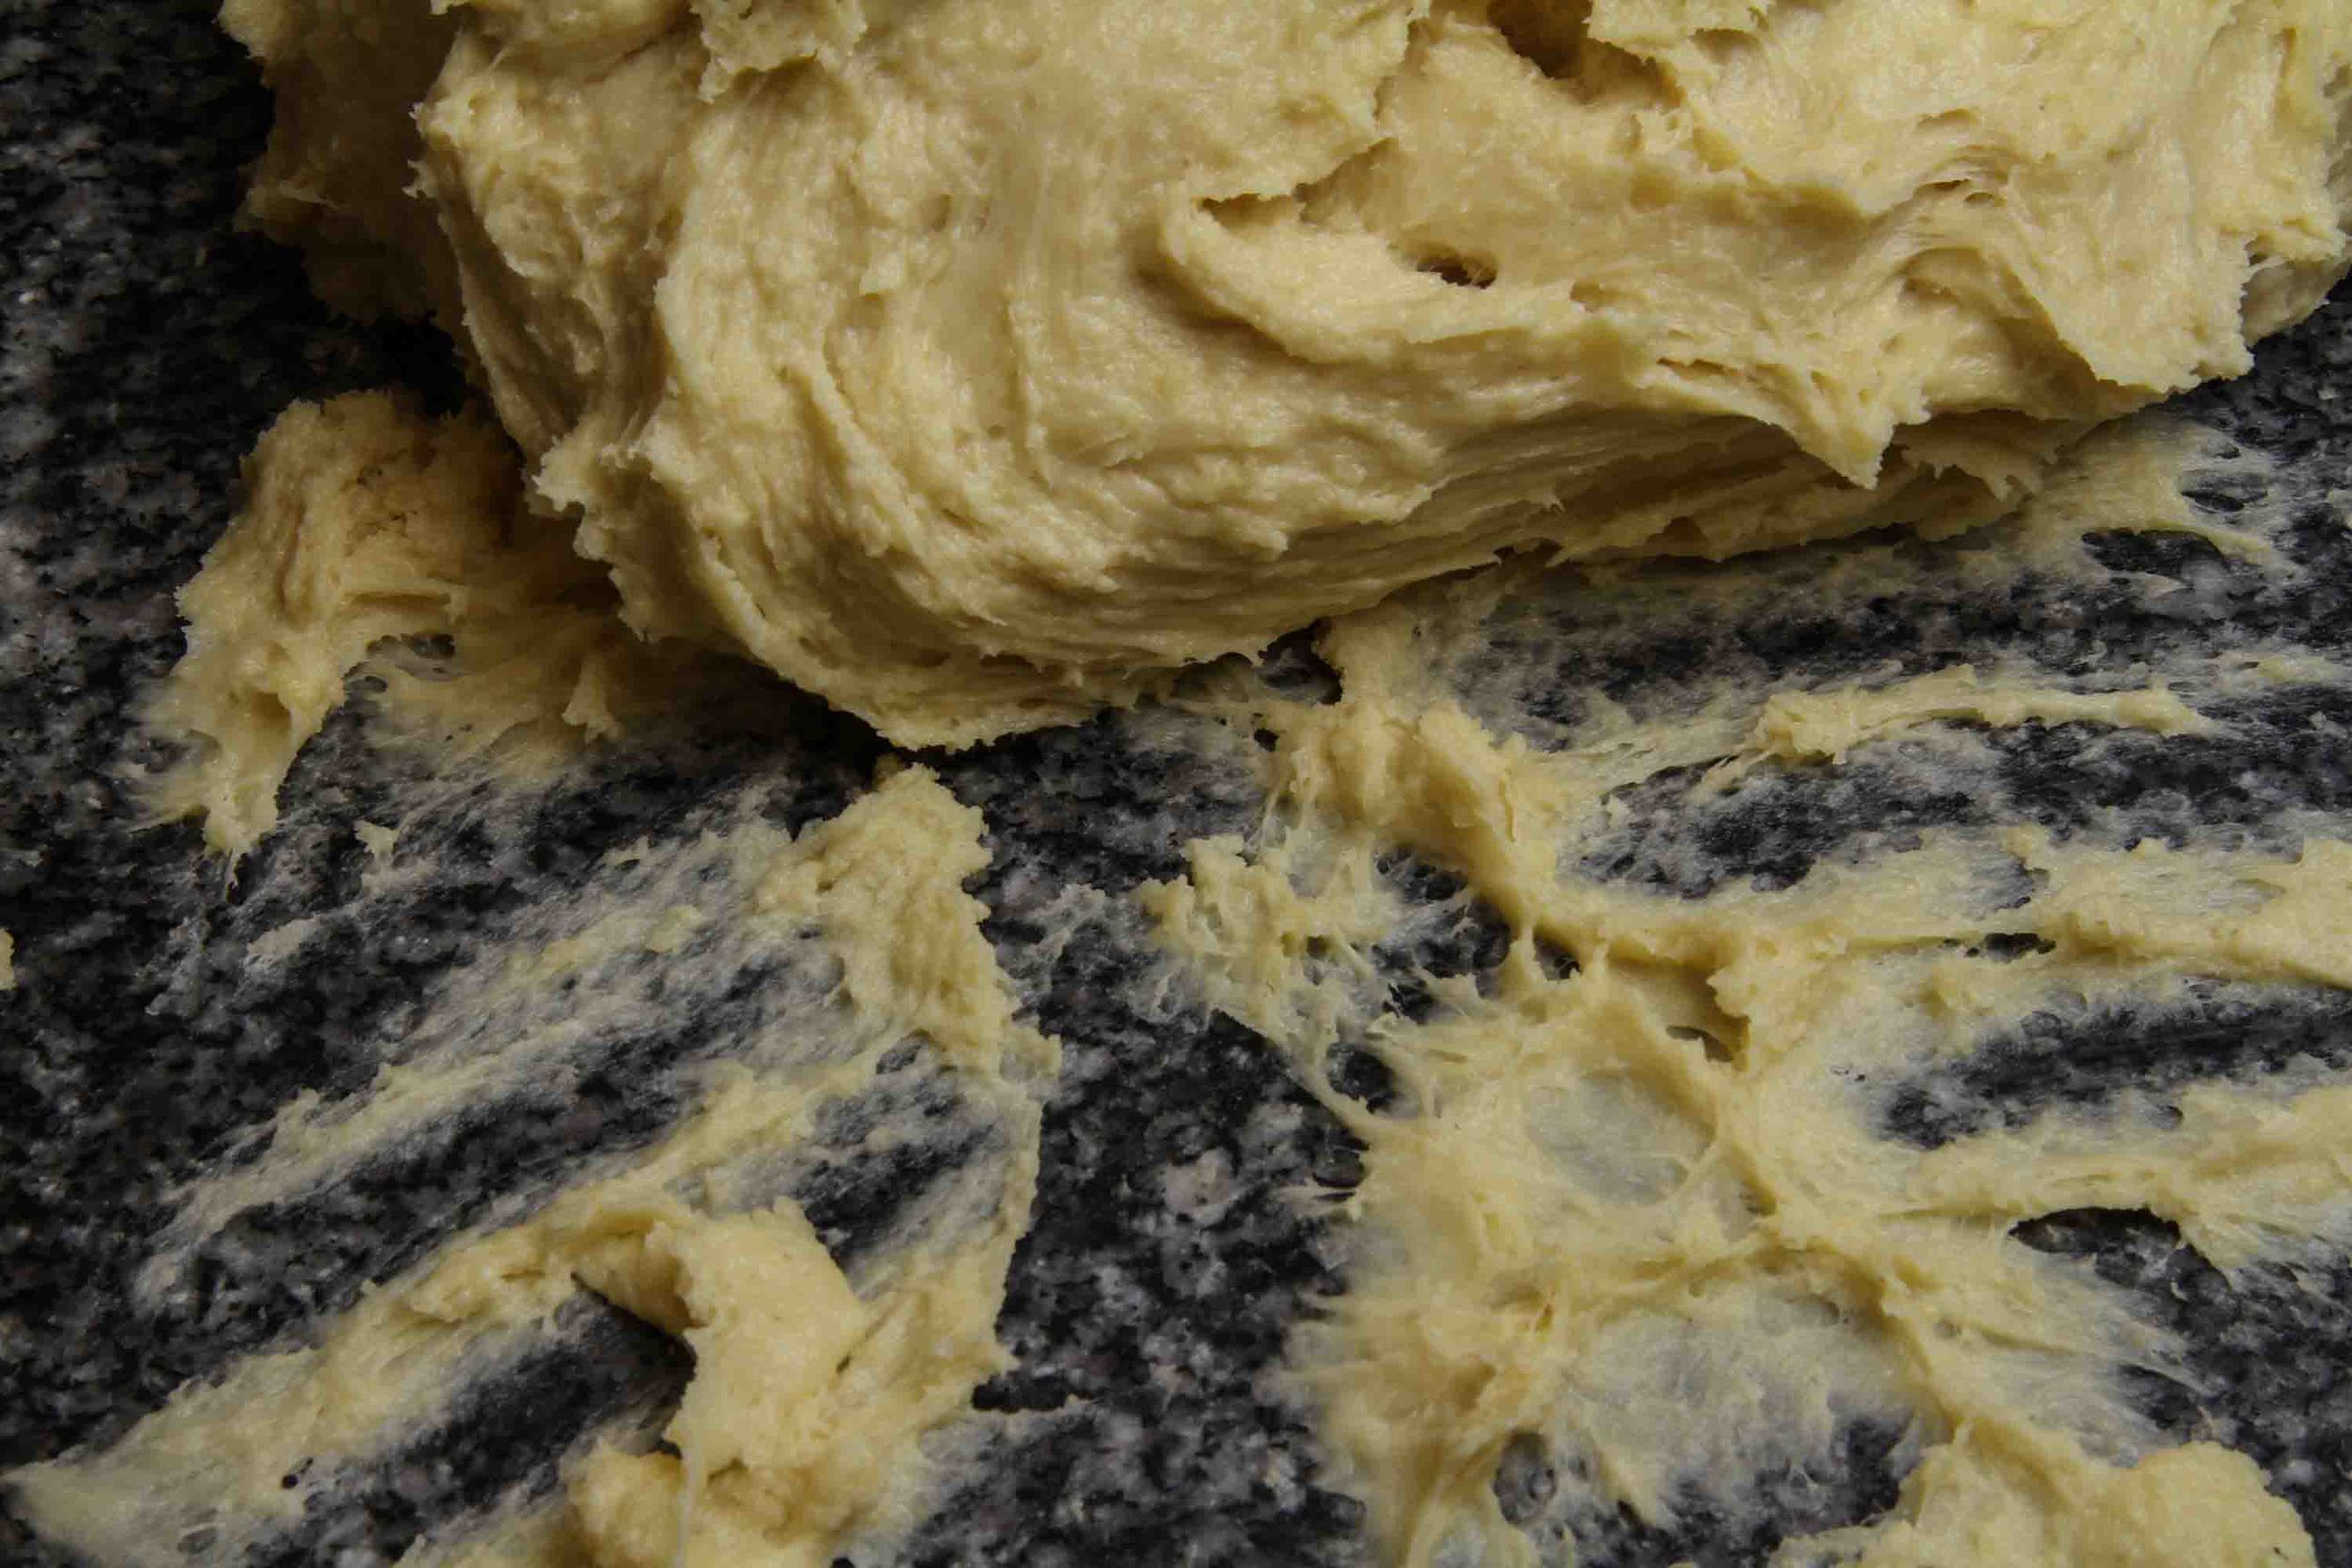
When I'm teaching a bread class, the number one question is always. "How long will I knead the dough?"  The best way to know that you're finished kneading it to check a gluten window.   Gently cut off a small piece of dough, gently tease/strectch the dough with your fingers and look for a sheer pane of dough that wont' tear as it's being stretched.   It you can make it sheer without tearing, you're finished!   Here' a photo of the White Breads' gluten window.

Notice the light coming through the sheer dough.  I was doing the photography and stretching myself, so the dough isn't stretched as thin or far as I would have like.    Every single time I make bread, I check for the window.  Every batch is different, and I always want to make sure I've worked the dough enough.

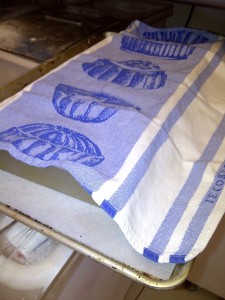
After the dough has had a good rise, and at least doubled in volume, it's time to shape the loaves.  I weighed the whole batch, then divided by four to make sure each loaf was about the same size.  You certainly don't have to be this picky, but baking is much more even when the loaves are the same.   I like to cover the bread pans with a favorite towel.  Call me superstitous.   By the way, did I tell you that I always spin the dough three times, then flip it in the bowl before it starts to rise?   Habits are good!

Here are the sweet loaves shaped and ready for the 2nd rise.

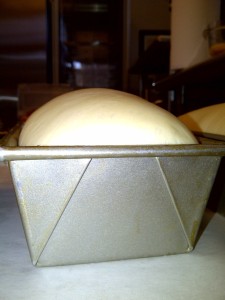
The 2nd rise is about an hour.  The key to to let the bread rise until the loaf is about 1 inch about the top of the pan.  That way, with the added spring in the oven, you'll have a nice tall loaf  with perfectconsistency to the crumb.  This recipe has a little bit more yeast than some recipes, so the bread rose faster than I was expecting.  It's just a bit taller than usual, but doesn't it look great!??

Now into the oven!  The yeast will work like crazy as the temperature of the dough increases.  Once the dough reached about 120 F, the yeast will die, and bread will be it's finished size.    I bake the dough until the internal temperature is about 180-200F.   Just push an instant read thermometer right into the end.  You can also pop the dough of the pan and look at the color.   It should be golden.  Once you've got the temp and color, try to tap the loaf and listen to the "hollow" thump.   It's hard to know that sound unless you know the bread is done.    I turn the bread out of the pans immediately and let them cool on their sides.  OK, another weird habit, but it works.   I pulled this bread out of the oven at about 195F and liked the pretty light golden color.  This was JUST enough.   It could have easily gone another 5 minutes.  It's great for toast.  Don't underbake your bread.  The golden color is caramelization of the sugars which equals flavor!

The bread is cool, and upon inspection, no swirly holes.   It has a nice soft but sturdy, consistent crumb.   And... look at the cute shape of the loaves.  They look like the cookie cutter shape of bread!  and...not too high to fit into the toaster!

I hope you'll join me in two weeks for the Chocolate Truffle Tartlets.  In the words of our dear Julia,  "Bon Appetit"!

Let the Good Times Roll! Jambalaya with New Orleans Sauce

It's almost February and I'm in the mood for spicy, New Orleans food.  Mardi Gras is only a few weeks away so I'd like to share my recipe for Jambalaya.   I've been making this recipe since 1988.  It's evolved over the years.  The original recipe was  in one of Paul Prudhomme's books.  The best part is that you can add shrimp, sausage, chicken or any combination depending on what you have available.  I've found that for the sausage, a good fully cooked kielbasa or butcher shop wiener is great. Serve the Jambalaya with or without the sauce.  I like to make the jambalaya spicy, and quiet the heat with the sauce.

Let's face it, it's January in Wisconsin.  Tomatoes are ... well, to keep it polite.  They're pale and not the vine ripened beauties we see in summer.   I've created a recipe that uses canned tomatoes.   Tomatoes picked at produced in their peak.  The brand I use is Organic, and whose cans are (or will be very soon) BPA free.   The spices are dried, and the rest of the ingredients are very easy to find.

Every Creole or Cajun recipe uses the vegetable trinity of onion, celery, and green pepper.  Chop them in equal sized pieces, and in equal parts.   Since you'll be making both recipes, you can do your chopping all at once.   Don't worry if you don't measure exactly, just try to be close to equal parts.

I love the sight of vegetables all chopped and ready to go.  Here are the triplets, ready for the heat.

The spice mix is the perfect balance and heat and flavor.
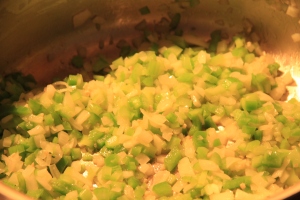
The onions should begin to look translucent.

Once you've cooked the vegetables, turn up the heat and add the chicken and stir in the seasoning mix.  At  this point, you'll know you're able to make the best meal ever!  You'll smell the spices and know it's pure New Orleans.

Add the stock, tomatoes with puree, and rice, then crimp foil around pan and place in the oven.  NO PEEKING!   You may want to move the mixture to a small baking dish, then cover with foil if you're having trouble getting a good seal.  Relax, have little libation and start the sauce.

I like to think of the sauce as a nice way to use the leftover vegetables, and spices.  The spice mix is just a little different, and somewhat sweeter.

This time you're going to use butter.  Melt the butter, and add the onion, green pepper and celery.  Add the spice mix, and stir to combine.  Add about 2/3 of the can of tomatoes, and the stock.  Add a few dashes of Tabasco and a few pinches of sugar.  Simmer while the jambalaya is cooking.  The picture below is the Jambalaya just after the foil came off.

You'll want to gently toss/fold the Jambalaya after you remove the foil and the bay leaves.  The tomatoes will be at the surface.  This will gently mix them together.  Be sure to taste the rice to be sure it's completely cooked through.  Sometimes I've needed to add more stock and place it back in the oven.  This is due to the type of rice and the amount that it requires.  Can you smell it yet?  The  sauce is delicious!  Use it with other dishes too.  It's great with eggs with spicy sausage.

To serve, I mound the Jambalaya in a flat soup bowl, and top with the  sauce and chopped scallions if desired.   Serve with a great crusty roll.  The recipe will serve 4-6 people.

Jambalaya with New Orleans Sauce

Spice Mix

2 bay leaves

1  1/2 tsp salt

1 tsp white pepper

1- 1  1/2 tsp cayenne pepper

3/4 tsp thyme leaves

1  1 /2 tsp  dried oregano leaves

Ingredients:

2 T. olive oil or solid fat

1 1/2 cup chopped onions (about 1 medium onion)

1 cup chopped celery (about 3 stalks)

1  cup green pepper, chopped ( about 1 medium)

1 cloves garlic, chopped

2 uncooked  boneless, skinless chicken breasts, cut into 3/4 inch pieces

1-2 kielbasa, sliced diagonally (if desired)  fully cooked

1- 2 pounds cooked shrimp (you can use any amount)

2 cups chicken stock

1 can (28 oz.) diced tomatoes in puree

2 cups uncooked rice

Preheat your oven to 350 degrees F.  Heat the oil in a stock pot or large saucepan.  Add the onion, celery and green pepper and cook over medium heat until the onion is becoming clear.  Turn up the heat and add the chicken.  Cook about 3 minutes, stirring to toss the vegetables and the chicken.  Add the seasoning mix, and cook about 2 more minutes.  Add the garlic.    When the chicken is white, and appears cooked through, add the tomatoes and the chicken stock.  Bring to a boil, then add the rice.   Heat though, add shrimp and and sausage.   Transfer the mixture to a baking pan.  A deep 8x8 or 13x 9 will work depending on how much meat you're added.   Seal the top with foil and place in the oven for 30-45  minutes.  The rice should be soft, not crunchy and the liquid mostly absorbed.  If you prefer the rice softer, the mixture can remain in the oven longer.

For the sauce:

Spice Mix

2 bay leaves

3/4 tsp dried oregano leaves

1/2 tsp salt

1/2 tsp cayenne pepper

1/2 tsp paprika

1/2 tsp black pepper

1 /2 dried thyme leaves

1 /2 tsp dried basil leaves

Ingredients:

4 T butter

1 can diced tomatoes in puree

3/4 cup chopped onion

3/4 cup chopped celery

3/4 cup chopped green pepper

2 cloves garlic, chopped

1  1/2 cups chicken stock

1 tsp granulated sugar or honey

2-3 dashes Tabasco Sauce

In a large saucepan, melt the butter, add the onion, celery, and green pepper and cook until the onion begins to look clear.  Add the spice mix and stir to combine.  Stir in the stock and tomatoes.  Bring to a boil, add the sugar/honey and Tabasco.  Reduce heat and simmer uncovered while the jambalaya cooks, about 30-45 minutes.  The mixture will reduce and thicken.  If it becomes too thick, add chicken broth.   Be sure to remove the bay leaves before serving.

This recipe will make about 2 1/2 - 3 cups.