Popovers

Beef Wellington, check.   Blue cheese Souffle, check.  Graham crackers, check.   These are all things I've made in the last year that I've always wanted to try.  Call it a culinary bucket list of sorts.  What's on your list?   Maybe it's simply roasting a chicken.  No one will make fun of you.   Give it a try.   What's the worst thing that can happen?  Frozen pizza?

three-popovers-4

three-popovers-4

I can't believe that this is the first time I've ever made popovers.  In the past I've tried to make the Dutch/German puffy pancakes without much success.  It seemed like a popover was in the same mystery family, so I've always found another option.  Today was the day.  Thanks to Baking with Julia and the Dorie Greenspan Tuesdays with Dorie group, Popovers made it on the calendar.

Much to my surprise, they were easy!  A quick brrrrr in the blender, 45 minutes in the oven and ta-da!  Tasty, dreamy popovers.  And without gooey centers, I might add.

The ingredients are super simple.  Flour, eggs, milk, salt and a butter.  The usual suspects.

ingredients-1

ingredients-1

 When all the ingredients are at room temperature, they get a quick brrrrr in the blender.  I've always wanted to include an overhead blender shot, so here it is!

Blender with popover batter

Blender with popover batter

I don't own a popover pan, so I opted for the muffin cups with 1/4 cup batter in each cup.  I very skeptically put the pans in the oven and walked away.  Then walked back and turned the oven light on.  This was too good to miss.   After a few minutes the popovers started to pop, and I knew I was in business.  Twenty-five minutes later, I reduced the oven temperature and waited for the finished beauties.   They were crisp, light, and best of all... not gooey in the middle.   I split one open, spread a little more butter and drizzled it with honey.  Why was this the first time I'd made these?    I hope you'll go to Paula's blog, Vintage Kitchen Notes, or Amy's blog, Bake with Amy to find the recipe and give popovers a try.

popovers-on-tray-3

popovers-on-tray-3

single-popover-5

single-popover-5

Now on to the next new-to-me recipe...  I think it might be pretzels using real lye!  Stay tuned.

Oven Roasted Cherry Tomatoes

simple pleasures are the best.  

Don't you love finding a little cash in the coat hanging in the closet for months?  A bouquet of garden zinneas?  Someone holding the door open for you with a smile.    I've got a short, sweet simple pleasure of a  recipe for you.   Cherry tomatoes are popping everywhere.   We  eat them like candy around here.  I didn't think they could get any better.  Here's how--   Pick up a pint or two at your market and you're half way there.   No, you're more than half way there.

img_7115-2
img_7115-2

Slice them in half, then toss with just a litte bit of olive oil, salt and pepper, then roast at 200 degrees for about 1 1/2 hours.  Your house will smell great, and you'll have rich gems to toss in pasta, on a pizza, or chill for the top of a salad.

img_7120-5
img_7120-5

It's so easy, and the results are SO good!

finished-tomatoes-6
finished-tomatoes-6

To print this recipe, click HERE

Oven Roasted Cherry Tomatoes

2 pints cherry tomatoes

1-2 T olive oil

salt and pepper

Preheat oven to 200 degrees F.  Slice tomatoes and toss with oil, and scatter in a single later on a baking sheet lined with parchment paper.   Sprinkle with salt and pepper.  Bake for 1 and 1/2 hours or until tomatoes are wrinkled and fragrant.   Cool and store in an airtight container for up to 4-5 days.


Cafe Style Grated Carrot Salad

Think about your best friends and the first time you met them.   Was it at work?  At school?  On a bus? I have a dear friend, Kim.   For those who have heard me speak of her, you may think her name is Myfriendkim.   She lives in Michigan which is way too far away.   We met the very first day of pastry school, in Paris.  Everyone was nervous and waiting for orientation to begin.  There were about seven Japanese young women, a Turkish woman, another from Brazil plus a few Americans.  As we waited,  we made our hesitant introductions to one another.  When it came to her turn, she told the group.  "I'm a mom and I want to learn how to bake.  I've stayed at home, planned vacations, and I love to eat bon-bons".    She was honest, sweet and had a killer sense of humor.  I had to get to know her.

At the end of the morning after we had been assigned our uniforms and lockers, as we chatted, she asked if was in Paris alone.   I told her, yes, and that was staying in a hotel about a 15 minute walk away.  She told me that she had been to Paris several times and knew it well.  We went back to class and as we were packing up for the day, Kim invited me to join her for dinner.  She hates to eat alone.   Little did she know that I had been glued to my hotel room for the past four days.  I had terrible jet lag, a constant stomach ache and was still shaking off the fake taxi that had scammed me out of most of my cash.   I eagerly accepted and we walked back from school to my hotel a few blocks away to change clothes & make a quick call home, then to hers and then to dinner.  She had a knowledge of Paris that was amazing.  We were going out to eat... at night... I had made a friend!

Where does the Carrot Salad fit in to this story you ask?   Kim picked out the perfect restaurtant.   Chartier.  It's grand, yet casual.  The waiters were bustling about dressed in black vests, white shirts and floor length aprons.  I was awe struck.   We talked and laughed about our husbands, dogs, families and our love of food.  As we ate, she told me the history of Chartier.  It was a workingmen's lunch room.   The walls are lined with small drawers where they kept their napkins and forks.   We ordered Carrot Salad as a side for our Steak au Poivre while we laughed and talked even more. After some much needed nourishment, the jet lag and stomach ache were gone  and I was thrilled to be in Paris.

I've never forget that meal, or how I meant Kim.

carrots-1
carrots-1

This week's French Friday's with Dorie recipe is simple.  Grate the carrots, add a quick dijon dressing/vinaigrette then toss with a few raisins.   Our CSA box had a big bag of carrots last week.  Orange, purple and yellow.  They were a little tough to grate, and yes, I did knick a knuckle - shoot! The carrots were more like chips than grates.  The salad is fresh, bright and a great treat for any lunch or supper.

carrot-salad-3
carrot-salad-3

Warm Grilled Scallop, Nectarine and Corn Salad

It's been such a great month so far.   We've traveled to fun places and just hosted a wedding reception.  It was a belated reception!  The sweet couple got married last summer in the Rockies, then celebrated with friends here in Wisconsin this summer.    While I was supposed to be writing and posting the French Friday's With Dorie post, I was elbow deep in decorating, baking, fluffing pillows, and turning our yard into a summer party wonderland.  Before I tell you about the salad, I have to get you a peek at the party. With the help of my friends and florists extraordinaire, Jennifer and Scott, we clustered BIG grapevine balls and hung them from the tent ceiling.  Our friend, Paul, made a door frame which held an old door we found in our garage when we moved in.  It was the perfect entryway for our guests.

wedding-door-1
wedding-door-1

So what does a pastry chef make for her step-daughter's weddding reception?  PIE!  Another friend, Diane and I made pie, pie, and more pie!  It didn't take very long to make 17 pies.  Cherry, Peach and Blueberry.  I'll save crust and pie filling for another post...

Back to the salad... Around My French Table by Dorie Greenspan is the source of this recipe.   The scallop salad was a big hit as we were racing around running last minute errands.  The scallops got to ride home on ice, and waited patiently for lunch time.

Instead of using fresh corn, I had some corn, still on the cob on the freezer.  I let it defrost lightly and removed it from the cob.  It was slightly soft, but nice and cold for the salad.

img_7100-1
img_7100-1

Instead of the grill, I heated my grill pan, and seared the nectarines, then wiped the pan, added some oil and seared the scallops.   It went together SO quickly!  A quick dressing for the corn salad and lunch was ready!   I would have to say that the basil coulis preparation was one of the best parts.   The fragrance and texture of the delicate garnish was amazing!

scallops-salad-complete-4

Here's to summer, good friends, sweet babies, families, and happy Marriages!

img_7102-3
img_7102-3

And P.S.... Happy 100th Birthday, Julia Chld!

Berry Galette

just like becoming an expert in wine, you learn by drinking it, the best you can afford. You learn about great food by finding the best there is, whether simply or luxurious. The you savor it, analyze it, and discuss it with your companions, and you compare it with other experiences.  Julia Child.


galette-on-plate-6

Thank you Julia, that's just what we're doing.  Sampling, baking, cooking then photography and writing all about it to share and learn from one another's experiences.   If she only knew what a great impact she made on all of us.

This summer I've been making galettes with peaches and pears for the farmers' market.  The crust is a simple pate brisee, with frangipane (baked almond cream) and sliced fruit.   They'so so tasty and sell out right away.   This week's Baking with Julia galette is slightly different.  This one is made with berries, and no filling.   The crust is made with flour and cornmeal, making it crunchy and very earthy.   If you 'd like to follow allow and make a galette, Lisa of Tomato Thymes in the Kitchen and Andrea from The Kitchen Lioness  will have the reicpe written on their blogs.   The best part about this recipe, is you don't need a fancy schmancy tart ring or pan.   Just a baking sheet and some parchment paper.

crostada-ingredients-1

The dough goes together quickly in the food processor.  I found it to be a little dry so I added about 1 T of water.  I also used Greek yogurt instead of sour cream.  After a good chill, it was very nice to roll, and shape. I used strawberries, blueberries, blackberries.

crostada-before-3

After 40 minutes of baking, the galette was golden and so wonderfully fragrant!  I feel like I should have added a little more sugar to the top.  The crust doesn't have a lot of sweetness, and it could have been just little sweeter.  I did really like the additional of cormeal. the earthy crunchy texture was perfect for the freeform beauty.    HOpe you enjoy this one!  Your friends will love it!

crostada-finished-4

crostada-slices-5

Tomato Cheese Tartlets

First things first.  I know it's wrong, but I like to spell tartlet, tartlette.  It just seems more fitting for a small French pastry. Smell is such a huge part of taste.  If you're stuffy, nothing seems to taste good.    There are some smells that make you happy with just a whiff.   This recipe combines those  fragrant and delicous ingredients.  Basil, fresh tomatoes, garlic, baking puff pastry, and goat cheese.   I went out to the tomato patch to check on the progress, and ta-da!    I picked about a dozen San Marzanos.  These are amazing little guys.  They look like a Roma, but are even meatier, and more flavorful.  They're that tomato of choice for wood-fired pizza makers in Italy.   They're one the key ingredients in Pizza Margherita.    Don't you love the smell of tomato plants?

And the basil...what a punch!

tart-ingredients-3
tart-ingredients-3

Wait!  For those of you who just read the word puff pastry and are ready to move on, please stay.   You'll be using a sheet of pastry that you can purchase at the grocery.  All you'll need to do is thaw and unfold it.  Here's your chance to make a beautiful tart that will look like you spent all day.   You could if you wanted to, but you don't have to.   Sometime we'll make puff pastry together.  It takes time, but it's really worth it.

This recipe is part of the French Fridays with Dorie online cooking group.  The recipe comes from Around My French Table, by Dorie Greenspan.   I'll walk you through the basic steps, just in case you don't have a copy.

First you'll open your thawed box of pastry and unfold it.  Find a bowl or cup that's about 3-4 inches in diamenter and trace four circles.  If the puff pastry has tears where is was folded, gently smoosh it together.  Not too hard though.    Once you have your circles, move the dough to a baking sheet, covered with parchment, and poke with a fork.   This keep the puff pastry from puffing too much.   A way to make sure the dough puffs evenly is to set another sheet of parchement paper and a baking sheet or cooling rack on top.   The dough will still puff and be flaky, just nice and even.

vertical-puff-prep-1

Here's the dough! Super simple.

cooking-rack-on-puff-2

After you've removed the puff from the oven, let it cool.  It should be nice and golden.

Puff Pastry Circles
Puff Pastry Circles

Now on to the pesto.  I filled the food processor with basil, garlic, and pine nuts.   Gave it a whirl, when I realized that I didnt' have any parmesan cheese.  Another oops!   No problem.  There's going to be cheese on top, so I added the drizzle of olive oil and had a great tasting topping for the tarts.   Here's the recipe I made:

To print this recipe, click HERE

Basil Pesto 

2-3 cups basil leaves

1/4 cup pine nuts or walnuts

2-3 tsp chopped garlic

1/2 cup grated parmesan cheese (apparently optional)

1/2 cup olive oil, or to desired consistency

salt and pepper to taste

Pulse the basil, garlic, nuts and cheese until to forms a chunky paste.  Drizzle in olive oil until pesto is desired consistency.  Season to taste.

It's so easy!  However, we're in the together and I don't want you to miss out on this tart.   You can buy pesto, and it will be fine.   You can find it in the refrigerated department or the condiment aisle.

Now be creative.  Put a big dollap of pesto on each tart.  Then, slice the tomatoes, and cheese.  If you have one big tomato, place a big 'ol slice on the tart.   I had smaller sized tomatoes, so I made a pinwheel around the tart.   I used both goat cheese and fresh mozarella.  I put the goat cheese around the edges, and the mozarella in the middle, in case it oozed.   Once they were all assembled, I baked mine for about 5 minutes until the cheese looked melted, then I popped the pan under the broiler for about 15 seconds.  WATCH carefully, they will brown and burn very quickly.

Tomato Cheese Tart
Tomato Cheese Tart

The easiest part of all... Find three friends.  Make a salad, pour a glass of wine and enjoy!

tart-plated-10
tart-plated-10

Goat Cheese Butter

"After one taste of French food ... I was hooked. I'd never eaten like that before, I didn't know such food existed. The wonderful attention paid to each detail of the meal was incredible to me. I'd never really drunk good wine before, and knew nothing at all about it. It was simply a whole new life experience.  Julia Child.

Here's a recipe I think you'll love.  Simple, with careful attention paid to each detail.  Just like Julia has taught us.

Read more

Lemon Barley Pilaf

pilaf plated by . Whew!  It's been a busy week, and I'm late in getting this post off.   This is an Around My French Table recipe and part of the French Fridays with Dorie blogging group.  You know the drill for these recipe.  We're asked not to post the recipe, but you can find it in the book.   Just in case you don't have to book, I have good news for you.   August will mark Julia Child's 100th birthday month.   To celebrate, I'll be blogging some of her most famous recipes with some stories, fun facts and quotes from our dear Julia.    Any requests?


Well back to the pilaf... I love barley and was very interested to try the recipe.   My friend Jane makes a great salad with barley and tuna.  It's so good on a hot summer day.    I simmered the barley on the stove, and carefully added the chopped vegetables just as Dorie suggested so they didn't overcook.

pilaf ingredients by .


The pilaf was tasty, and make a nice side dish with the grilled corn salad and salmon with dill and lemon.

pilaf final by .


Grilled Corn Salad

What an exciting weekend!  I'm back from  San Francisco.   I went for a class on food styling and tips on food photography.   It was really fun and very interesting.   Joy Wilson from Joy the Baker sand Tracy from Shutterbean were the teachers.   They were full of ideas and great information.  Now the trick is to put it to good use.   Tracy and Joy prepared two recipes, and we got to style and shoot using our new props and tips.  Here are some oat bars, and my best shot of the day.

Walnut Oat Bars
Walnut Oat Bars

It's been awhile since I was in San Francisco.  What a gorgeous city!    The hotel's driver/maintenance man invited Gary and I to the roof top to see the view on our last morning there.   Amazing!

Here's my postcard to all of you!

Golden Gate Bridge
Golden Gate Bridge

Upon arrving home, I found our CSA box brimming with lots of fresh vegetables.   I wanted to make something crunchy, tasty and cool.  My version of a grilled corn salad - minus the grill.

The best part about this recipe is that you can use anything you like and leave out the things you don't like.   I had little baby eggplants, zucchini, red onion, cherry tomatoes and fresh sweet corn.

Beautiful Produce!
Beautiful Produce!

To start, shuck the corn and carefully slice off the cob.  Then,heat a grill pan or skillet and place the corn in a single layer ith just a little olive oil.  I used about 2 1/2 cups of corn and about 2 tsp. oil.  Let the pan get hot, really hot.  The corn will sizzle and snap.  Get it quick stir and your should see searing on the corn.  Move to corn to a heat proof bowl.  Add eggplant (I didn't peel mine), and zucchini to the pan and saute for 3-4 minutes, just to heat through.  Add these vegetables to the corn and toss.

grilled corn
grilled corn

Now for the fun part.   Add other chopped vegetables, feta, black bean, cilantro/parsley... anything you like.

My salad included parsley, red onion, cilantro and a small piece of feta I had left over from another meal.

To finish the salad, mix in 1 T lime juice or vinegar, salt, pepper, cumin and chili powder.

You can eat the salad warm, or cover, chill and enjoylater.   This salad is great with any grilled meat, or by itself for a light supper.

To print this recipe, click HERE

Grilled Corn Salad

2 1/2 cups corn (kernels)

1/2 -1 cup chopped zucchini

1 cup chopped eggplant

1 small red onion or scallions, chopped finely

1 can black beans (optional) rinsed

1/4 cup chopped parsley, cilantro or both

1/4 cup feta cheese, cut into 1/2 inch pieces

1 cup cherry tomoates, or 1 large tomato, chopped

1 T olive oil

1 T red or white wine vinegar (or a squeeze of 1/2 lime)

1/2 tsp. chili powder

1/2 tsp cumin powder

salt/pepper to taste

Shuck corn and remove from the cob.  Heat a skillet or grill pan with 1-2 tsp olive oil.  Add corn in a single layer and sear until light brown marks appear on some of the kernels.  Remove from pan to bowl.   Add zucchin and egglant to pan and saute for 3-4 minutes.  Transfer vegetables to the bowl with the corn.  Add the chopped onion, and black beans.  Add remaining olive oi, vinegar and spices.  Toss in tomato, feta and mix gently.   Remember, you can add any other vegetables or spices to make it your own!

Happy Summer!

corn-salad
corn-salad

Chewy Crunchy Granola

Are you planning any vacations this summer?  Stay-cations?   It doesn't matter how far you're going, or how you're getting there, you're going to need a snack.  Something to take the edge off of your hunger as you travel from point A to point B.   Rather than pick up a sweet, calorie-filled nutrition bar at the gas station or magazine counter at the airport, toss a baggie of this great granola in your bag. Way back when, I learned a little rhyme in Girl Scouts for packing a lunch .  It goes something like this...

Something munchy, something crunchy, something juicy, something sweet.

Nothing gooey, nothing drippy, nothing sticky, nothing soggy.

It might be corny, but it's true.  There's nothing worse than a big spot on the front of your shirt as arrive at your destination.

   As you know, we've undergone some big dietary changes around our house.   Gary's doing great, and has become the salad king.   In a never-ending effort to find good food and keep control of the fat and sugar we were looking for a healthy granola recipe.   This recipe comes from our friend who's been making it for a long time.  She's tweaked the original in volume and fat.  I ran the nutritional data on the recipe, and 1/4 cup (about 30 gm)  is about 120 calories and about 20gm of carbohydrate.  Perfect for topping some yogurt or nibbling with the piece of fruit.

img_6928-3
img_6928-3
granola-ingredients-1

To print this recipe, click HERE

Granola   (Adapted from Granola of the Gods)

5 cups rolled oats

1/2 cup brown sugar (I used Brown Sugar Splenda)

1/2 cup whole wheat flour

1 cup nuts, slightly chopped (almond and walnuts!)

1/2 nonfat dry milk

1/2 cup coconut (optional)

1/3 cup vegetable oil

1/3 cup honey

1 egg

1 tsp. vanilla

water

 1/2 cup Raisins or Craisins.

Instructions:

Preheat oven to 225 degrees F.  Mix dry ingredients together (except raisins).  In a separate bowl, whisk wet ingredients together.  Pour wet over dry and mix.  Spread on a jelly roll pan or in a 13 x 9  pan.  Sprinkle with about 2 T water.  Bake for 45 minutes, stirring twice during baking.   If you'd like it dryer or crunchier, increase oven to 300 degrees and bake for another 20 minutes or until more golden.   Turn off the oven, and allow the granola to cool.  The granola can be removed from the oven right away, but won't be a crunchy.  When it's cool, add the raisins or craisins as desired.   Store in an airtight container.


I hope you enjoy this as much as we have.  Happy summer and happy travels!

granola-2
granola-2

Blueberry Mascarpone Roulade

It's fun when you can combine a things you really like to do into one project.   The roulade from French Fridays with Dorie, fits the bill.

  • Recipes that require careful technique and a few steps are more fun
  • Birthdays should be celebrated for a week
  • Mascarpone should be its own food group
  • Roulade whether sweet of savory is kind of glamorous

When I saw Roulade in the recipe name, I knew this was going to be fun.   A friend of ours was turning a "Zero" birthday, and I wanted an extra special birthday treat.   We'd have a nice light and cool dessert to celebrate.

Simple, pretty and full of sweet blueberries.  The preparation of the berries is wonderful.   Bring sugar and water to a boil, add the berries and turn off the heat.  The berries plump but won't burst.   When they dry, they're sticking and sweet.  You could almost spread them like jam.   SO good!

The  recipe isn't really hard, but careful attention is required to make sure your sponge cake is just right.   Here's a photo of the eggs just before they're combined with the flourl

eggs-whites-1

Here's the pretty sponge before baking...

sponge-cake-ready-for-oven-4

baked-sponge-cake-5

And this is the after.  Golden, tender and ready to be rolled.

towel-with-sugar-and-sponge-cake-6

It's never really made sense to me that you could roll a sheet of sponge cake in a towel.  I had it all wrapped up and ready to cool, and realized that you really needed to see what this looks like.   The towel is dusted with powdered sugar, the sponge cake goes straight on it while it's warm, then it's rolled up and cooled.  The cake takes the shape so it will roll nicely when the filling is added.

Sorry I don't have a photo of the blueberries and cream on the sponge before I rolled it.  I was a in the zone and forgot to grab the camera .   Here's the finished dessert.  If you don't have a copy of Around My French Table, by Dorie Greenspan,  I highly recommend the book.   It's full of great recipes with carefully written instructions.

blueberry-roulade-7


Hazelnut Biscotti with Affogato

Happy Summer!  What have you been doing to enjoy summer?  Popsicles?  Pedicure?  Any good summer books?  I'm reading Lies Beneath, by Anne Greenwood Brown.  It's young adult fiction (beachy!) It takes place near and on Lake Superior. The vampire stuff didn't appeal to me, but this book is all about mermaids.  It will make you think twice before you hop on an air mattress. This summer I've been really enjoying an occasional affogato.  What's that you ask?  It's SO good.   Two small scoops of vanilla gelato or ice cream with espresso/strong coffee poured over the top.  A perfect dessert.   Think... root beer float for grown-ups.   Add salted caramel ice cream and it's even better.  Crunchy biscotti are meant to be dunked.  Wine is good, coffee is good, and an affogato... great!   There's really not a fancy recipe for the delight.  Find a cute, small clear glass, add the ice cream, top with coffee/espresso and ta-da!  You'll love it, I promise!

The hosts this week for Baking with Julia are Jodi of Homemade and Wholesome, and Katrina of Baking and Boys.  Just click on one of their links and you'll find the biscotti recipe.

I'm late getting this post out, but... better late than never, as they say!  It's been so hot, and so dry, and I really didn't feel like baking today.   However,  biscotti recipe is very easy and fun.  So I cranked up the A/C and here they are!

Biscotti require two baking sessions.  The first time is about 35 minutes.  This bakes the log shape.  Then, after a short cooling period, the biscotti are sliced, they're baked again on a wire rack to dry and toast the sweet cookies.  I found that it went quickly.  There was the perfect amount of dough to make about a dozen good sized biscotti.  Some to eat, and some to share.   I stayed pretty true to the recipe.  Though I used chopped hazelnuts that I only toasted and didn't boil, and used Cointreau for the liqueur for the nice subtle orange flavor.

sliced-biscotti-5

sliced-biscotti-5

First the dough is pressed into a log and 12 inches by 3 inches.

biscotti-dough-1

biscotti-dough-1

Once it's baked, it's sliced on the diagonal and placed on a wire rack.  Then back into the oven for another 15 minutes or so, until light brown and crunchy.

precut-baked-biscotti-2

precut-baked-biscotti-2

biscotti-ready-for-second-bake-3

biscotti-ready-for-second-bake-3

 Stay cool, bake when you can, and try an affogato soon!

biscotti-and-affogato-8

biscotti-and-affogato-8

Preserving Peaches

img_6776-2  

There are so many quotes about trying new things, making mistakes, being adventurous, etc.  so I thought I'd take that advice and try something new.  New to me.   No ski diving, or zip lining, just a new food preparation that has been around for years.  Canning!  For those of you who don't know how, please hang in there with me.   You might be able to find a big box of fruit at a market, grab a few friends, pitch in and buy the equipment, and be as thrilled as I am.   Canning is kind of like trying on Birkenstock sandals.   It seems really strange the first few times, and you skip it.  Then one day, it's the day.  Today was that day!

If you took a survey of the farm women living in this county, I bet 90% or more can fruits and vegetables each summer.  No fear.  Just good common sense and years of practice.


I've really wanted to try it.  I'm not going to make a big production out of it.  Just a few quarts of peaches.   The worst that could happen is that the jars won't seal and we'll have to eat them sooner than expected.   The best thing?  I'll have quarts of peaches at the ready, and a great deal of satisfaction.

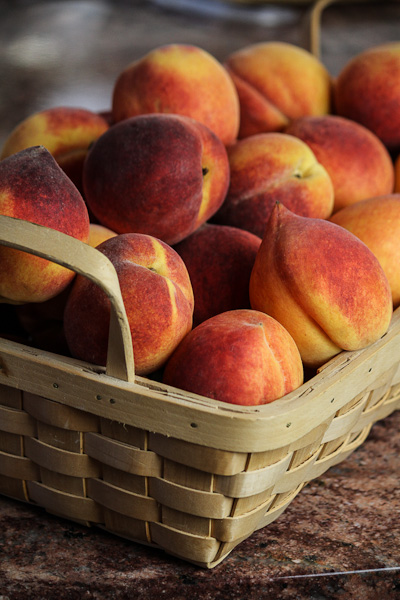
Last Tuesday, I got a big box of peaches from a truck driving through from Georgia.  My friend waited in a  line of about 100 people also in pursuit of the wonderful fruit.  They ripened perfectly.   I made peach tarts for the Farmers' Market, ate serveral peaches, gave peaches away, and still had a worrisome amount I feared might spoil.  Peach pie?  Sure, then what?   Canning seemed like a great idea.  I know that canned peaches don't sound glamourous, but they won't be stringy, squishy or mushy.  Promise.

We've canned applesauce and pickles, but never peaches.  Enter the internet. I found a great preserving/canning site and read the specs for peaches. I had every thing on hand, plus the time.

First, gather the cast of characters needed for all canning jobs.

1.  Giant Canning pot (cheap, can double as party ice bucket, apple bobbing, felting... you get it.)

2.  Jars.  Classic Ball jars - I choose wide mouth

3.  Rings and Lids (always use new lids, they don't get re-used)

4.  Lots of clean towels, and all of your burners on the stove.

5.  Tongs and Jar Grabber

img_6775-1

The Jars, Lids, and Rings can be found in almost any grocery/hardware store.

img_6782-8

And for those of you who need a little more specifics, here is a jar, a ring and a lid.

img_6785-11

This is kind of like rubbing your stomach and patting your head.  Lots to do all at once.

First, get the jars clean.  Run them through your dishwasher, or bring them to a boil/simmer for about 10 minutes upside down in a stock pot of water.  Lift them out, and let them, turn right side up.  The air will dry them quickly.

Second, fill the big pot with warm water and begin bringing it to a simmer.  Start another small saucepan simmering with the lids and rings.

Now, start the syrup.  I made a lighter syrup.   2 cups of sugar for every 1 quart of water.  Bring the sugar and water to a boil, then keep warm.

We haven't even touched the peaches yet!

Once all the jar are clean, and the lids and rings are ready, take about 6 peaches, and gently drop them into boiling water for about 30 seconds.  Using a slotted spoon or skimmer, lift from the water and place in cold water.  The skins will slip right off.   I decided to can peach halves for more flexibility later.   If you slice along the dent/fold in the peach and follow all the way around, the peach will easily separate from the pit.   That part was the most fun.

Place the peach halves pit side down in the jar. Give them a push to make sure they're tight.  Pack to just below the neck of the jar.  Fill the jar with the syrup, to withing 1/2 inch of the top.  Try to be exact for this part.   Using a butter knife, slide it up and down the side of the jar, to encourage any air bubbles to float to the top.   Clean the rim of the jar with a clean paper towel, then with tongs, take a lid from the simmering water and place it on the jar.  Then a ring,  but not too tight.

Your pot should have a stand, or rack inside to make sure water can circulate completely around the jars.  Set jar one the warm water, and repeat with the remaining peaches and jars.  If you prepare to many peaches at once, you risk them turning brown.   It's ok to use lemon juice or pectin, but I didn't.

When you have all the jars ready, add more water to the pot so the jars are covered by at least an inch of water.  Bring the water to a rolling boil.  Start timing when it's a rolling boil.  I live in about 875 feet above sea level so my processing time was 35 minutes.

Processing Times, Tips and Trouble Shooting

Once the processing is complete, carefully remove the jars to a towel and allow them to cool undisturbed until cool.  While they're cooling you'll hear the jars seal with little (or not so little) pops.   Any jars that don't seal should be placed in the refrigerator and eaten within a few days.

I heard four pops from four jars.

img_6792-14

 I can't wait to pop open a jar (pun intended), and try the peached with some ice cream, or an old-fashioned favorite, cottage cheese.   I still have 12 peaches left who I'm sure will be a pie very soon.

Try something new today!


Strawberry Cream Cake

  img_6644-11


What a treat!  Don't you LOVE strawberries?  I do.  Very much!

Last summer I went to the close-out sale of the Farm & Fleet garden center.  They set it up each spring, and close it sometime in June, or July.  I found four strawberry plants that needed a home.  They didn't have a variety or pedigree, they were marked "strawberry".   I brought them home and planted them in the little herb garden behind the wood oven next to the oregano and thyme.   I ddn't expect much from them, but hoped they would at least survive.  And survive they did.   One day on late May I was weeding, and found at least three that were nearly ready to pick.   They were very early... with a few others nearly ready as well.

My parents were visiting (inportant note:  My dad has a degree in horticulture and agronomy...) and I proudly picked two ripe berries.  We shared them, and ooh'ed and ahh'ed about how delicious they were.   I named them One and Two.   A few days later,  I picked Two and Three, followed by Four, Five, Six and Seven.    I won't bore you with the details, but suffice to say that I grew 14 strawberries!

The berries in the photo came from a berry farmer about 1 mile from our house.  We picked them on the second day of the season.   The berries have had a tough year.  Early, dry, hot, and just plain mixed up.  I'm hoping that my berries will be back next year, I'd love to be able to make a whole cake with them!  The berry on the top of the strawberry cake is one of mine.

The best part of the dessert this week is that I was able to take it to dinner with good friends celebrating their 40th Anniversary! 

The recipe this week is hosted by Sophia of Sophia's Sweets and Allsion of Think, Love, Sleep, Dine.  They'll both the recipe for you.

I've said it again and again.  Simple recipes with few ingredients are some of the most difficult.  Genoise is in that group.   It's not hard, though it takes a great deal of respect for the ingredients.

Eggs are the leavening agent in this tender cake.  They need to be at room temperature to maximize the loft from whisking.   Rather than leave them at room temperture to warm, here's a tip.   Place them in the stainless steel bowl, then place that bowl over warm water.   I like to swish them around a little bit.   Once the chill is off, you're ready to go.

img_6654-3

After several minutes of whisking, the eggs and sugar reach the "ribbon" state.   A gentle ribbon of the mixture will set on the surface when drizzled from the whisk.

img_6655-4

Then, the sifted flour is carefully folded into the egg/sugar mixture.  The last step, folding the melted butter into the mix.

img_6652-1

The genoise smells SO good as it bakes.  Once it's cool, top the layers  with the macerated (berries mixed with sugar), and fluffy whipped cream mixture.

img_6660-11


img_6670-5

 I decided not to frost the whole with cream, but just dollop it on the top.

img_6673-7


 img_6664-3


Lime, Honey, Beet Salad - Can't Beat It!

Summer's in full swing.  The corn is growing, vegetables are more plentiful at farmers' markets, and life is very busy!  Summer salads are great.   After a busy day, it's so nice to wash off the garden dirt and have a late supper.  Vegetables, and perhaps something on the grill or quickly sauteed.   You don't heat up the house, or feel too full.    Got herbs?  Here's just the recipe for a hot summer night. This week's French Friday's With Dorie recipe is Lime Honey Beet Salad.  Another one of those love it, or hate it recipes.  It's a salad worth creating the meal around.   We love beets.  And,  the ones we found at the grocery were perfect.  Earthy, deep red and ready for roasting.   It took about an hour to roast three large beets.  I quartered them, covered them with foil, and roasted at 400.


img_6679-1

While they were roasting, I prepared the rest of the ingredients.  The green, murky dressing smells amazing!  Lime, Dill, Chive, vinegar and a little oil.   Here's the before mixing photo.

bowl-of-herbs-3


We were really hungry and the salad smelled great.   After I peeled the beets and tossed them in the dressing, they rested while I quickly sauteed the shrimp and we ate the salad just a bit warmer than room temperature.   It was delicious!  Every time we make a simple Dorie recipe that seems like "why is this going to be good?"  the recipe  always exceed our expectations.  The lime, honey and herbs are perfect with the beets.  I added garlic, cayenne and lime juice to the shrimp.  It was a great, simple combination.    This one is a recipe you'll make again and again.   I would serve this to guests anytime.   Warm in the fall with some goat cheese, and cool in the summer.


beet-lime-honey-salad-4


Strawberry Rhubarb Coffee Cake - Gluten Free!

I have a special recipe for you.   It's a gluten free coffee cake.  Can you believe it?   I generally don't seek out or try GF recipes, but I've been interested in new options for GF guests, and this one hits the jackpot.   For those of you who have been turned off by, or don't need gluten free options, please don't pass this one by.   It's really, really good and you'll never know that it's made without flour.   I've made it with strawberry/rhubarb and just strawberries.   I think you could easily toss in blueberries or other fruits more options. 

To print this recipe, click HERE

Strawberry Rhubarb Coffee Cake

Ingredients

For the Topping

8 T unsalted butter, or heart healthy butter-like stick

1 cup all-purpose gluten free flour.   (Bob's Red Mill AP version is great!)

1/2 tsp xanthan gum

1/4 cup granulated sugar

1/3 cup packed light brown sugar

1/8 tsp salt

For the Batter

3-4 stalks fresh rhubarb, cut into tiny 1/4 inch pieces

1-2 cups fresh strawberries, hulled and sliced

1  1/4 cup all purpose gluten free flour

1/2 tsp xanthan gum

3/4 tsp baking powder

1/4 tsp baking soda

1/4 tsp salt

3/4 cup granulated sugar

2 T butter - room temperature

4 T shortening

6 T  plain Greek yogurt

3 large eggs, or equivalent of egg substitute

1/2 tsp vanilla extract

Instructions

Preheat oven to 350 degrees F.  Grease and flour an 8 inch cake pan.  (round or square).  Line the bottom with parchment paper. 

Combine the topping ingredients and blend with a fork until just combined.  Place in refrigerator until needed.

For the cake batter, in a small bowl,  combine the fruits with the brown sugar, and 1/4 cup flour, stir and set aside.

In another bowl, mix the remaining flour, xanthan gum, baking powder, soda, salt and 3/4 cup granulated sugar.  By hand or with a mixer (paddle attachment for Kitchen aid)  add the butter, shortening, yogurt and mix.  Add the eggs, one at a time and mix after each addition.  Add vanilla, then fold in the fruit.  The batter will be thick.   Mix just until combined.

Scrape batter into the pan, smooth, and bake in preheated oven for 30 minutes.   After the cake has been baking about 20 minutes, remove the topping from the refrigerator, and toss/fluff with a fork to create the crumbles.  

Remove the cake from the oven, sprinkle on the topping, and return to the oven for another 20-30 minutes or until a toothpick inserted comes out clean or with just a few crumbs.  Remove from the oven and cool completely, carefully turn out of pan and remove parchment.   Then return to plate or pedestal.   Slice into squares or wedges.    Serves 8-10

Enjoy!  

Adapted from Gluten Free on a Shoestring